 Docs
DocsUser configuration
Onboard users
Onboarding users depends on the authentication method used, either native or single sign-on (SSO).
-
For SSO users, a blank user account is created when the user first accesses the website with a successful authentication confirmation sent by the identity provider (IDP).
Active Directory or other Identity Provider integration can be configured for SSO using SAML 2.0. For more details, see SSO configuration.
-
For users using native authentication, the ‘Onboard Users with Password and Roles’ example process imported with the TrustPortal‑specific bp.release into Blue Prism is the recommended onboarding method.
Alternatively for users using native authentication, you can add users from the Users menu:
- Log into the web browser interface with an administrator account.
- Click the Admin icon in the toolbar, click Users and then Add New User.
-
Enter a username and a password for the new user.
Usernames cannot be changed once created. Passwords must contain a minimum of 8 characters, one uppercase character, and two digits.
-
Click Save.
-
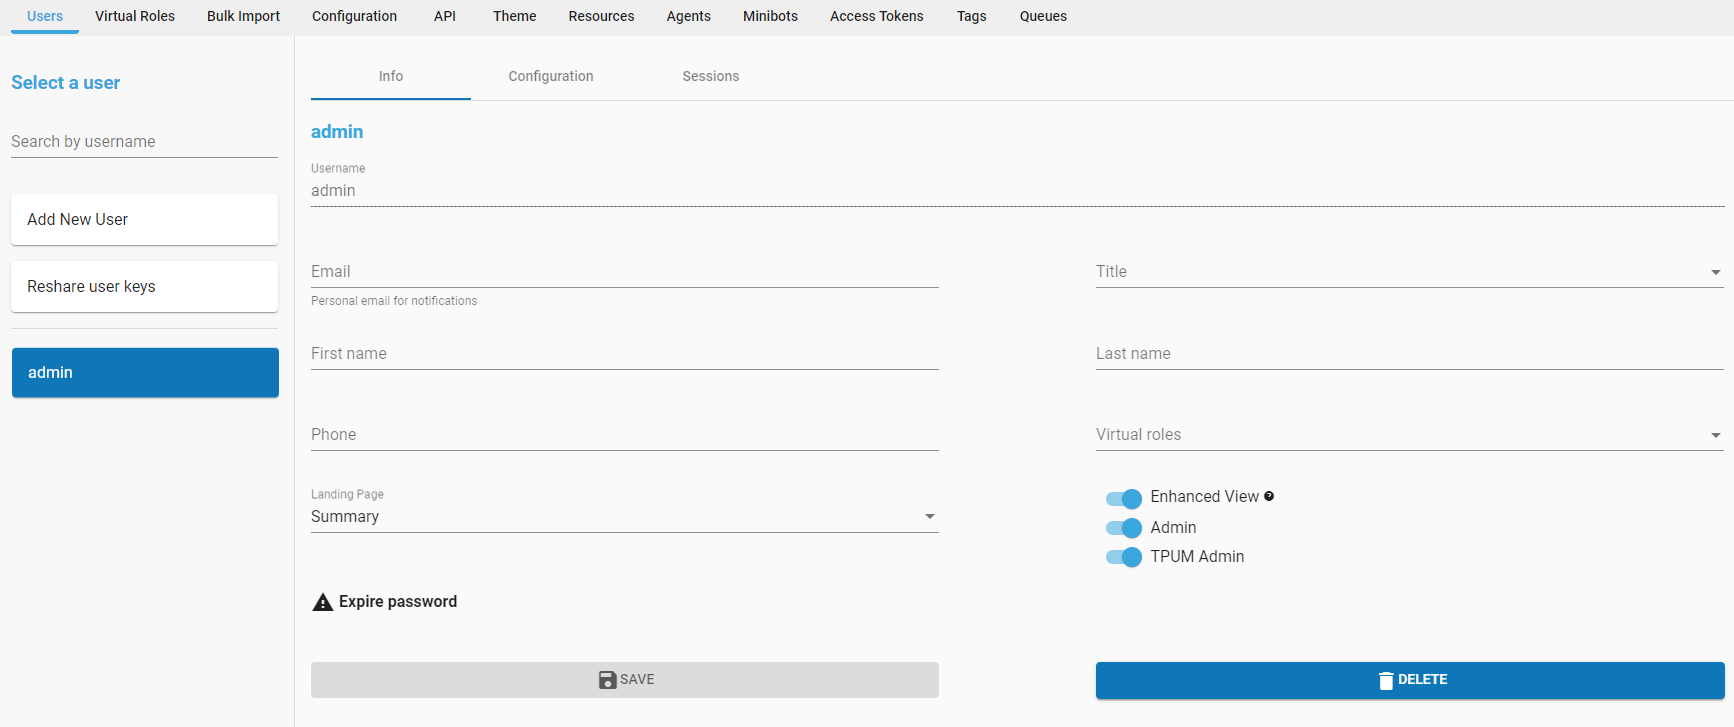
Once the user has been created, you can add the following details, as required:
- Email – Email address used for notifications.
- Title
- First name
- Last name
- Phone
-
Landing Page – This can be set up individually for each user. Available options are Summary, Admin, Tiles, Menu Items, or Messages. This setting can also be set in the Users VBO via the Landing Page input parameter.
- Virtual roles – You can search for and assign virtual roles that have been configured on the Virtual Roles tab.
-
Enhanced View – If this is enabled, the user will have access to the enhanced view of the front-office user interface.
-
Admin –If this is enabled, the user will have access to the admin user interface.
-
TPUM Admin – If this is enabled, the user will be able to configure and assign virtual roles as part of the TrustPortal User Management module (TPUM). For more information, see User roles. This is enabled by default for admin users.
-
Expire password – If clicked, a message displays asking whether you want the user password to expire. This will force the user to change their password when on their next login.

-
Click Save to save your changes.
Edit users
User details
Once a user has been added, you can edit their details in the Users > Info tab.
You cannot change a user's username.
User interface display
To configure the interface display for a user, click the user in the navigation menu and then navigate to the Configuration tab. This configuration overrides the application-wide configuration set up
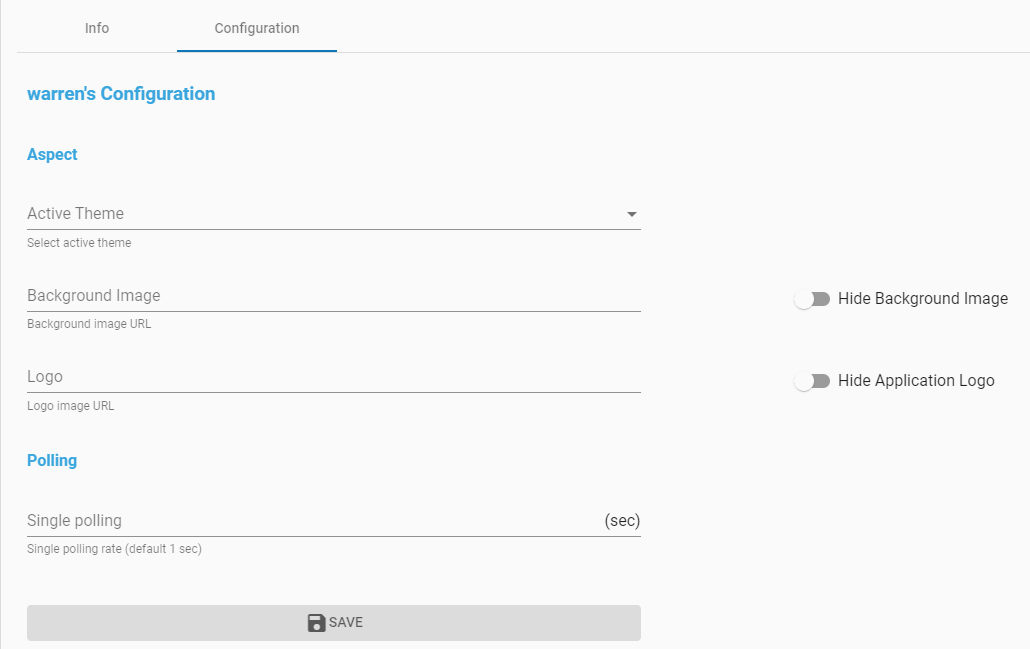
Aspect
- Active Theme – The theme to be applied to the user interface.
- Background Image – .
-
Logo – URL of the logo to be used on the front-office user's Summary page. The image must be in .png or .jpeg format.
The background image and logo can be hidden if required by toggling off the appropriate sliders.
Polling
- Single polling enables browsers to poll for all UI changes at once and there will be one single poll for all UI elements at the same time (products, messages, configuration and actions). The default single polling rate (the frequency with which browser polls for changes) is 5 seconds.
User profile
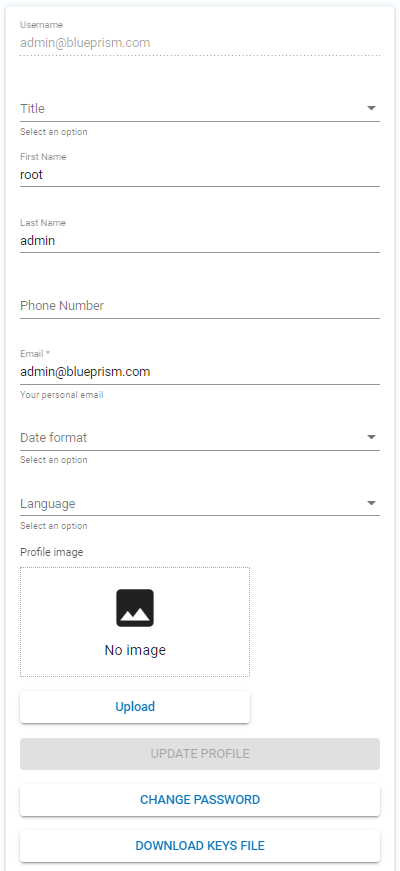
Users can also edit their own profile by clicking the icon next to their name in the top right-hand side corner.
![]()
They can details such as, title, name, phone number, email, date format, language, and profile image.
Delete users
The user deletion and deactivation process depends on the authentication method used:
- For SSO users, simply remove the user from the access group and they will no longer be able to authenticate. You can re-grant access with no loss of data or permanently delete a user via a maintenance script.
- Native authentication users can be deleted via the Users > Info tab in the admin interface or by removing their roles in the TPUM module.
