 Docs
DocsRoles and permissions
Roles and permissions allow you to create roles and assign permissions to specific areas of
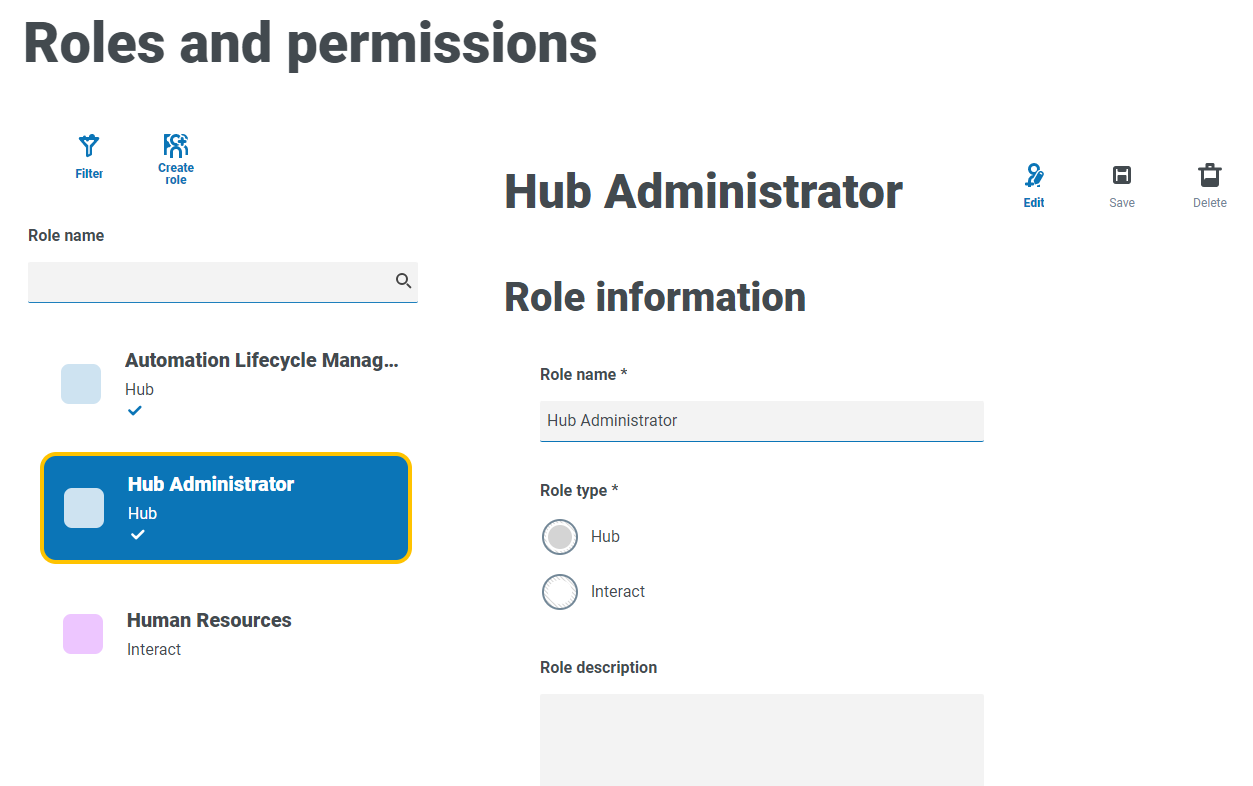
The Roles and permissions page displays a list of existing roles. There are predefined roles automatically created as part of the Hub installation process. These are indicated by a blue tick, for example, the Hub Administrator role. These automatically created predefined roles are locked and cannot be changed or deleted, although you can add users to them. You can click on a role to view the permissions.
To open the Roles and permissions page, click your profile icon to open the Settings page, and then click Roles and permissions.
Find roles
The Roles and permissions page includes two methods for finding roles:
- Search by role name – This is located above the list of roles. Start typing the name of a role to filter the search results, the list dynamically filters as you enter more characters.
- Filters – The filters enable you to easily find a specific role or roles with specific permissions based on the selected criteria. Click Filter to view and use the filters.
Add roles
Based on the authentication type and settings configured for your environment on the Authentication settings page, there are several ways of adding users to the role you are creating:
- If native authentication is enabled, you can add native users directly to a role.
- If Active Directory authentication is enabled, you can:
Add Active Directory users directly to a role – Allow Active Directory users to be added directly to roles must be enabled on the Authentication settings page.
Add Active Directory security groups to a role – The Allow authorization via Active Directory security group membership must be enabled on the Authentication settings page.
If you are using Interact with Active Directory, be aware that some actions in the Interact Web API Service do not support the use of security groups. All actions support Active Directory users being directly assigned to Interact roles. For more information, see
Add users directly to a role
-
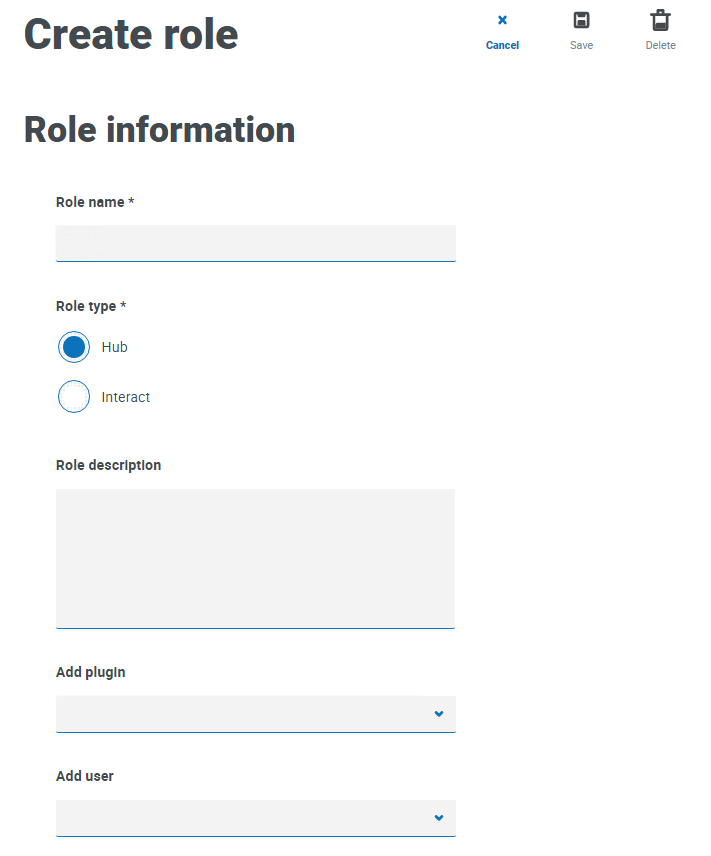
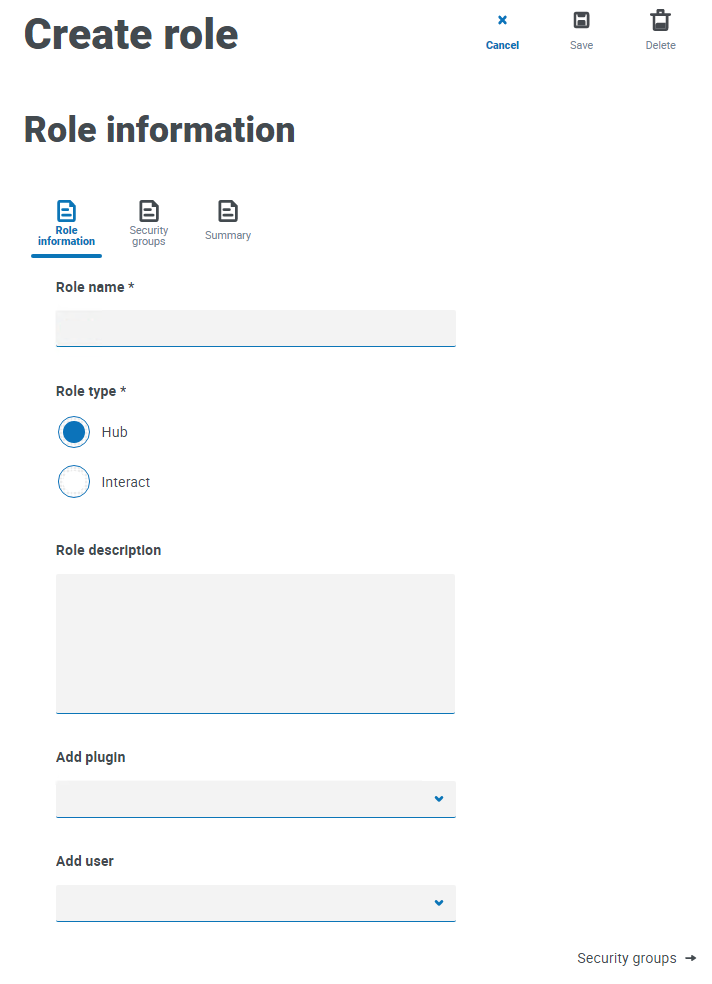
On the Roles and permissions page, click Create role.
The Create role section displays.
Example page when AD security groups cannot be added to roles:
Example page when allowing AD security groups to be added to roles:
- Enter a role name and select whether it applies to Hub or Interact.
- If required, enter a description.
-
Select the items that you want the role to have access to. If you have selected:
- Hub, select the required plugins from the Add plugin drop-down list.
- Interact, select the required forms from the Add forms drop-down list.
You can select more than one item from the list.
-
Select the users that will be assigned this role from the Add user drop-down list. The list only displays users who have appropriate privileges, for example, if the role is for Interact, it will only display Interact users and not Hub users. See Users for more information on user permissions.
Users can also be added to roles from the Users page.
-
Click Save to create the role.
Add Active Directory security groups to a role
If you are using Interact with Active Directory, be aware that some actions in the Interact Web API Service do not support the use of security groups. All actions support Active Directory users being directly assigned to Interact roles. For more information, see
-
On the Roles and permissions page, click Create role.
The Create role section displays.
- In the Role information tab, enter a role name and select whether it applies to Hub or Interact.
- If required, enter a description.
-
Select the items that you want the role to have access to. If you have selected:
- Hub, select the required plugins from the Add plugin drop-down list.
- Interact, select the required forms from the Add forms drop-down list.
You can select more than one item from the list.
- Click Security groups.
-
Search for security groups by entering the distinguished name of the root location, for example, dc=bpdevops, dc=co, dc=uk.
You can apply search filters based on CN (Common Name), UPN (User Principal Name) or SID (Security Identifier); or use wildcard search, for more information, see Add an Active Directory user.
You can also scroll down the page, click Next or Previous to navigate between multiple pages of security groups, or move between the Role information and Summary tabs.
-
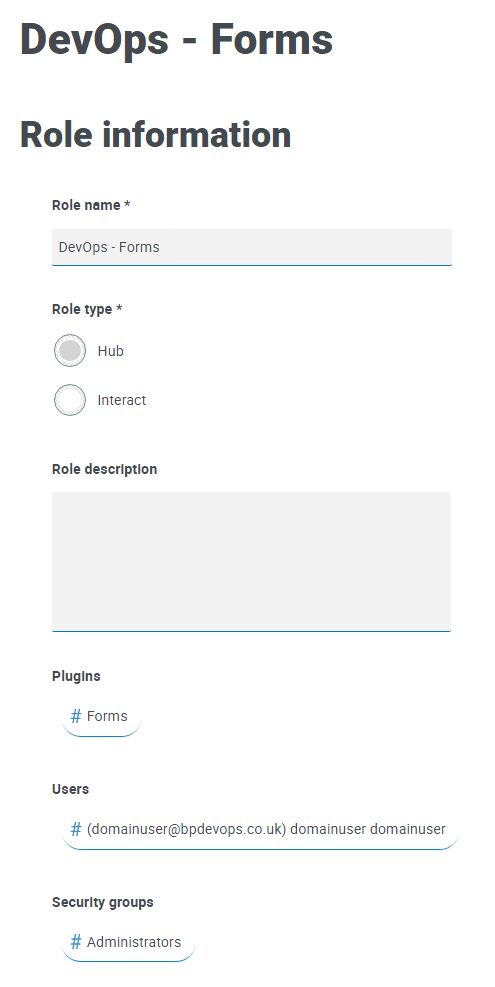
Select the group(s) you want to add to the role and click Save.
The added security groups display as part of the role information. All users who are members of the added security groups will be automatically added to the role and will have an account created in Hub when they sign in for the first time.


Edit roles
- On the Roles and permissions page, select the required role and click Edit.
-
Change the information as required
You cannot change the role type. If you are editing a role that displays a blue tick, you can only amend the users assigned to the role.
- Click Save to apply your changes
Delete roles
You cannot delete a role that displays a blue tick. This is a role that was automatically created when installing Hub or a plugin.
-
On the Roles and permissions page, select the required role and click Delete.
A message displays asking you to confirm.
-
Click Yes.
The role is deleted and a confirmation notification displays.
Use the filters
The filters enable you to easily find a specific role based on the selected criteria.
- On the Roles and permissions page, click Filter to open the Filter panel.
-
Use the toggle to turn on the required filter and complete the information to find the required role. You can apply multiple filters at the same time.
The available filters are:
Filter
Description
Type
Select the role type from the drop-down list. The options are:
- Hub – Displays the roles which have Hub set as the role type.
- Interact – Displays the roles which have Interact set as the role type.
Description
Enter a term or word to search against the text in the Role description.
Hub plugins
Enter the name, or part of the name, of the Plugin that you want to search against. For example:
- Automation lifecycle – Displays all roles which have access to ALM.
- Forms – Displays all roles which have access to Interact Forms.
- Business process – Displays all roles which have access to the Business process plugin.
- Control Room – Displays all roles which have access to Control Room.
Interact forms
Enter the name, or part of the name, of the Interact Form that you want to search against.
Users
Enter a user's username, or part of their username, to find the roles that are associated with that user.
If you have entered part of a username, the roles display for all partial matches. These may be for other users as well as the one you intended.
The information on the Roles and permissions page is immediately filtered.
If you have set the filters but want to view the unfiltered information again, either
- Click Close drawer to close the filter panel.
