Docs
DocsBranches
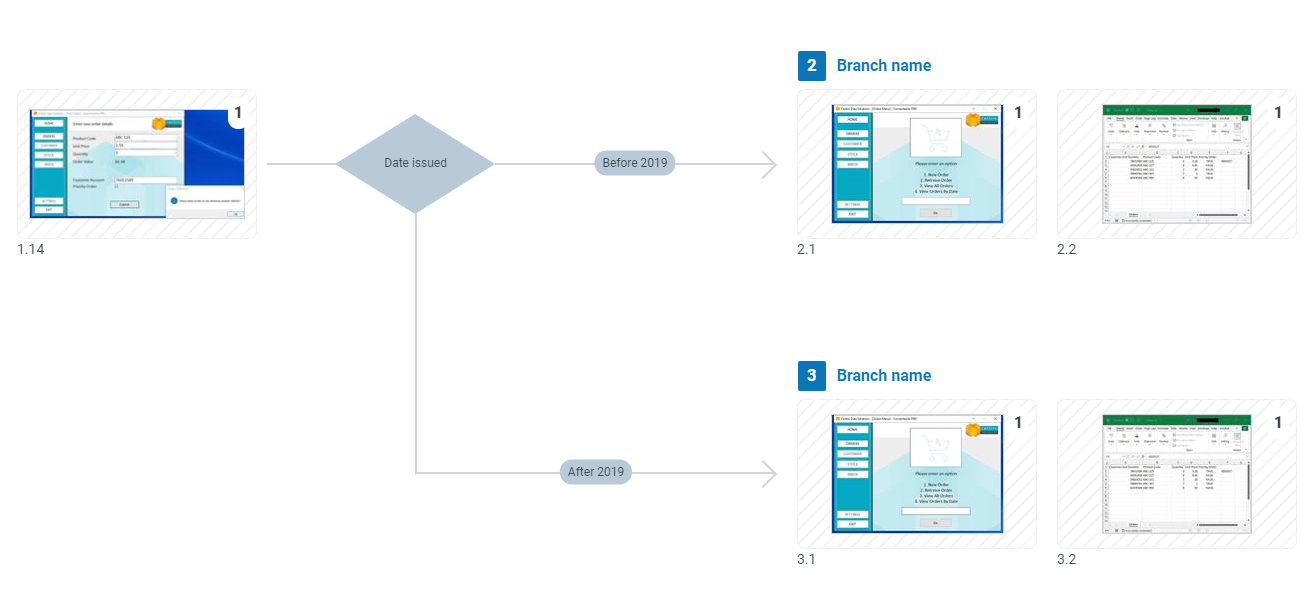
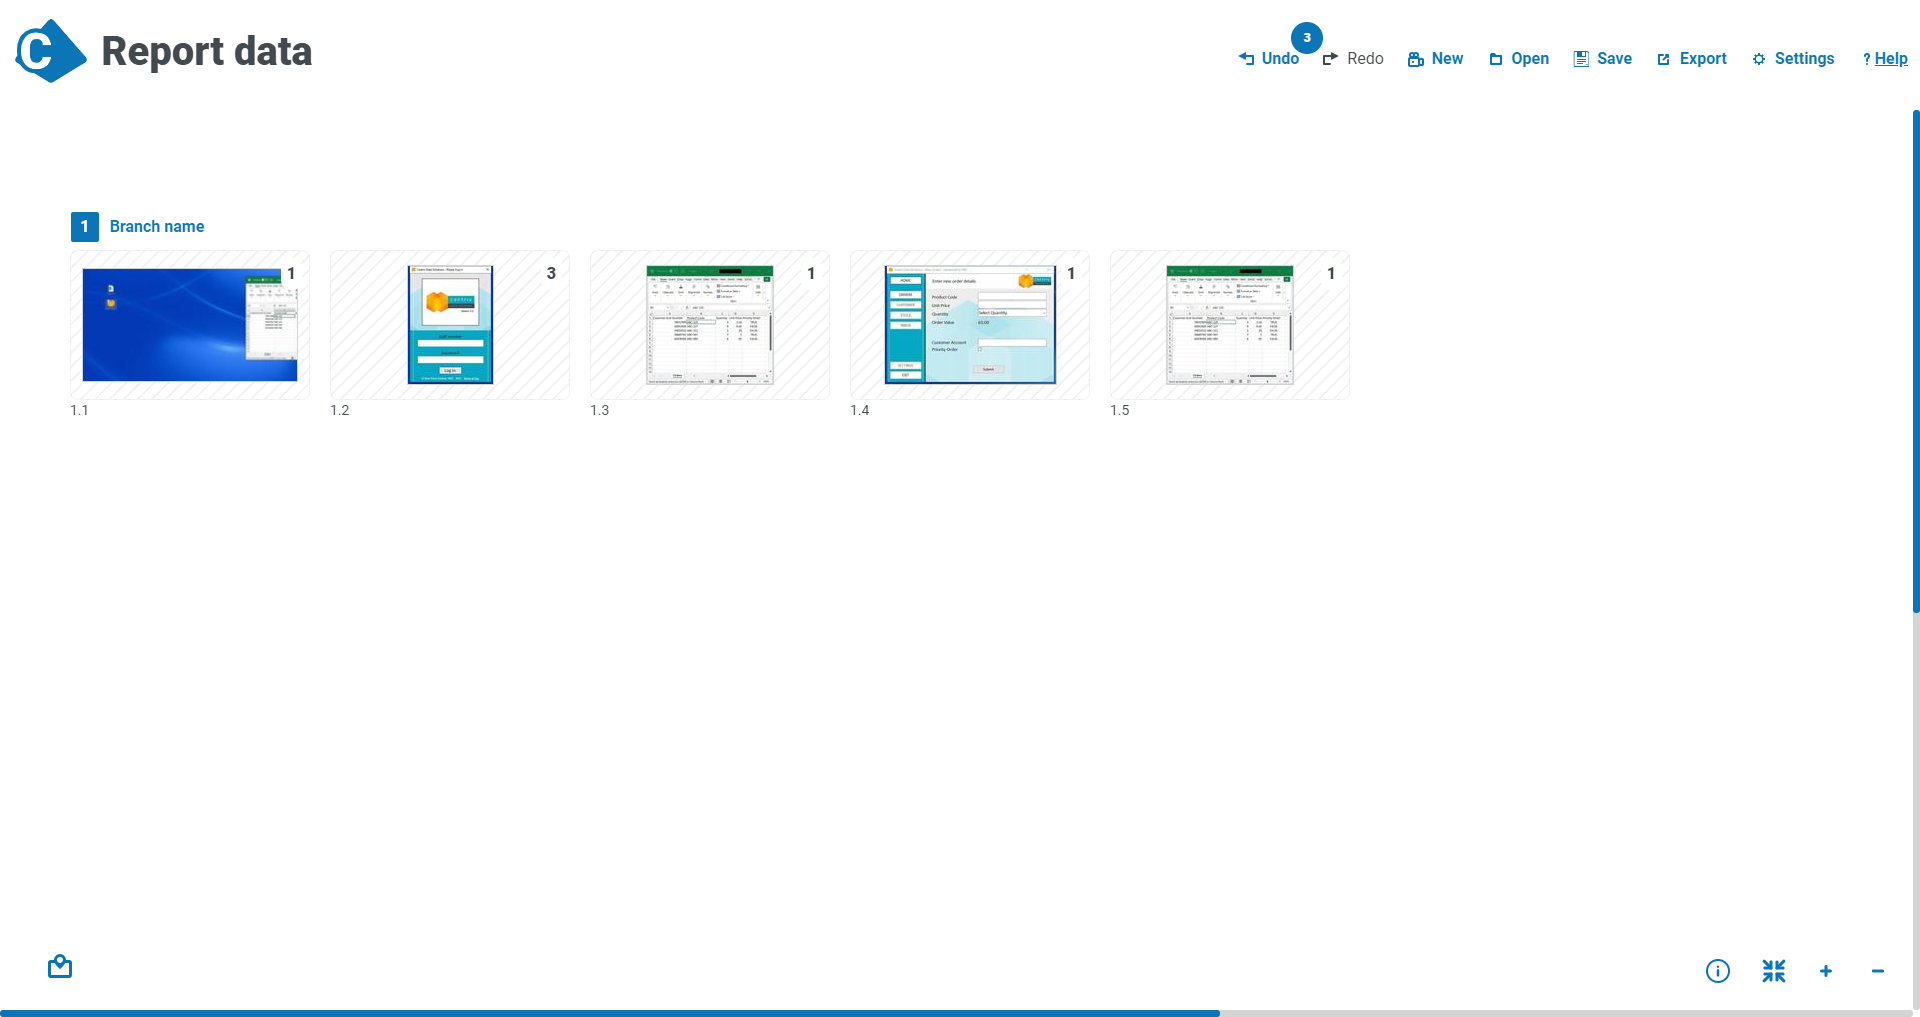
Branches show you the available paths through a process. A branching point is identified by a blue diamond called a decision point. From here you can add branches
Up to a maximum of 15 choices per decision point are supported by ALM. You can import JSON files into ALM to create a process definition document. For more information, see ALM-Process definitions.
Create a branch (Add decision point)
To create a branch:
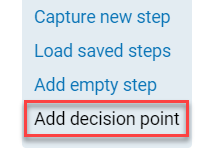
- Add a decision point by right-clicking a group and selecting Add decision point.
-
Right-click the decision diamond to display the shortcut menu and select the required option.
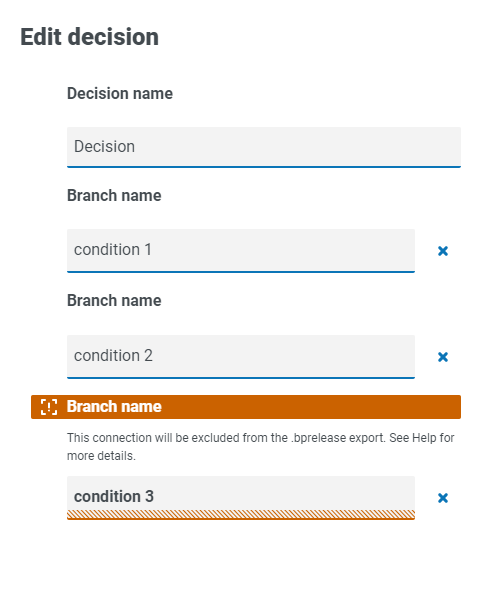
- Edit – Edit the text within the diamond and each condition point.
If the best practice template is enabled in the User settings, a warning displays for any connection that will not be included in the BPRELEASE export file. For more information, see Understanding the best practice template.
- Capture new branch – Capture a new process and insert it as a new branch.
-
Load saved branch – Add pre-saved captures to a branch.
-
Add empty branch – Add a branch as a placeholder that can be added to later. This enables you to create the skeleton of a process without adding detail all at once.
-
Add connection – Enables you to connect this step to an existing step in the process.
The decision point is added directly after this group .
Create a branch with best practice template applied
If Apply best practices to .bprelease export is enabled in the User settings, you must only connect a decision point to the first group in a branch. If you attempt to connect a decision point to any other group in the branch, a warning displays. If you decide to proceed, the connection is not included in the BPRELEASE export file.
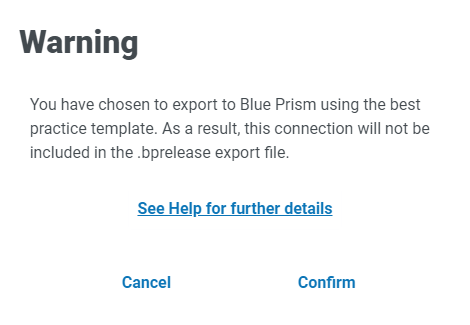
Any connections that do not adhere to the best practices set by the process template are displayed in orange on the main process screen. A warning is displayed in the Edit decision dialog for any connections that will not be included in the BPRELEASE export file.
For more information, see The Blue Prism best practice process template.
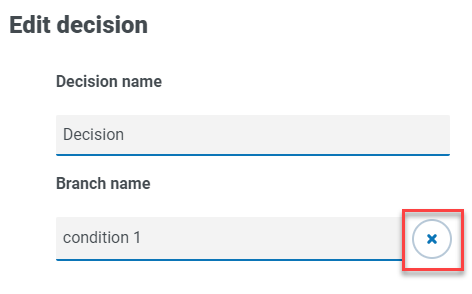
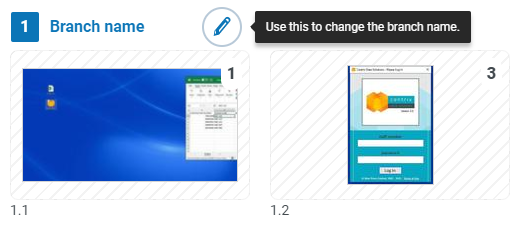
Edit branch name
To rename a branch:
-
- Enter a new branch name into the Branch name field, and click Confirm.
The Edit branch screen displays.
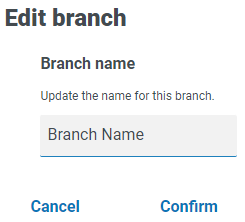
The Edit branch screen closes and the new branch name displays on the main process screen.
Delete a decision point
Deleting a decision point also deletes all branches and connections coming from that decision point. If you want to keep a branch, you will need to use the Cut, Copy, and Paste options to move the branches before deleting the decision point.
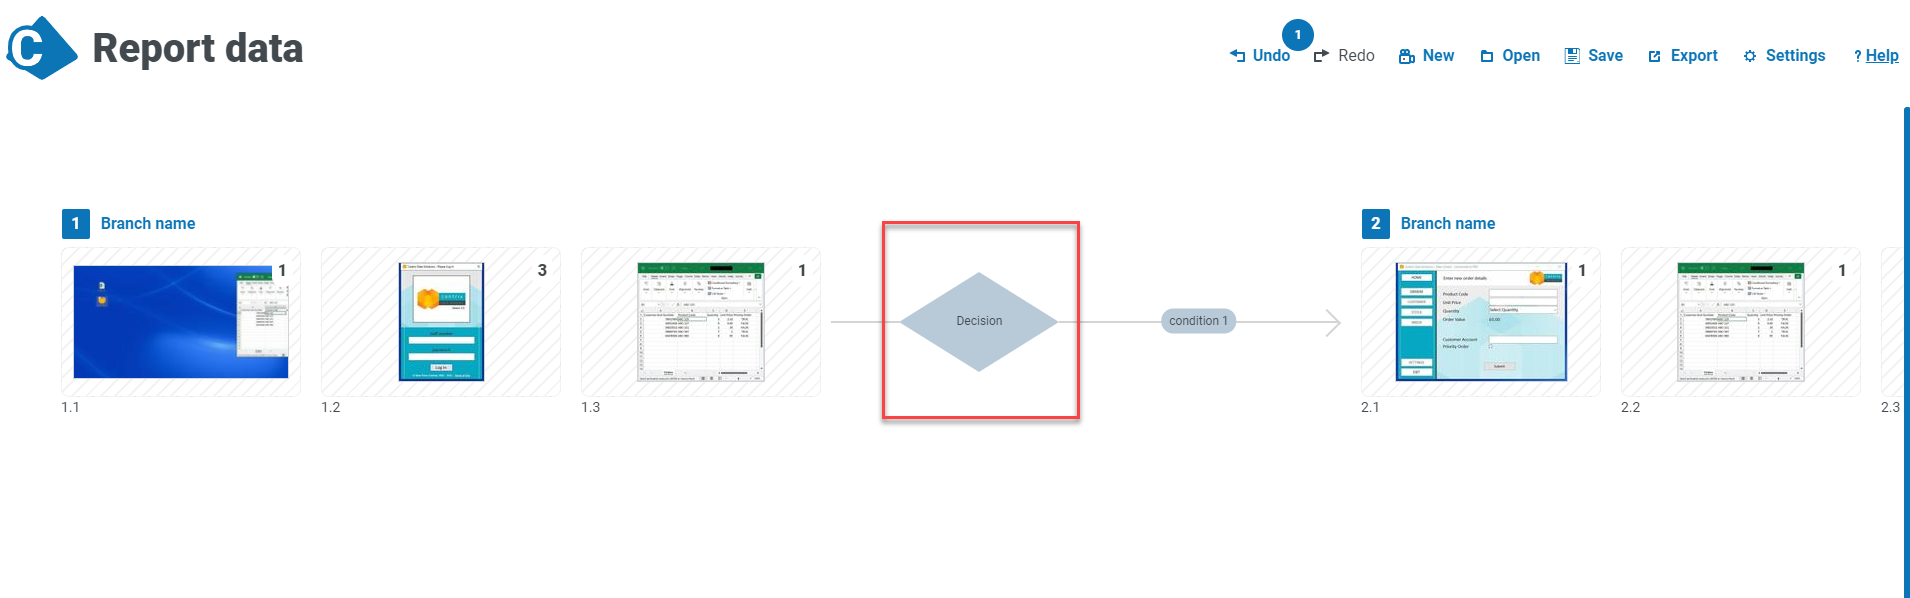
The following example shows how to delete a decision point, without losing any of the grouped steps to the right of the decision point.
| 1 |
This branch shows the unwanted decision point and the other grouped steps to the right.
|
| 2 |
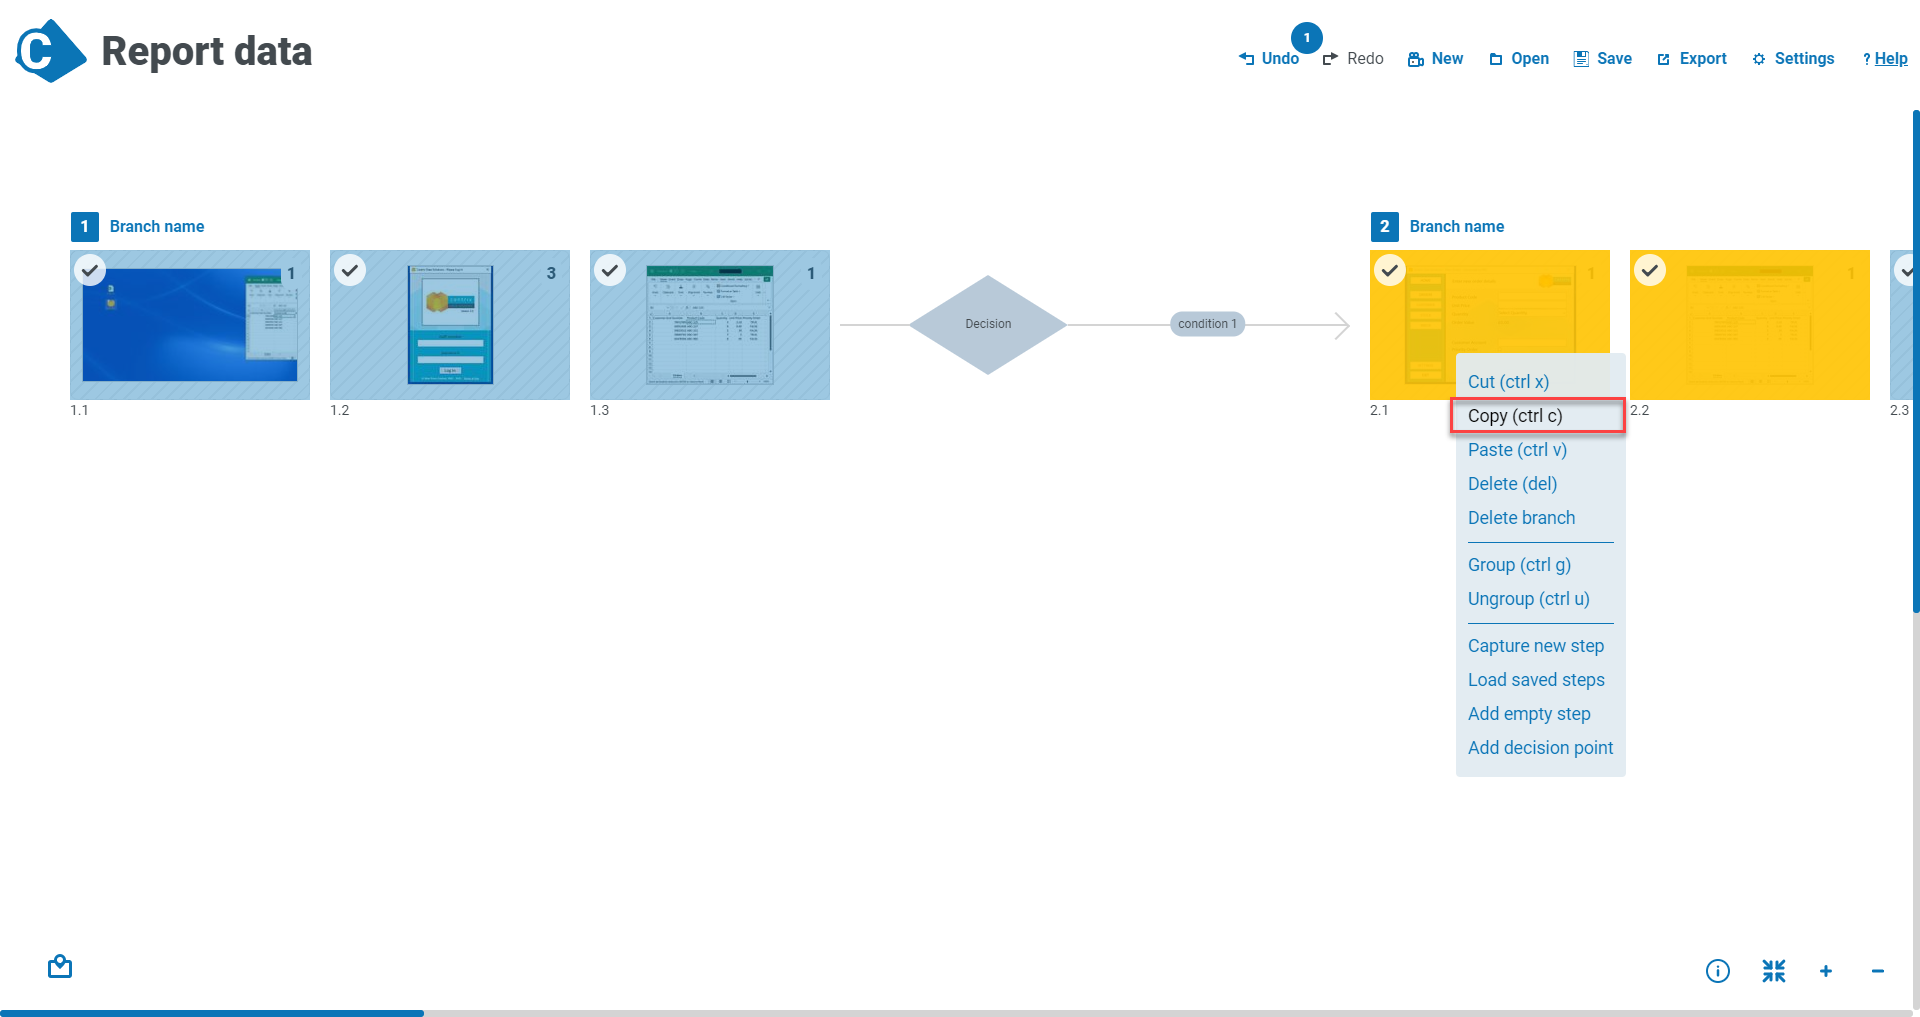
Cut or copy all the grouped steps you want to keep. Select them all and select Cut
|
| 3 |
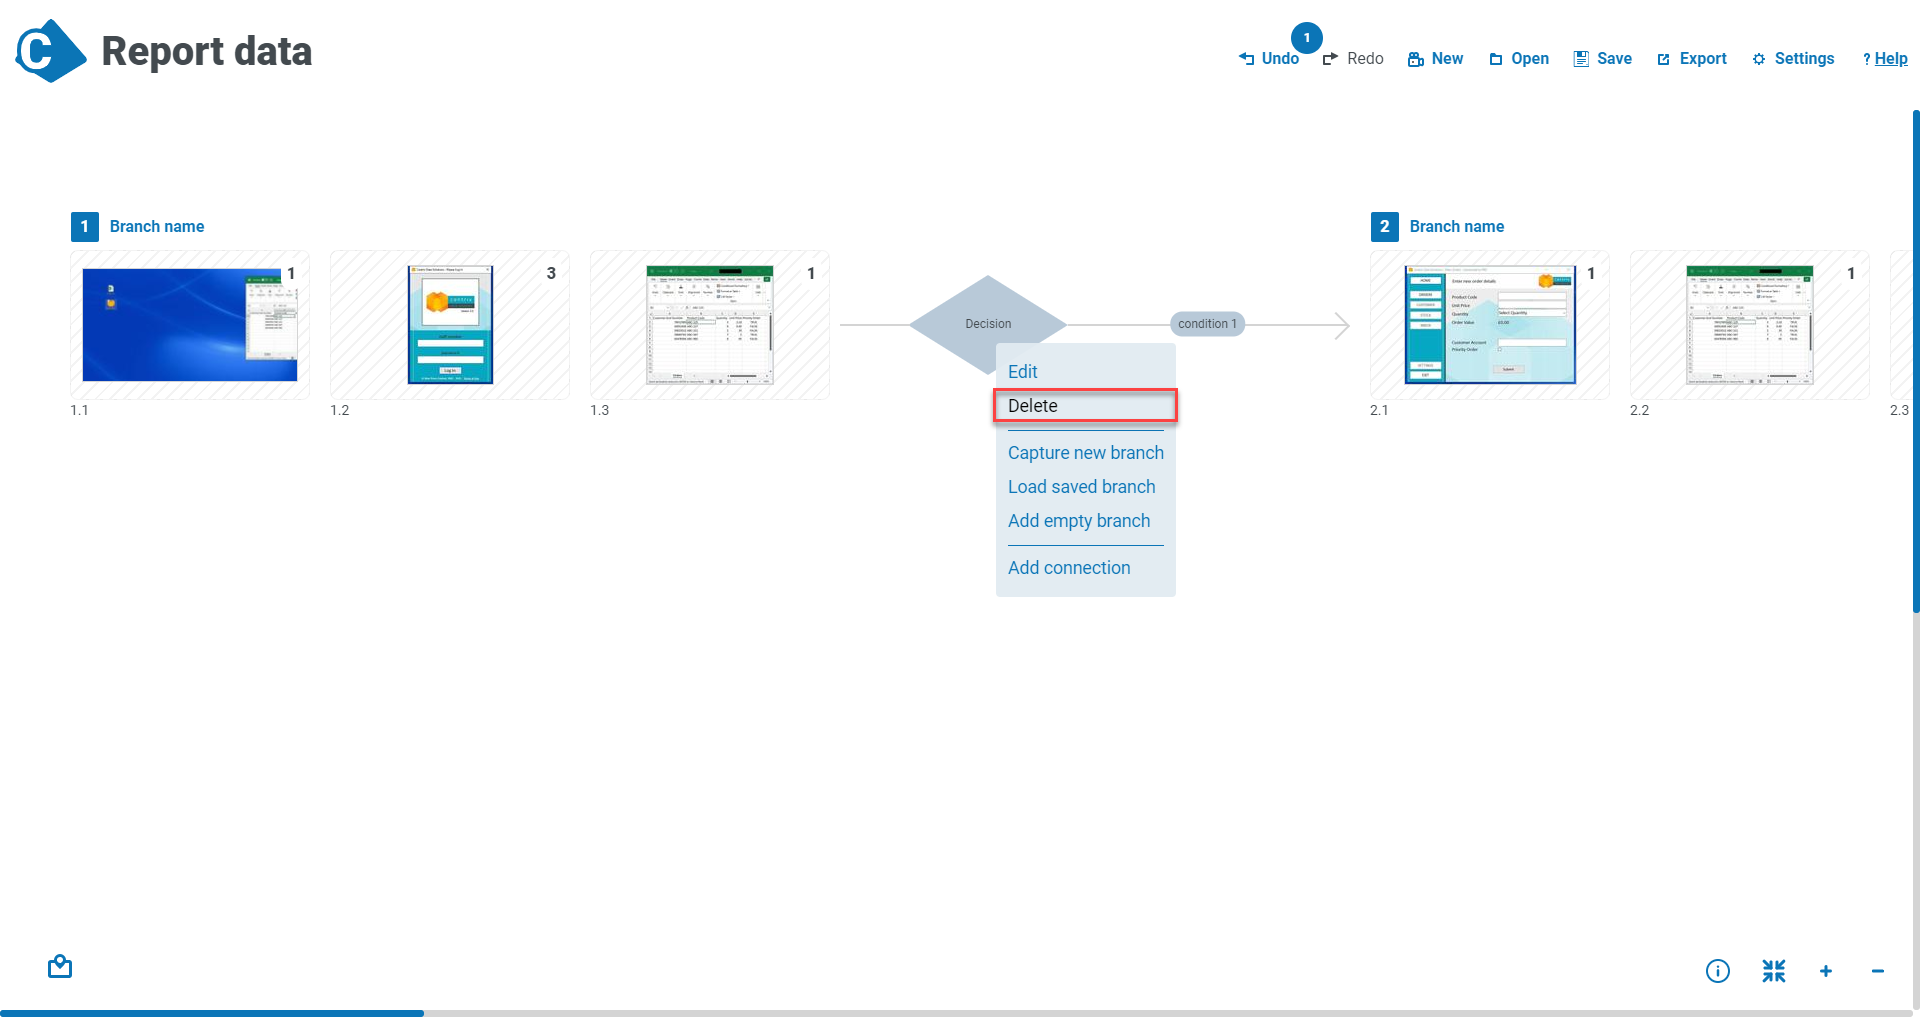
Right-click the decision point and click Delete
|
| 4 |
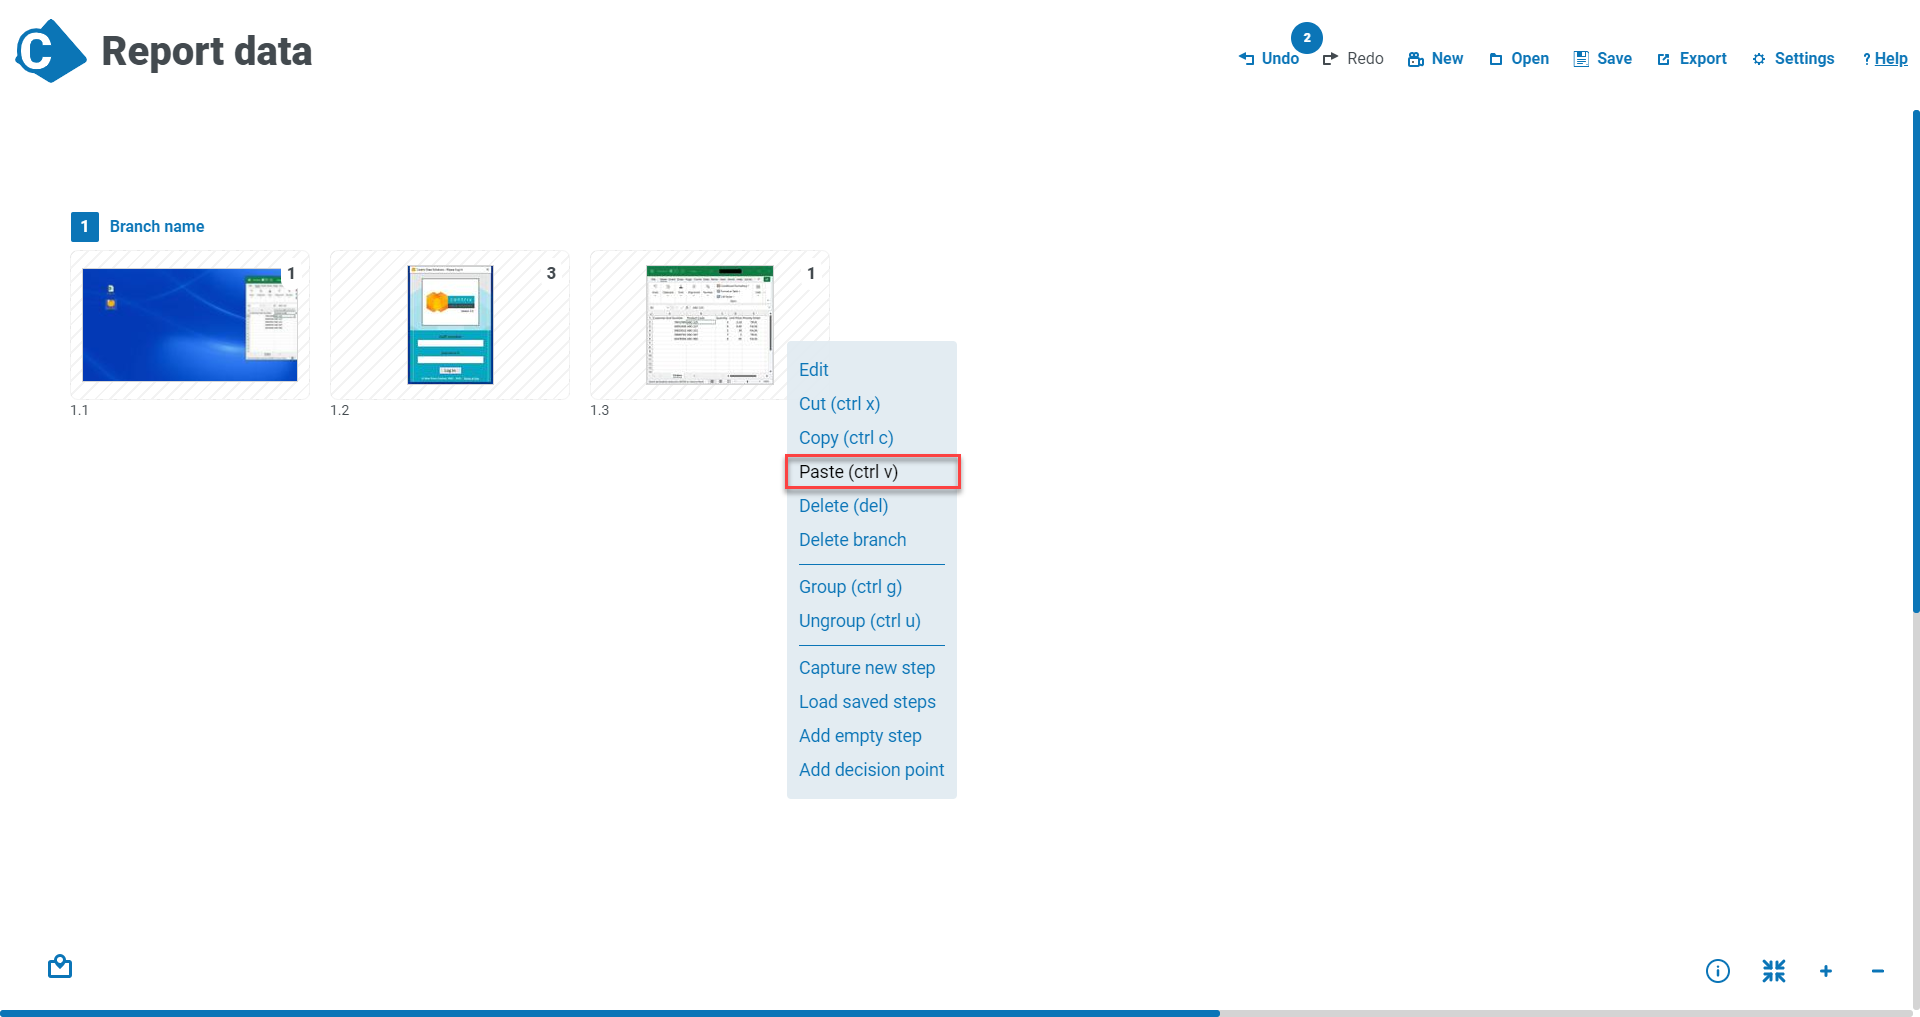
With the decision point now deleted, right-click the last group and click Paste
|
| 5 |
The branch is restored to how it was before the decision point was added.
|
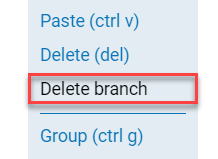
Delete a branch
If you delete a branch, any other branches that are connected to it are also deleted. If you delete the first branch of a process, a warning message displays.
There are two ways to delete a whole branch.
Option 1 – Right-click any step in the branch you want to delete and click Delete branch.
A warning displays asking you to confirm that you want to delete the selected branch. Any branches connected to the selected branch will also be deleted.
Option 2 – Open the Edit decision dialog and click the X next to the branch you want to delete.