 Docs
DocsUser Settings
The User Settings dialog can be used to configure your own
General tab
When you open the User settings, the General tab displays by default.
You can change the values in the General tab, as described below. You can revert the settings back to the default values by clicking Restore General to defaults.
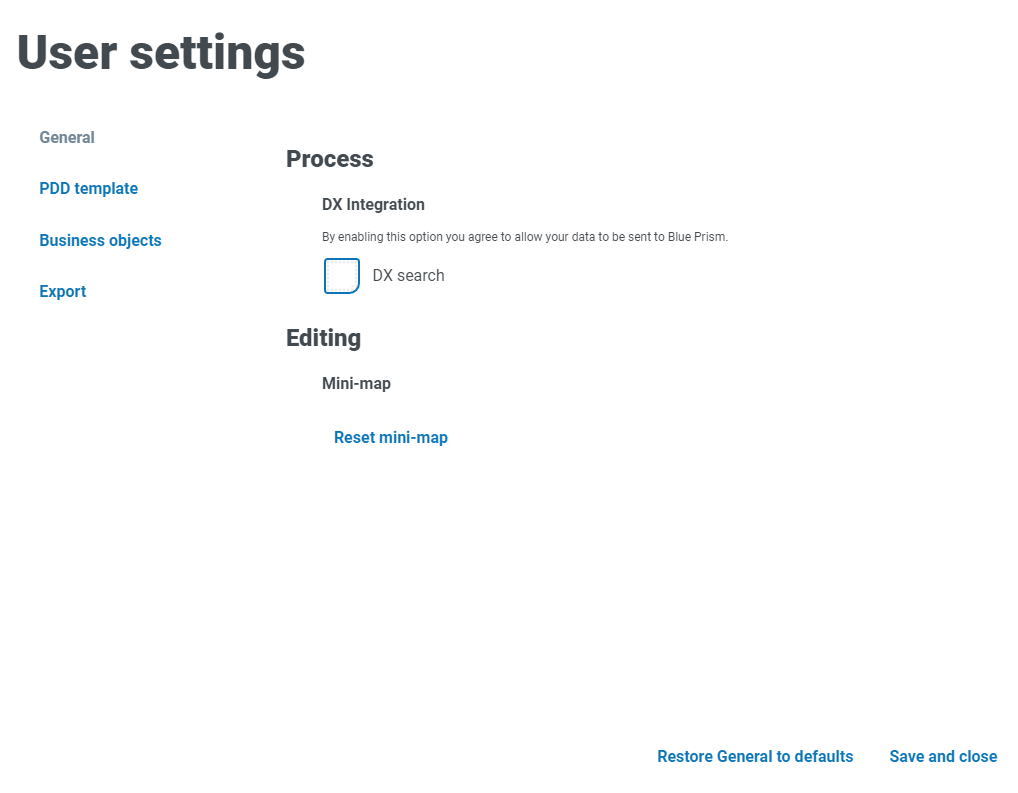
Process
The following options are available:
| Option | Description |
|---|---|
| DX Integration |
Select the DX search check box to enable the DX Search button on the Capture toolbar. The DX search function helps you find and download the most appropriate assets (such as VBOs) for the current process. See Perform a DX search By selecting the DX Search check box, you are giving consent for your data to be sent to Blue Prism.
|
Editing
The following options are available:
| Option | Description |
|---|---|
| Mini-map |
Click Reset mini-map to restore the mini-map to its default size and position. |
PDD template tab
You can change the values in the PDD template tab as described below. You can revert the settings back to the default values by clicking Restore PDD template to defaults.
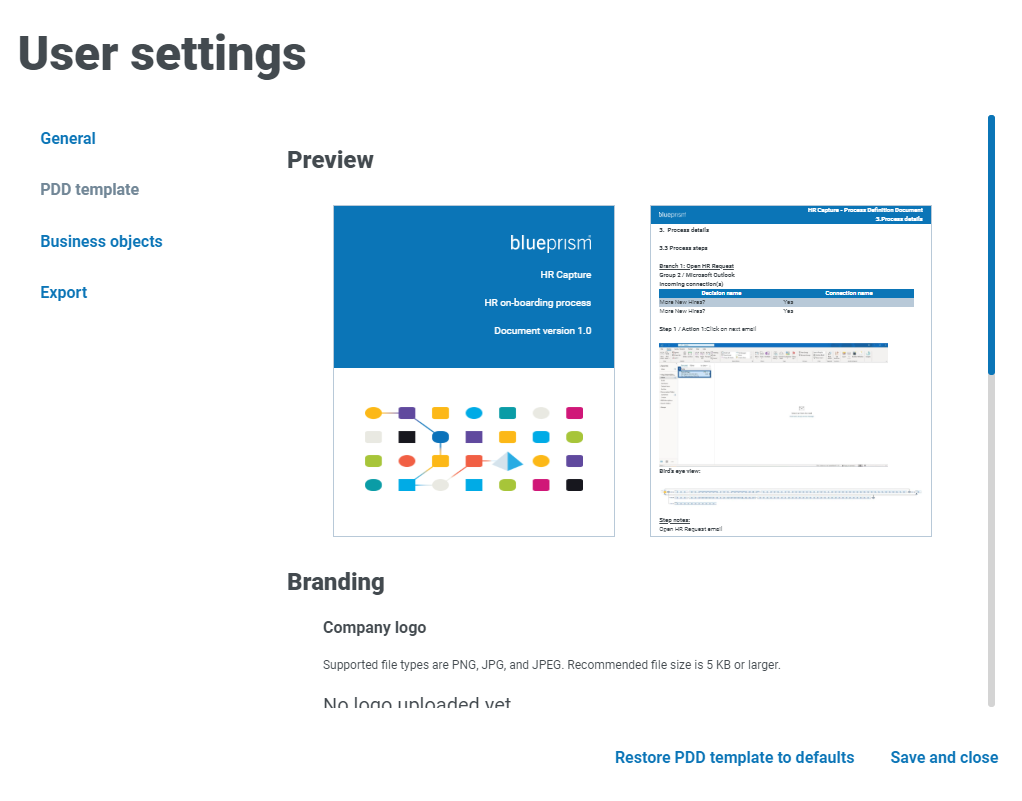
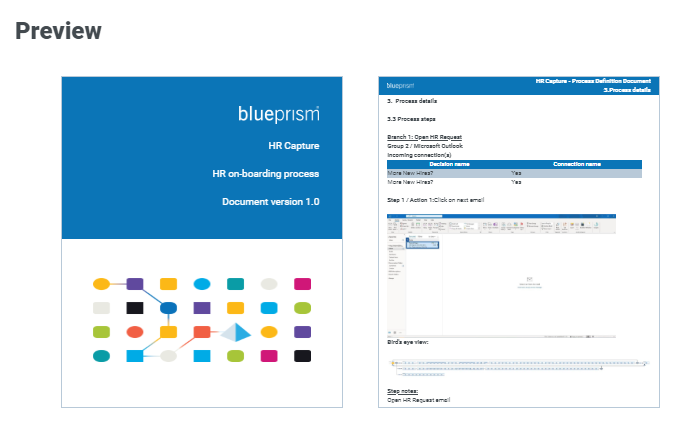
Preview
A preview of the Process Definition Document is displayed here. As you edit the color theme and upload a company logo, the preview will automatically update to display the changes you make.
Branding
The following options are available:
| Option | Description |
|---|---|
| Company logo |
Allows you to upload your own company logo for inclusion in the exported Process Definition Document. See Upload a company logo. |
|
Colors |
Allows you to customize the colors of the front cover, headers, and tables in your Process Definition Document. See Select colors. |
Upload a company logo
-
Click Choose a file.
-
Navigate to the required image and click Open.
A thumbnail image of the uploaded file displays with a confirmation that the upload was successful.
![]()
-
Click Clear to remove an uploaded logo.
-
Click Choose a file to replace an uploaded logo.
Capture supports PNG, JPG, and JPEG file types. The recommended file size is 5 KB or larger. The recommended file type is a PNG file with a transparent background.
Select colors
This section has the following options for customizing your Process Definition Document (PDD):
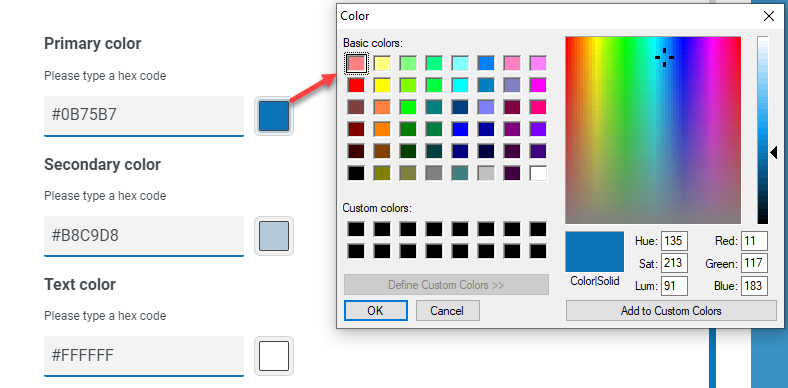
-
Primary color – To select the color for the front cover, header area and table header rows, either type a hex code into the text field or click the colored box to open a color picker.
-
Secondary color – To select the color for alternate table rows, either type a hex code into the text field or click the colored box to open a color picker.
-
Text color – To select the color for the default white text on the front cover and in table headings, either type a hex code into the text field, or click the colored box to open a color picker.
When entering a hex code directly into the color fields, use the following format: #XXXXXX (a hash followed by six alphanumeric characters).
Process
The following options are available:
Bird's eye view
| Option | Description |
|---|---|
| Show full bird's eye view | Select this option to display the entire process map in the exported PDD. |
|
Show focused bird's eye view |
Select this option to display the current step and any surrounding steps in the exported PDD. |
|
Disable bird's eye view |
Select this option to not display a bird's eye view in the exported PDD. |
Business objects tab
You can change the values in the Business objects tab, as described below. You can revert the settings back to the default values by clicking Restore Business objects to defaults.
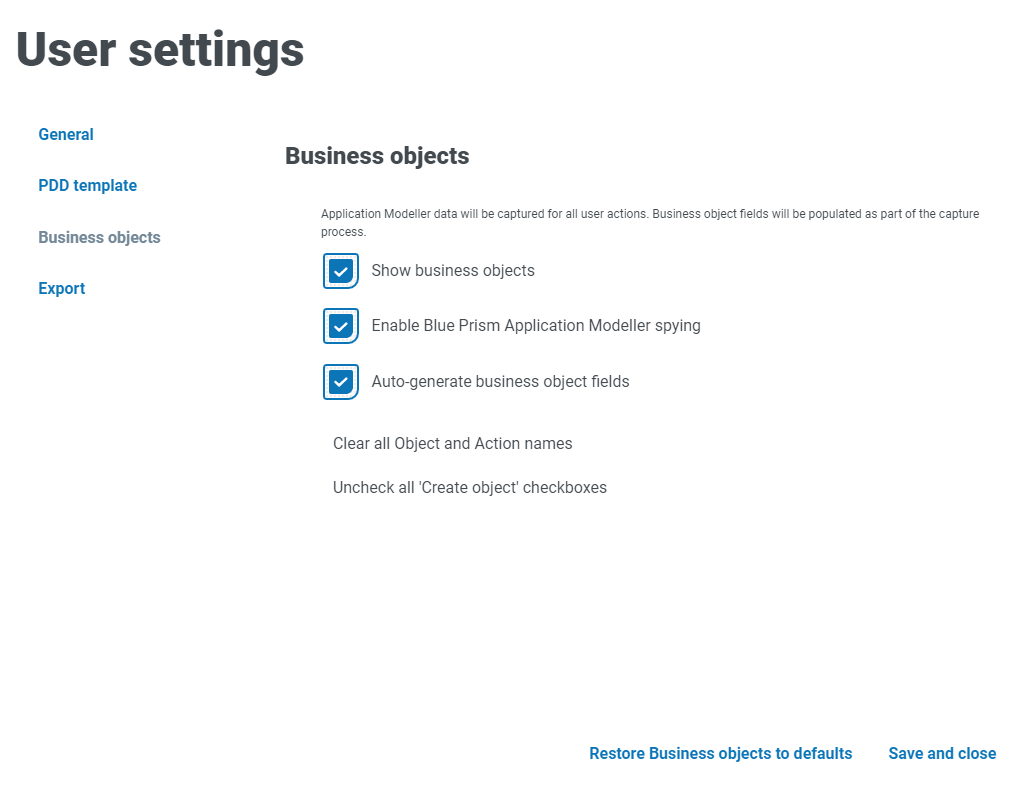
Business objects
The following options are available:
| Option | Description |
|---|---|
| Show business objects |
Select the Show business objects check box to display the business object fields and Create object check box in the Step action panel. See Create business objects. |
|
Enable Blue Prism Application Modeller Spying |
If required, you can deselect the Enable Blue Prism Application Modeller spying check box to disable the business object functionality and password censoring. For more information, see Application Modeller spying. |
|
Auto-generate business object fields |
Select the Auto-generate business object fields check box to automatically populate the Create object fields for each step in new Capture processes. For every step action, the Create object check box will be automatically selected. This will not affect existing open processes. |
|
Clear All object and Action names |
Click Clear All object and Action names to remove all information from the Create object fields each step action. Saving and closing the User settings panel places an action number above Undo on the main process screen. Click Undo to revert the action if required. |
|
Uncheck all 'Create Object' check boxes |
Click Uncheck all 'Create Object' check boxes to deselect any selected Create object check boxes for each step action. Saving and closing the User settings panel places an action number above Undo on the main process screen. Click Undo to revert the action if required. |
|
Restore Business objects to defaults |
Click Restore Business objects to defaults to revert any changes you have made to the default values. |
Advanced options
The following advanced options are available:
| Option | Description |
|---|---|
| Automatically add Launch actions |
Select the Automatically add Launch actions check box to create Launch action steps and add them to represent the first interaction with each new application. Launch actions are populated as part of the Capture process. |
| Clean up BPRELEASE file on export |
Select the Clean up BPRELEASE file on export check box to remove any step actions performed in Windows Search from the exported BPRELEASE file. |
Export tab
You can change the values in the Export tab, as described below. You can revert the settings back to the default values by clicking Restore Export to defaults.
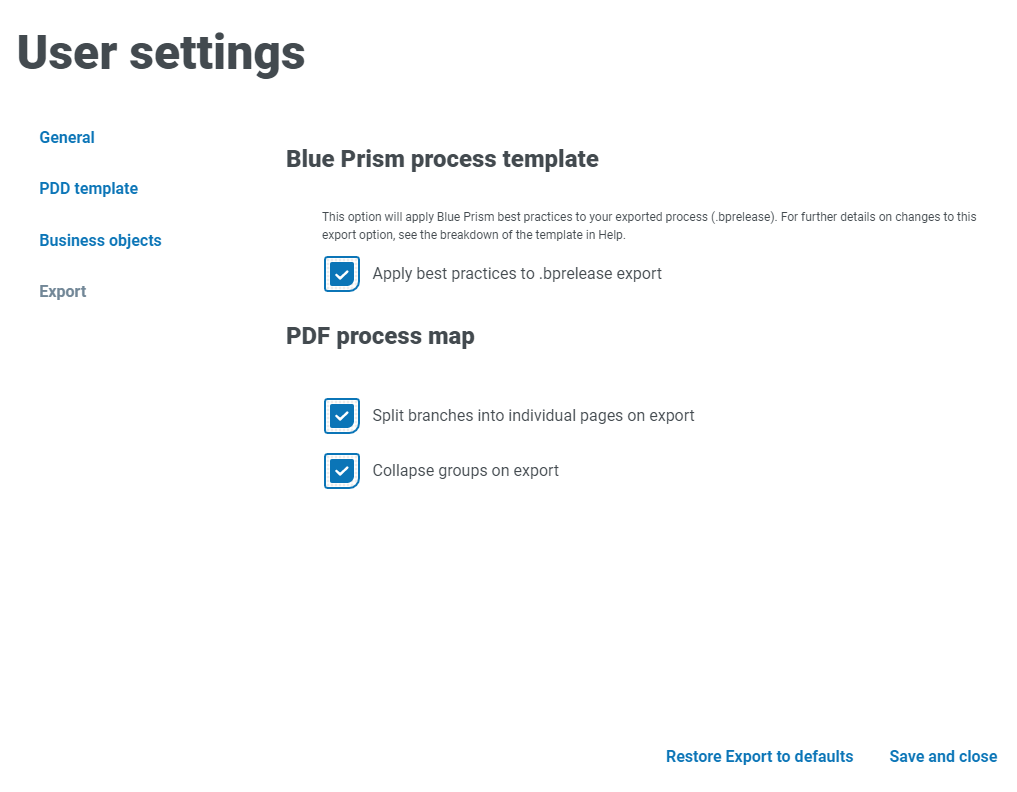
Blue Prism process template
The following export options are available:
| Option | Description |
|---|---|
| Apply best practices to .bprelease export |
This option applies the Blue Prism best practice template to your exported process (BPRELEASE). See The Blue Prism best practice process template. |
PDF process map
The following options are available:
| Option | Description |
|---|---|
| Split branches into individual pages in PDF on export |
Displays one branch on each page of the PDF process map export. The full process map is displayed on the first page. |
|
Collapse groups on export |
Only displays the first two screenshots for each group in the PDF process map. The total number of steps in each collapsed group is displayed under the collapsed‑group screenshots. |
Blue Prism release (.bprelease)
The following options are available:
| Option | Description |
|---|---|
| Custom process template |
Click Choose a file to select a BPRELEASE file to be used as a process template. For more information about creating and using custom templates, see Create a custom process template. |
