 Docs
DocsQueue management
Work queues provide a mechanism for modelling the queueing, locking and reporting of work items within a Blue Prism environment.
A queue contains a number of work items, which a session can lock and work within a process or business object.
Working the queues is done using the work queues business object. It provides actions for retrieving items from the queue, altering metadata around the items, reporting on the queue.
When an item is retrieved for work, it is locked and cannot be retrieved by another session. It is released when the work is done – by deferring the work until a specified time, marking the item as complete, or by marking it with an exception.
Full documentation for the work queues business object actions
can be found by clicking on the information icon : ![]() in the action
properties dialog within Process Studio
in the action
properties dialog within Process Studio
Blue Prism supports any number of work queues – they are created and configured within System Manager . The items can be monitored and altered from within Control Room, using the panel described in this page.
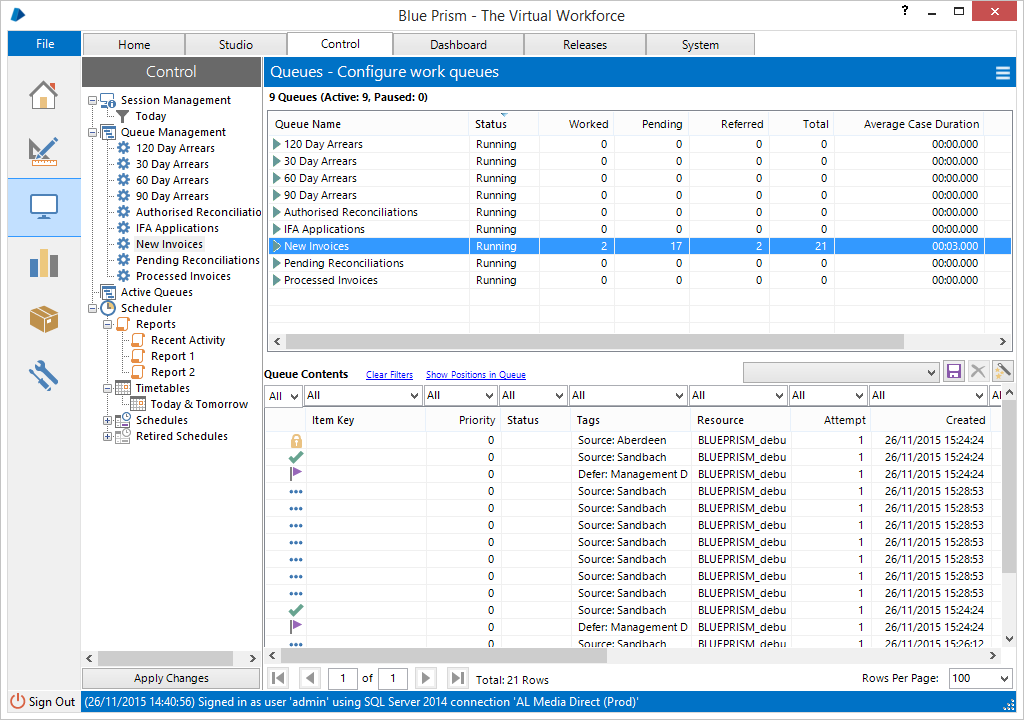
The Queue Management panel can be reached by opening Control Room and selecting the Queue Management tab. From here it is possible to pause/resume the queues, monitor the queue items, mark them with exceptions and delete them.
Queues
The top half of the page lists the queues that have been configured within this environment. The name of the queue is listed along with its status and some statistics regarding the items within the queue.
A queue's contents can be viewed by selecting the desired queue in the list – only one queue's contents is displayed at one time, even if multiple queues are selected.
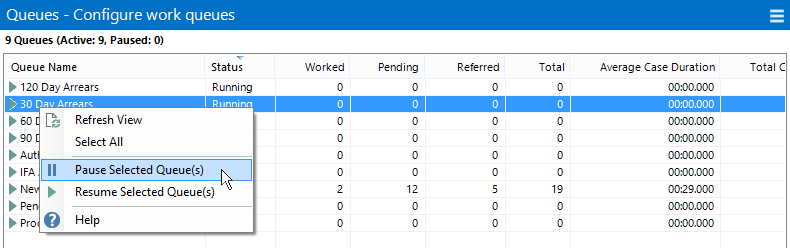
Pause/resume a queue
A queue can be paused or resumed by right-clicking them in this list and selecting Pause Selected Queue(s) or Resume Selected Queue(s) respectively.
Pausing the queue has the effect of making the Get Next action on the Internal – Work Queues business object return nothing, as if the queue was empty.
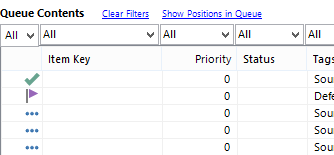
Queue contents
When a queue is selected, its contents are displayed in the list on the bottom half of the panel. By default, all the items are listed, but they can be filtered using the filter above each column in the list.
Queue position
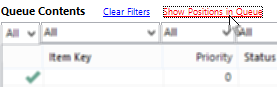
When you first look at a queue's contents, each item's position is not visible. The calculation can slow down the loading of the queue data, so it is only displayed on request.
To show the position of each item within the queue, the Show Positions in Queue link can be clicked. Items which are pending will have their position number updated (where '1' represents the next item to be retrieved in the queue). Items which have been worked or are currently deferred will have no number set in their position column.
The position column can be rehidden by clicking on the Remove Positions Column link which replaces the 'Show Positions' link when the position column is visible.
Filters
Each column has a filter combo box above it which can be used to filter the items on that particular column.
Filter items with a specific state
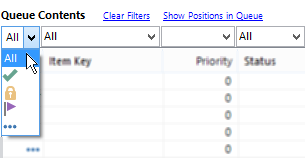
All items within the queue are in one of four states:
Pending/deferred
Items which are still to be worked have this state. The items are selected for working by the Get Next action in the order specified by the position of the item.
If an item is deferred, it will not be selected for working until the deferral date/time is reached.
These items can be marked with an exception or a deferral date can be set on them.
Locked
Items which have been selected for work and are still being worked are in this state.
The locked state prevents them from being selected twice from the queue by more than one session
Locked items can be unlocked within the list.
Completed
Completed work items have been worked successfully to completion and they require no further attention.
Completed items can be deleted from the queue as required.
Exceptioned
Exceptioned items have been selected for working, but have not been worked to completion. This may be due to a case being unsuitable for work by the process that worked it, or due to an error encountered in the session while working the case.
When an item is marked with an exception, it can be retried a number of items, if configured so in System Manager. Each attempt is represented by a separate line within the contents list.
Exceptioned items can be deleted or, if there are no pending or completed attempts, a new retry of the item can be forced.
This video demonstrates how to set and filter by the status of a work queue item.
Filter items using text filters
Some of the filters used to filter the queue contents are text based.
A text filter is used by entering the text to search for in the filter and pressing enter. Entries are saved in the drop down list for easy use later.
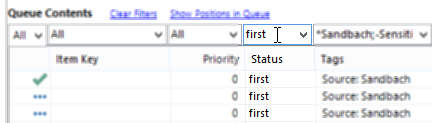
The items are filtered such that only items with the entered text somewhere in the relevant column are shown. The search is case-insensitive, such that applying a filter of first to the status column will show the items as follows:
- An item with first in its status will be shown.
- An item with First in its status will be shown
- An item with First of many will be shown
- An item with JUST THE FIRST will be shown.
- An item with second won't be shown.
Text filters are available on the following columns:
- Resource
- Item Key
- Status
Filter items using tags
Tags are individual text labels which can be assigned to items. They provide a means of grouping items together and can be used to filter items in the business object or in the contents list.
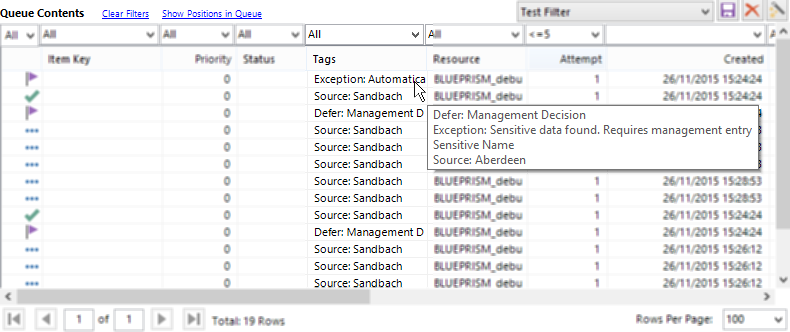
The tag filter looks like a text filter at first glance, but does not work in quite the same way. Using the tags filter, you can search for items which have specific tags, or which do not have specific tags, or a combination of both.
This video demonstrates how to use tags to filter work queue items in Blue Prism.
Search for items with a tag
To search for items with a specific tag, just enter that tag (case insensitive) into the filter, optionally prefixing it with a "+" symbol. eg.
wanted tag : will search for any items which have been assigned a tag labelled "wanted tag" or a tag "Wanted Tag" or any other case variation
+wanted tag is treated as an exact synonym – the "+" is implied if no symbol is given.
Search for items without a tag
To search for items which don't have a specific tag, enter that tag into the filter, prefixed with a "-" symbol. eg.-unwanted tag : will search for any items which do not have the tag "unwanted tag" assigned to them.
Search for items with multiple tags assigned/unassigned
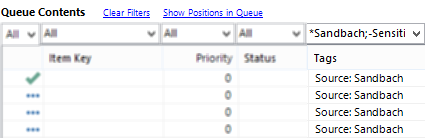
A tag filter can consist of any number of tag searches – each term can be separated by a semi-colon and they are all applied to the search (ie. they are AND'ed terms not OR'ed terms). eg.
Account: Joint; -Balance: Overdrawn; Card: *Visa* : will include any items which match all the terms, ie.:
- Every item must have an 'Account: Joint' tag applied.
- No item can have a 'Balance: Overdrawn' tag applied.
- Every item must have a tag applied which starts with 'Card: ' and then contains the text 'Visa'.
Wildcards
Tag searches support 2 wildcards. An asterisk character can
be used to search for 'any other characters', and a question
mark character can be used to search for 'any single character'.
eg.+Category: Senior* : will return items
which have a tag beginning "Category: Senior" and exclude any
items which aren't assigned such a tag. A search for
Priority ?; -Doc:* will return any items which have
a tag beginning 'Priority ' followed by a single character, and
which do not have a tag beginning 'Doc:'.
To search for literal asterisks, they can be escaped by entering them in the search twice, eg. a search for ** Star ** will return those items which have a tag of '* Star *' recorded on them. There is no mechanism for escaping a question mark, though a '?' wildcard character will obviously match the required character.
Filter items using dates/time filters

Custom filters can be applied to any of the date/time columns within the view:
Specific day
Keywords such as Today, Yesterday or Tomorrow.
A specific date can be entered either in local format (DD/MM/YYYY – UK), or universal date format (YYYY-MM-DD)
Relative ranges
Relative ranges based on minutes, hours and days, such as Last x minutes or Next x hours or Last x days.
e.g. Last 1 day or Last 5 days or Next 4 hours.
Abbreviations can be used e.g. minute/min; hour/hr/h; day/d
Values can also be plural (e.g. mins)
Specific ranges
Specific date ranges in local or universal formats such as:
- > 01/05/2014 – dates on or after 1st May 2014
- > 2014-05-01 – dates on or after 1st May 2014
- < 01/01/2016 – dates before 1st January 2016
- > 01/05/2011, < 01/06/2011 – dates on or after 1st May 2011 and before 1st June 2011
Filter items using numbers

The items can be filtered on their attempt number. Filtering by number can be done in two ways:
Specific value
The value can be entered into the filter, eg. entering the value: 1 will filter the contents such that only the first attempt of each item is displayed
Ranges
Similarly to dates, ranges can be entered in the filter, with multiple expressions comma-delimited, eg. > 1 will show only the subsequent attempts of each item. > 1, <=3 will show attempts 2 and 3 of each item.
Filter items using timespans
An item can be filtered on how much time has been spent working it. The work time is recorded in seconds, so any millisecond values entered in this filter are rounded before filtering takes place.

Timespan filtering can be done as follows:
Precise value
Searches for work item attempts with exactly the specified worktime. The value can take the format n (seconds), nn:nn (minutes and seconds) or nn:nn:nn (hours, minutes and seconds) eg.1 or 00:01 to search for items with a worktime of 1 second, or 30:00 to search for items with a work time of exactly 30 minutes. Timespans with a millisecond component can be used, eg.2.4, 01:50.675 but the filter value will be rounded appropriately before filtering.
Ranges
Similarly to dates and numbers, a range of timespans can be specified using >, <, >=, <= and separating multiple expressions with commas.
For example, >= 02:00 will find all items which have been worked for exactly two minutes or more while > 02:00 will find any items which have been worked for two minutes and one second or more.
A filter value of > 0, <= 59:59.0 will find any items which have been worked for any non-zero length of time less than an hour.
As with precise timespan filter values, if the value has a millisecond component the filter value will be rounded appropriately before being applied.
For example, > 02:00.070 will be rounded up to filter on >= 02:01, and will find any items which have been worked for two minutes and one second or more; whilst < 02:00.070 will be rounded down to filter on <= 02:00 and will find any items which have been worked for exactly two minutes or less.
Note that the work time is only updated once an item has been released, either by deferring, marking complete or marking with an exception.
Filter sets
Commonly used filters can be saved to the database for later use. On saving, the current state of all the filters in the view will be saved and, on restoring, the filters are set to their saved values, and the list is repopulated.

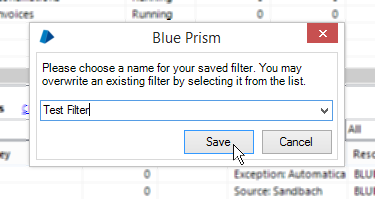
A filter set is saved by clicking on the disk icon above the filters. A prompt is displayed where the name of the filter should be entered – when the Save button is pressed, the filter is saved to the database and applied to the queue contents.
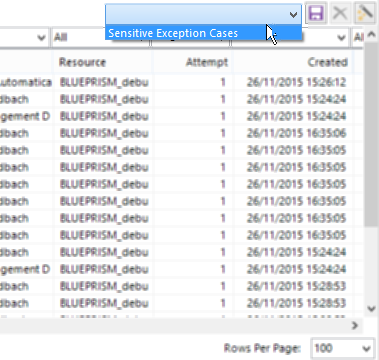
To restore a saved filter, it can be selected from the drop down list of saved filters above the filters. When selected, the filters will be loaded from the database and applied to the view of the queue contents.
A saved filter set can be set as the default filter for a queue – if done, the filter set will be loaded and applied whenever the queue is selected.
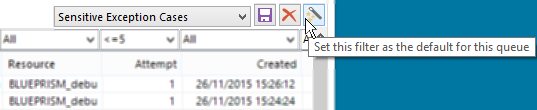
To set a default filter set for the queue, press the Set Default button above the filters.
A message will be displayed indicating success, and when the queue is selected subsequently, the selected filter set will be automatically applied.
To remove a default filter set, simply clear the filters using the Clear Filters link and set the default filter set again without any filter set selected.
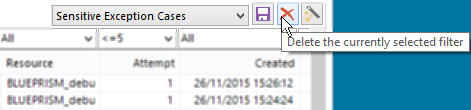
Filter sets can be deleted by first selecting them and then pressing the Delete Filter Set button above the filters.
After confirmation, the filter set is deleted, though it is still applied to the queue contents list – pressing the Clear Queues link will reset the filter on the list.
Manage work items
This panel allows a certain amount of modification of the work items themselves. The following functions are supported:
Unlock work items
When a work item is selected for work within a process, it is locked to ensure that it is not selected more than once. If a process fails while working an item, the lock may remain on the item after it should have been released.
Equally a session may maintain a lock on an item longer than it is supposed to.
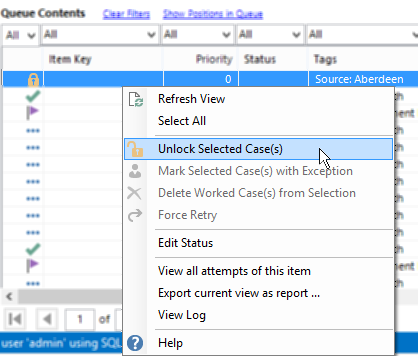
If this occurs, the lock can be released in Control Room by selecting the item(s), right-clicking and choosing Unlock Selected Case(s) from the context menu.
The lock(s) will be removed immediately and the item will be available for selection from the queue within running processes.
Mark items with an exception
Work items can be completed in one of two ways – they can be marked as complete within a session, or they can be marked with an exception. The latter can be done within a session or from Control Room.
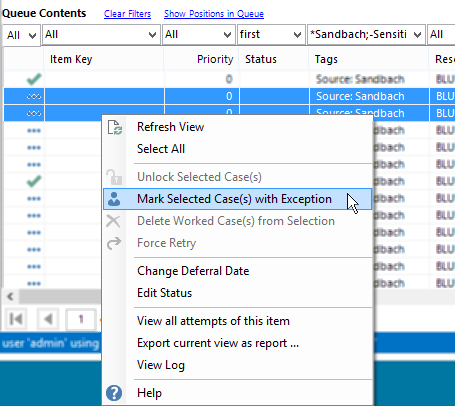
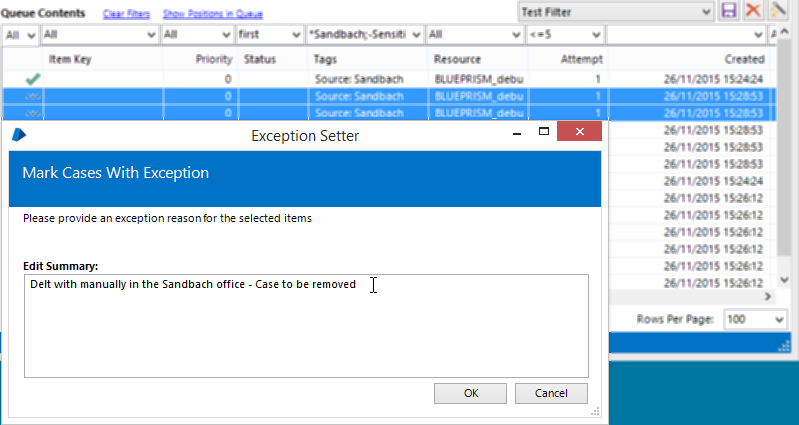
To mark items with an exception, select them in the contents list, right click and select Mark Selected Case(s) with Exception.
A dialog will be shown where the exception reason can be entered. When OK is clicked, the items will be marked with an exception immediately, rendering them unavailable within the queue.
Note that no retry will be created when an item is marked with an exception from within Control Room, regardless of how many retries are allowed for that queue.
Also note that only pending or deferred items can be marked this way, not items which have already been worked or are locked.
Delete worked items

When an item has been worked it is available for deletion. This can be achieved using the Delete Processed Items action within the queues business object, or by selecting the items in the contents list, right-clicking and choosing Delete Worked Case(s) from Selection from the context menu.
When the menu item is clicked, any selected items which are fully worked (ie. are marked as complete or marked with an exception and have no retry pending) are deleted from the database.
Any items which are not fully worked, as defined above, will remain in the list unaltered.
If a selected entry which is marked with an exception is left in the list after a delete has been initiated, it is likely that the item represented by the entry has a retry pending. This retry must be found and marked with an exception before the item can be deleted.
Force an exceptioned item to retry
A queue can be configured to support multiple retries, such that when an item is marked with an exception, the item is requeued with an incremented attempt number. Each retry is represented by a different line within the queue contents list.
If the item is marked with an exception such that the maximum number of retries is hit, no more retries can be generated from within the process.
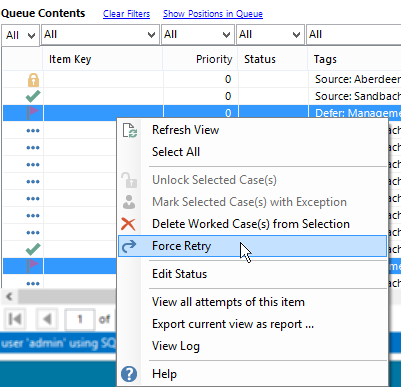
This maximum can be overridden in Control Room by selecting the items to retry, right-clicking and selecting Force Retry from the context menu.
When the menu item is clicked, a retry instance for each of the selected items is created and entered into the queue.
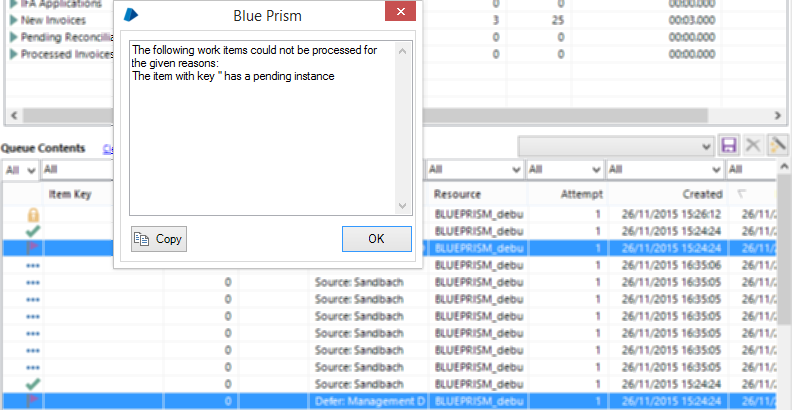
If any of the selected items could not be retried, the operation will abort, leaving none of the items with a retry instance, even if the operation would have worked for them.
If the operation fails, a comprehensive error message will be shown indicating why the operation didn't work – this is typically because the selected items already have pending instances or have been marked as complete.
Set a deferral date
When an item is deferred, it is temporarily made unavailable to be selected for working within a process. It is made available once the deferral date has been reached.
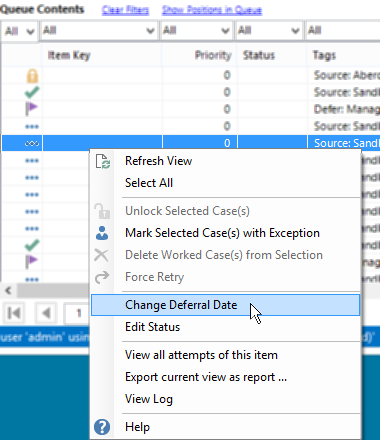
An item can be deferred by using the Defer action in the queues business object, or by selecting it in the queue contents list, right-clicking and selecting Change Deferral Date from the context menu.
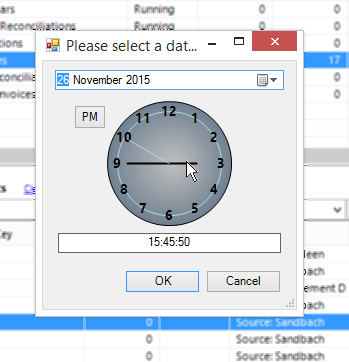
A dialog will be displayed in which the date and time that the item should be deferred to can be entered. The date can be selected by dropping down the date chooser and selecting the date to defer until. The time can be selected by dragging the hands of the clock to the correct place or entering the time manually in the text box below the clock.
On pressing OK, the item is set to defer until the specified time immediately and it will become unavailable to running processes until that time is reached.
Edit status
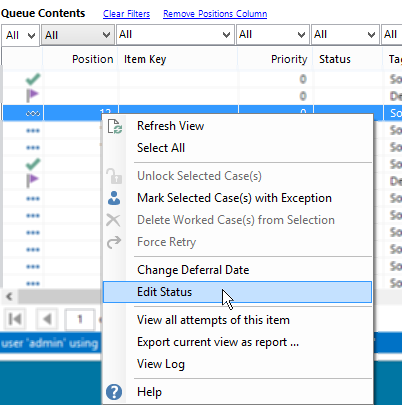
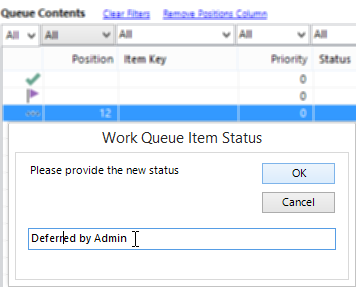
An item has a status associated with it. This can be edited using the Update Status action in the queues business object or by selecting it in the queue contents list, right-clicking and selecting Edit Status from the context menu.
A dialog will be displayed with the current status selected, ready to accept the new status. Once a new status is entered, all selected items will have their status set to the new value.
View all attempts of an item
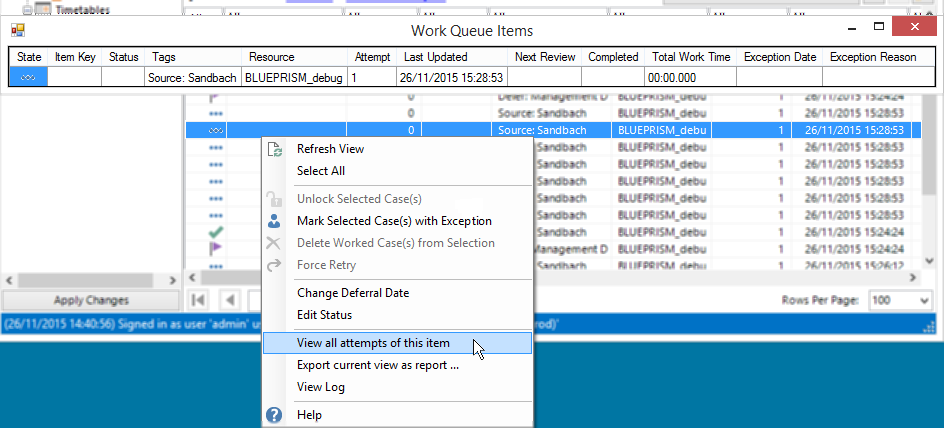
Each retry of an item is represented by an entry in the queue contents list. To see the state of all attempts of an item, the item can be right-clicked and View all attempts of this item selected from the context menu.
On selecting the menu item, a window will be opened showing the table of retries for the selected item.
Copy the item key
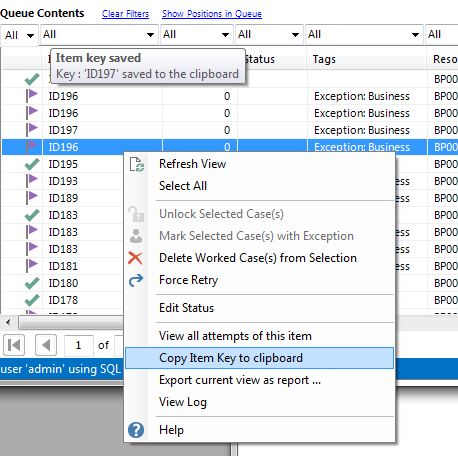
The key can be copied from the item into the clipboard. This is achieved by right-clicking the required item and selecting Copy Item Key to clipboard. The key will be copied to the clipboard immediately and a tooltip message will display indicating that that has occurred.
Export the queue contents
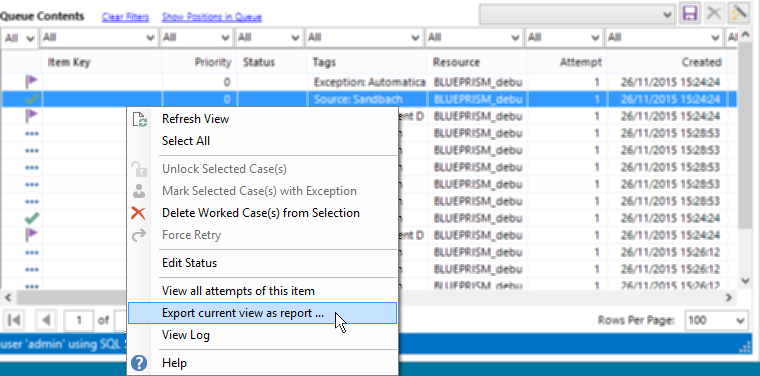
The queue contents data can be exported to a file by right-clicking an item and selecting Export current view as report....
On choosing the menu item, the Export Work Queue Report wizard displays, letting you choose to:
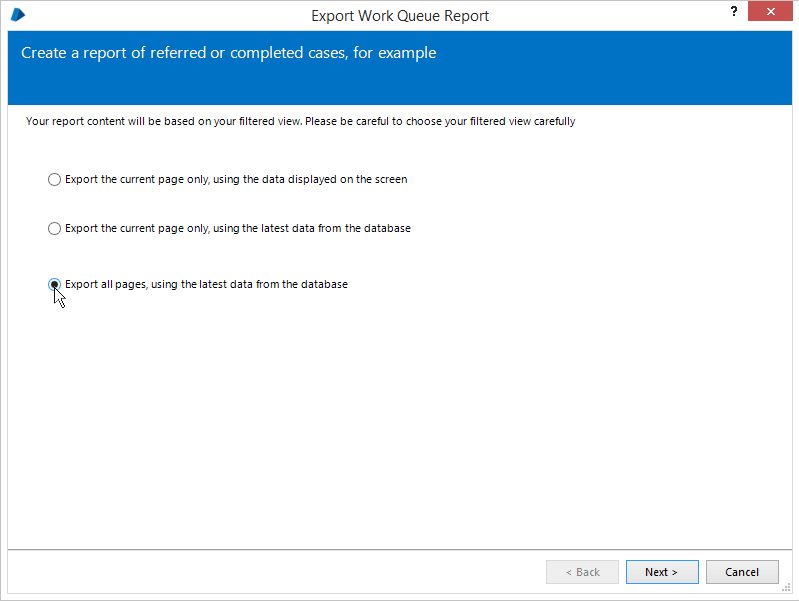
Export the current page only, using the data displayed on the screen.
This will export the data that is currently visible in the contents list without first verifying that it is still accurate according to the database.
Export the current page only, using the latest data from the database.
Exports the current page, after refreshing the data with the latest information from the database.
Note that the actual items exported may differ from those in the contents list at the moment, since some new items may have been created or deleted since the page was last refreshed.
Export all pages, using the latest data from the database.
Exports the entire contents of the queue (after current filters have been applied) using the latest data from the database.
Pressing the Next > button progresses to the next stage of the wizard.
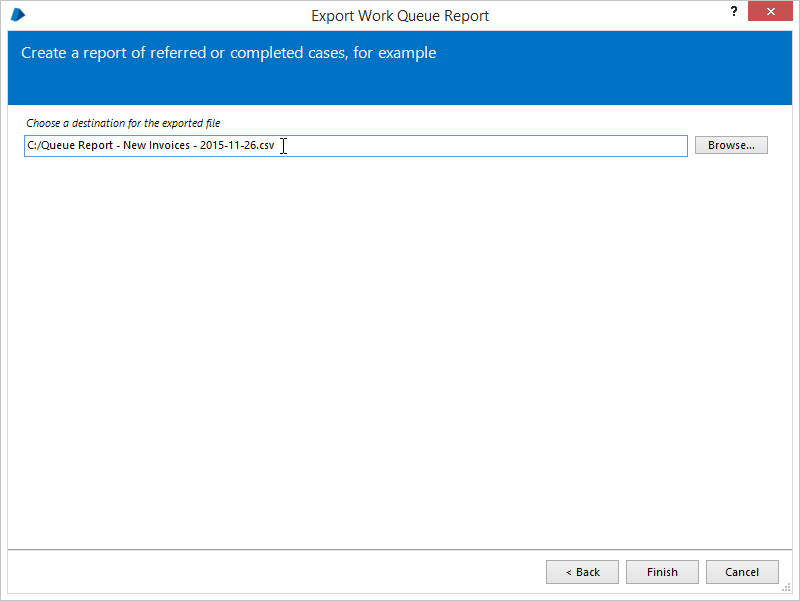
Once the data to export has been selected, the location of the output file is entered. This can be entered manually or selected by clicking on the Browse... button. The output is in the form of a CSV file.
Once the output file is chosen, and the Finish button is pressed, the output file is generated.
View the log
When a work item is added to the queue, the session which added it is recorded alongside it. From here on, any one of a number of actions which a session performs on a work item will result in that session being associated with the item.
The actions which cause a session to be associated with an item are:
- Adding an item to the queue
- Selecting an item to work – retrieve it using the Get Next action on the business object
- Deferring an item
- Completing an item
- Marking an item with an exception
The log for the session which is currently associated with a work item is available for viewing directly from the item itself.
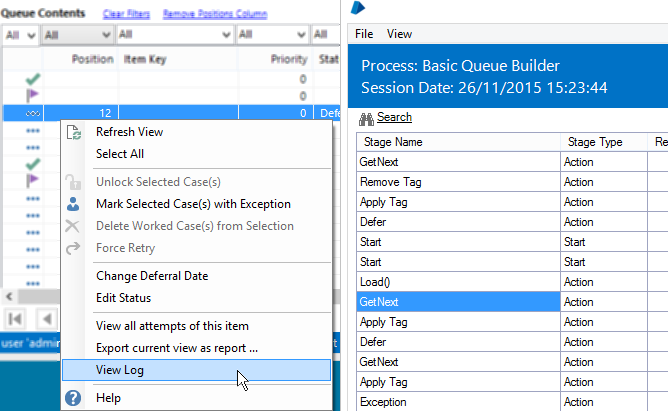
The log can be viewed by selecting it in the queue contents list, right-clicking and choosing View Log from the context menu.
Once the menu item is selected, the log for the session will display in a new window. It will attempt to find the area in the log file at which the item was marked as worked – this is approximate and handled by comparing the time at which the item was marked as worked and the time of the log entries.
