 Docs
DocsConfigure Microsoft Entra ID
To enable single sign-on, you can configure Process Intelligence with Microsoft Entra ID, enabling users to log in to Process Intelligence using their Entra ID credentials.
Microsoft Entra ID was previously known as Azure Active Directory.
Prerequisites
-
A Microsoft Entra user account.
-
Process Intelligence installed and set up.
-
A custom domain name configured by SS&C | Blue Prism support, for example,
https://<your-company>.processtaskmining.com. To do this:-
Define the <your-company> element of the domain name.
-
Contact the SS&C | Blue Prism support team with your domain name. For more information on raising a support ticket, see the Blue Prism Knowledge base.
-
Configure Microsoft Entra ID
-
Sign in to the Microsoft Entra admin center.
-
From the left-hand menu, select Identity > Applications > Enterprise applications > All applications.
The Enterprise applications | All applications page displays.
-
Click New application.
-
On the Add an application page, select Non-gallery application.
-
On the Add your own application page, enter a Name, and then click Add.
If the Name field is disabled, you may not have the correct Microsoft Entra ID subscription. Contact your Microsoft Entra ID admin or sales team.
-
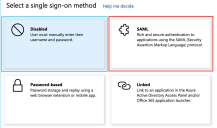
From the left-hand menu, select Single sign-on.
-
On the Select a single sign-on method page, select SAML.
-
On the Set up Single Sign-On with SAML page, click the edit icon in the Basic SAML Configuration section.
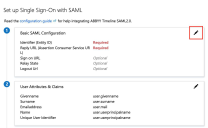
-
Populate the following fields:
-
Identifier (Entity ID) – For example,
https://<your-company>.timelinepi.com/user/sso/saml/metadata.xml. -
Reply URL (Assertion Consumer Service URL) – For example,
https://<your-company>.timelinepi.com/user/sso/saml/assert.
Values for these fields can be found in Process Intelligence. From your Account Settings, select Authentication, and then SAML 2.0. For more information, see Authentication.
-
-
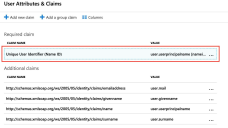
Return to the Set up Single Sign-On with SAML page, and click the edit icon in the User Attributes & Claims section.
-
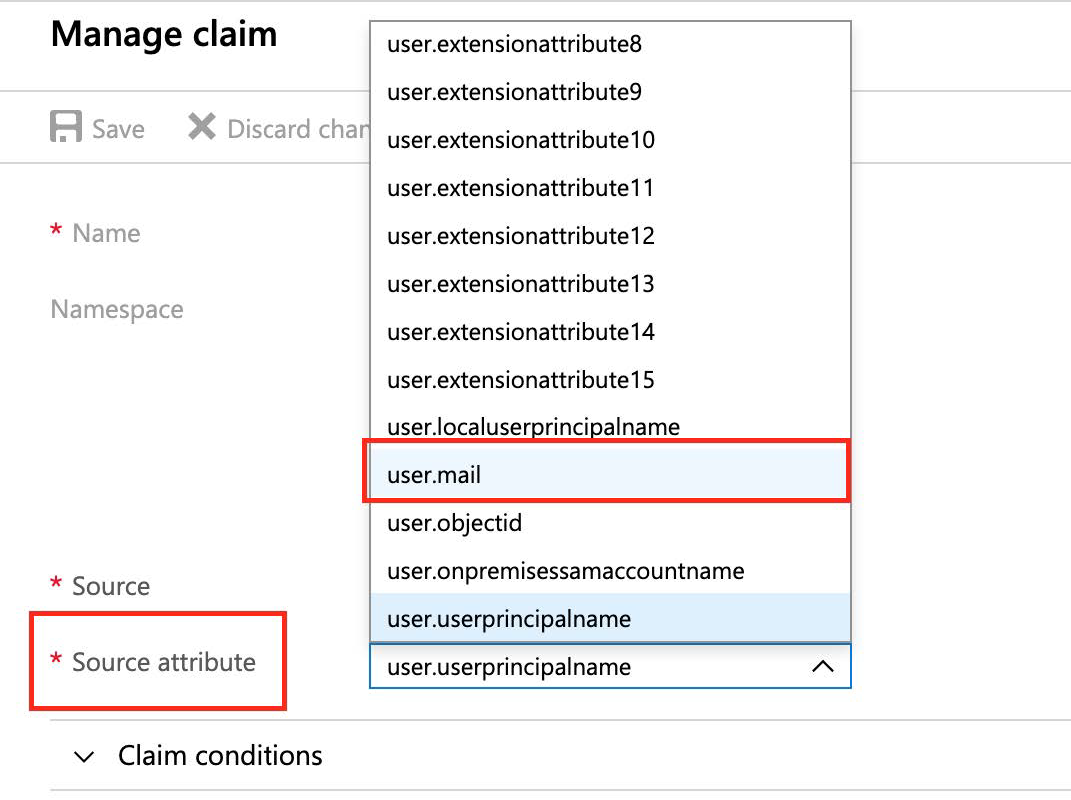
On the User Attributes & Claims page, select the Unique User Identifier (Name ID) row, and click the Value field.
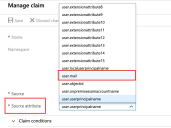
-
On the Manage claim page, from the Source attribute dropdown, select user.mail.
-
Return to the Set up Single Sign-On with SAML page.
-
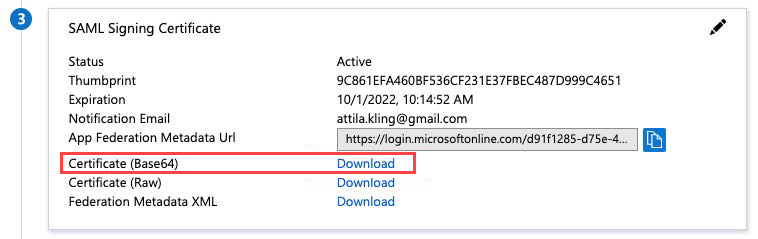
In the SAML Signing Certificate section, in the Certificate (Base64) field, click Download.

-
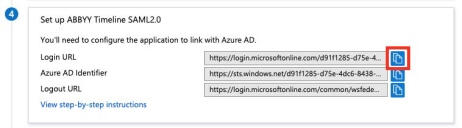
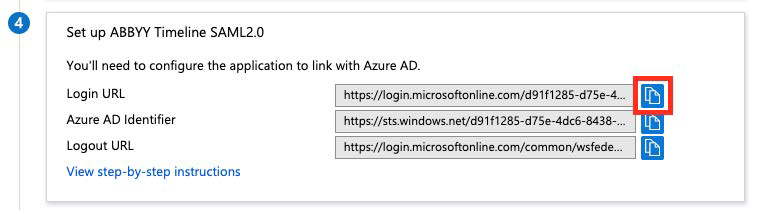
In the Set up <your company> section, click the copy icon to copy the value of the Login URL.


Configure Process Intelligence
After completing the Microsoft Entra ID set up, in Process Intelligence:
-
Go to Account Settings, select Authentication, and then SAML 2.0.
-
In the SAML setting section, populate the following fields:
-
Single Sign-On button text – Optionally, you can define the label for the single sign-on button on the Process Intelligence log in screen. If left blank, it defaults to Single Sign-On.
-
Identity Provider Login URL – The Login URL you copied in step 15 above.
-
Identity Provider Certificate – The Certificate (Base64) you downloaded in step 14 above. Copy and paste the certificate into the text field, or select Browse file and navigate to the certificate.
-
-
Click Save.
-
In the SAML instructions section, copy the Application URL. You and your users will use this URL to access Process Intelligence.
-
Log out, and navigate to the Application URL copied above.
