 Docs
Docs
ALM – Process definitions
The Process definitions option under ALM allows the creation of electronic versions of the process definition document and their attributes.
A process definition is a document, whether a physical document or an electronic version, that describes in detail a business process. A process definition document should consist of the following:
- A summary of what the overall process and solution is.
- Definitions of unique language used within the business process.
- Scope and expectations as to what the automation should achieve.
- Volumes, how many instances of this task are going to be ran each day.
- Interact design to dictate what the solution would visually look like.
- A list of applications that your automation will interact with as well as their versions.
- A high-level process map of what the goal is.
- Low level steps, keystroke level details of the process.
- Inputs, triggers and outputs relevant to the automation.
- Exceptions, what varying scenarios should you expect and handle.
The process definition is the core tool for the automation developer role, its accuracy and consistency will mean the difference between an average and great automation so ensure the information is complete before starting your work. The build of an automation shouldn’t commence without a process definition and so Blue Prism emphasizes the importance of this document.
On the Process definitions page in ALM, the following attributes for a process definition display:
- Process name – Name of the process definition. This is inherited from the business process.
- Version – The version number of the process definition.
- Update note – The note saved on a process definition when the latest update to the major/minor version was saved.
- Updated by – The last user to update the process definition.
- Update date – The latest date that the process definition was updated.
- Sections – Different sections that make up the process definition.
- Locked by – The user who currently has the process definition “open”, if appropriate.
- My access – The access the current user has on the process definition.
By default, the Process definitions page displays the latest version of each process definition. If you want to view all versions, open the Filters and turn off the Latest filter.
Versioning
Versioning is the method used to manage the creation and management of multiple releases of process definitions. As they are developed, improved, upgraded or customized users can save versions to capture versions at particular points in time.
There are two versions levels, minor and major versions. A minor version of the process definition is captured every time you save the document. Only an owner or contributor can update to the major version. This would be used typically when a milestone has been reached and the process definition is being sent for review. More details on versioning are included in Process definition sign-off.
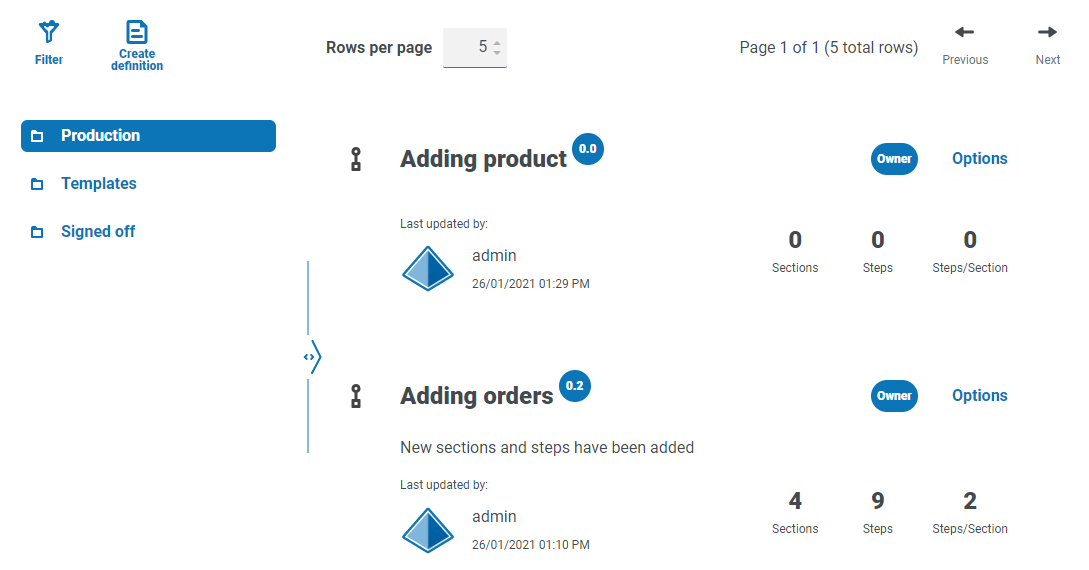
By default, the Latest filter is turned on and only the latest versions of each process definitions display. Earlier versions are hidden to provide a clean view. Click Filter to display the filters and turn off the Latest filter to see previous saved versions.
Add a process definition
You must have a business process defined before you can create a process definition. For more information, see ALM – Business processes.
-
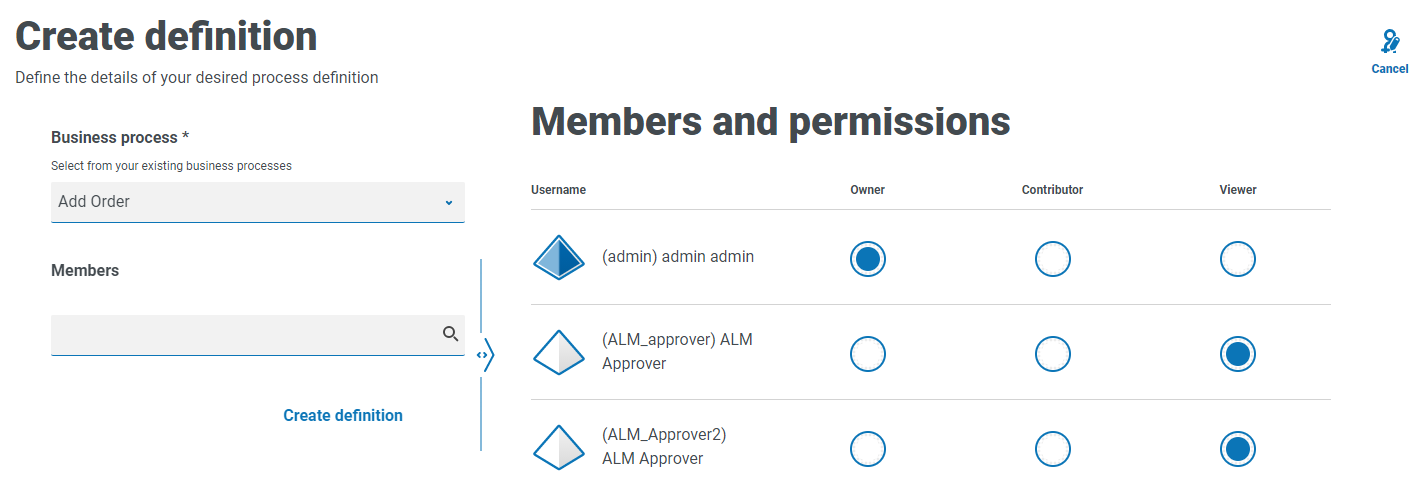
On the Automation lifecycle page, click Process definitions, and then click Create definition.
The Create definition page displays.
-
Select the appropriate process from the Business process drop-down list.
The Members and permissions section displays all the users assigned to the selected business process.

You can use the Members search field to find a specific user. The list of users filters as you type.
-
Set the permissions at the required level. By default, the creator will be the owner and all others will be members. You can change any permission, but you must have at least one owner assigned:
Access Level
Description
Owner
With this level of access the user can read, write, delete and initiate sign-off of the process definition. The user who created the process definition will automatically be given owner rights. In detail, they can perform the following:
-
Edit Definition – Allows the user to edit the process definition, if it’s not locked by another user.
-
Increase Major – Allows the user to increase the major version of the process definition.
-
View – Allows the user to view the process definition, they will not be able to edit the process definition in this mode.
- Edit Access Control – The user can alter the access privileges of different members. Members are alerted to their access change via a notification.
- Sign off Options – This gives the user three options:
- Submit for sign off – Sends a notification to members letting them know that they need to sign off on the process definition.
- Redact Sign-off – Owner can redact the sign-off.
- Member Sign off – View the different members who have and have not signed off.
-
View Update Note – Allows the user to see the latest update note, date it was updated and the user who updated.
- Delete – Reverts the process definition to the previous version.
Contributor
With this level of access the user can read and edit the process definition. In detail, they can:
-
Edit Definition – Allows the user to edit the process definition, if it’s not locked by another user.
-
Increase Major – Allows the user to increase the major version of the process definition.
-
View – Allows the user to view the process definition, they will not be able to edit the process definition in this mode.
-
View Update Note – Allows the user to see the latest update note, date it was updated and the user who updated.
Viewer
With this level of access the user can read the process definition. In detail, they can:
-
View – Allows the user to view the process definition, they will not be able to edit the process definition in this mode.
-
View Update Note – Allows the user to see the latest update note, date it was updated and the user who updated.
-
-
Click Create definition.
A notification displays confirming the definition has been saved and the Edit definition page displays. You are now ready to add sections.
Sections
A section is a group of steps that describe a combined part of the process, for example, the ‘Login steps’ into an application. Using this structured approach enables the users to create ‘reuseable’ sections which can be stored as templates and reused in other process definitions. See Templates for more information.
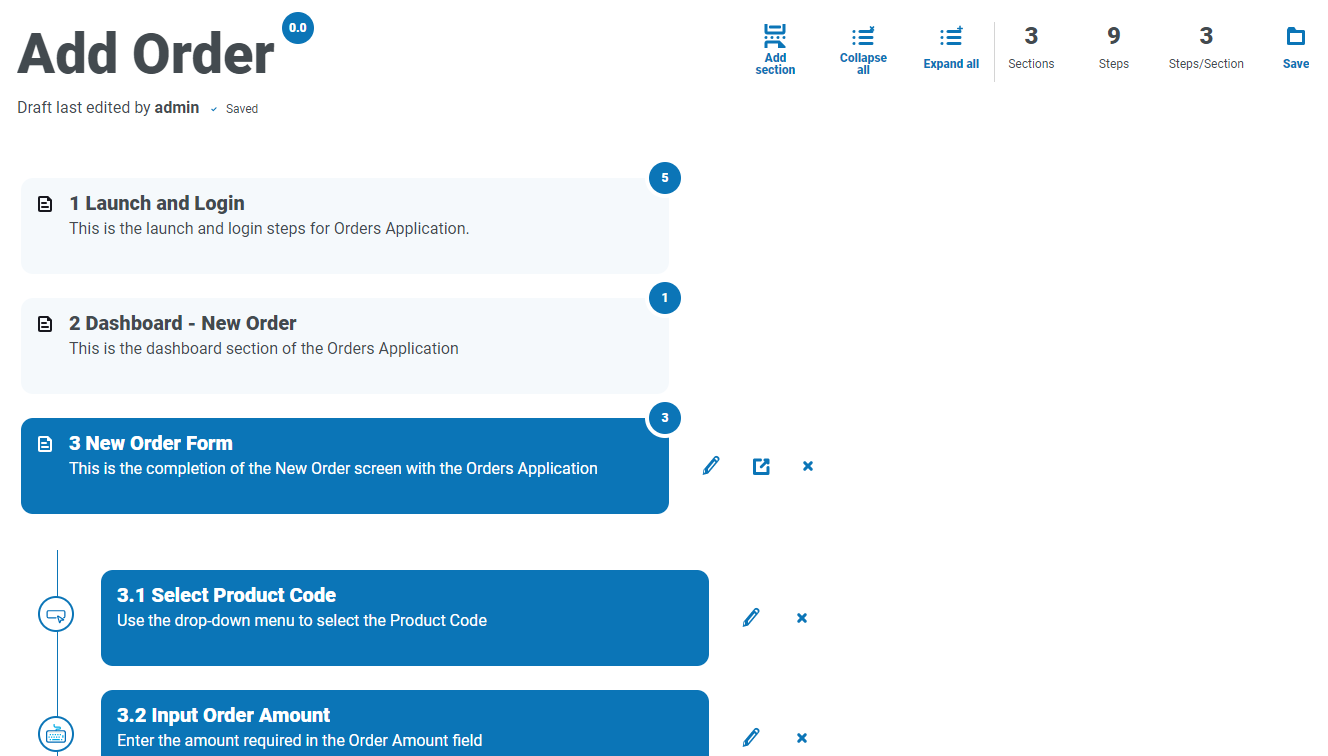
Add sections to a process definition
If you have just created a new process definition and now want to add sections, go to step 2.
You can not edit a process definition which has been sent for sign off. When you click Options, you will see that the Edit definition option is inactive. For more information, see ALM – Process definition sign-off.
-
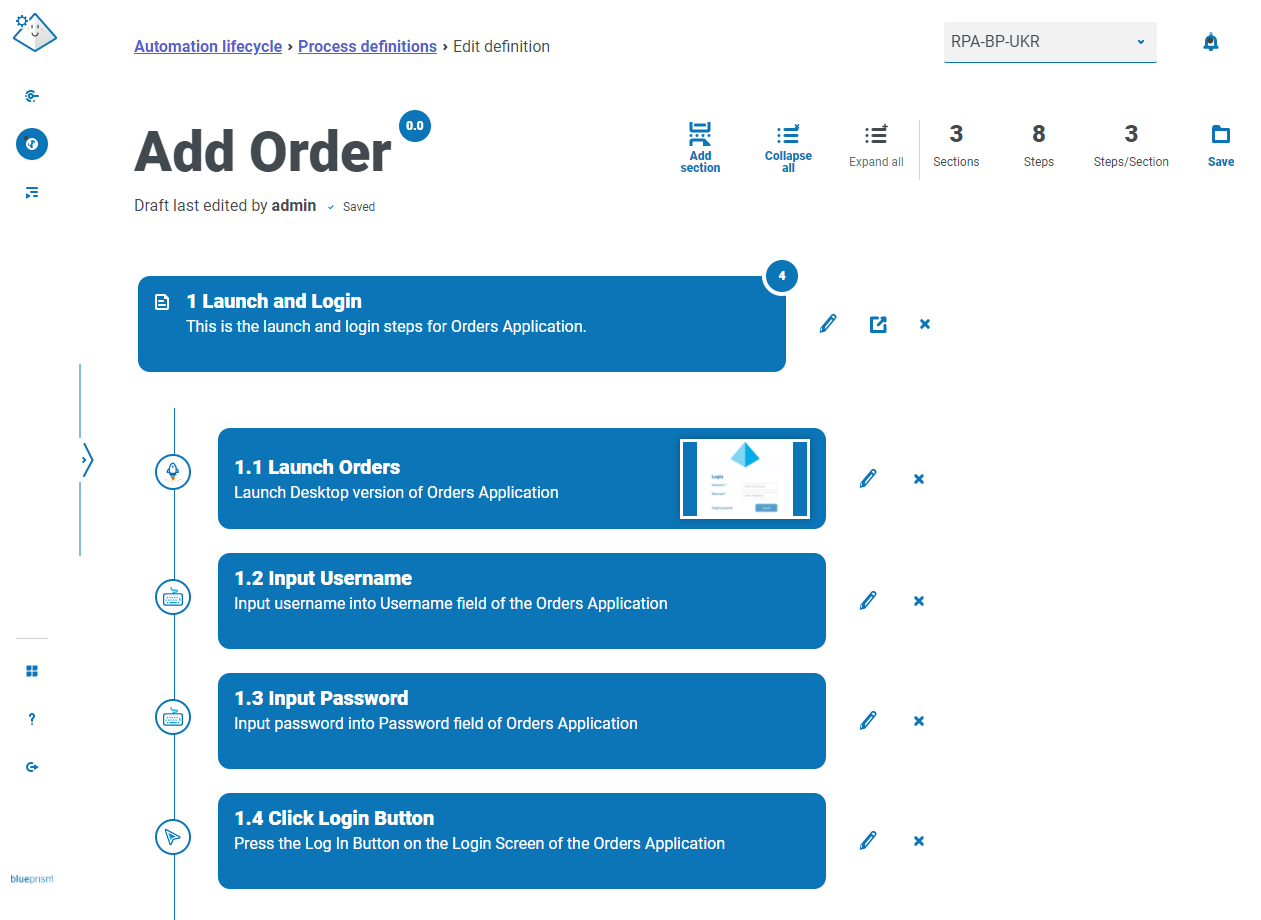
On the Process definitions page, click Options next to the required process and click Edit definition.
The Edit definition page displays.
-
Click Add Section.
The Create section panel displays.
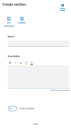
- Enter a name and an optional description of the section being created.
-
Click Save.
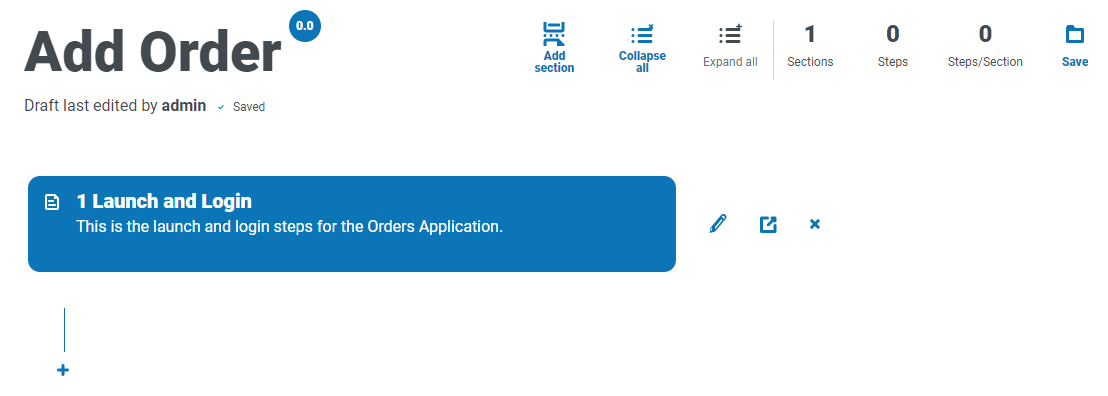
The section is added to the process definition.

As more sections are added, the order can be amended by dragging the section to the required place. The icons next to the section enable you to edit the section, export to a template, or delete it from the process definition.
-
Repeat this process to add further sections.
You are now ready to add steps to your sections, see Steps.
- Click Save on the Edit definition page to commit the sections to the process definition.

Steps
Steps are the tasks that the human worker would undertake to perform the business process. They are the actions, for example, input username, input password, click login button, and then a decision to check that the credentials were correct. There are fours types of steps you can use, these are:
- Action – This allows you to define an action for your application.
- Decision – This allows you to insert true/false or multiple conditions.
- Email – This allows you to include an email step within your process.
- Object – This allows you to add Blue Prism Object to your process definition.
Action
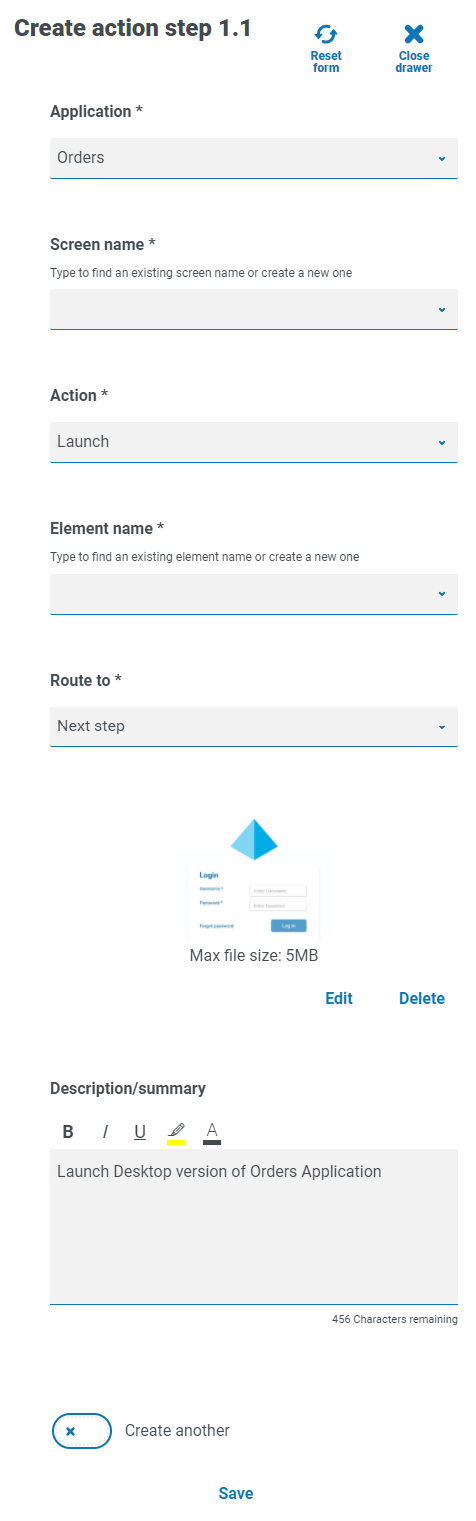
Actions are used to configure the steps a user would perform in a screen such as input data into a field, click a button, close an application.
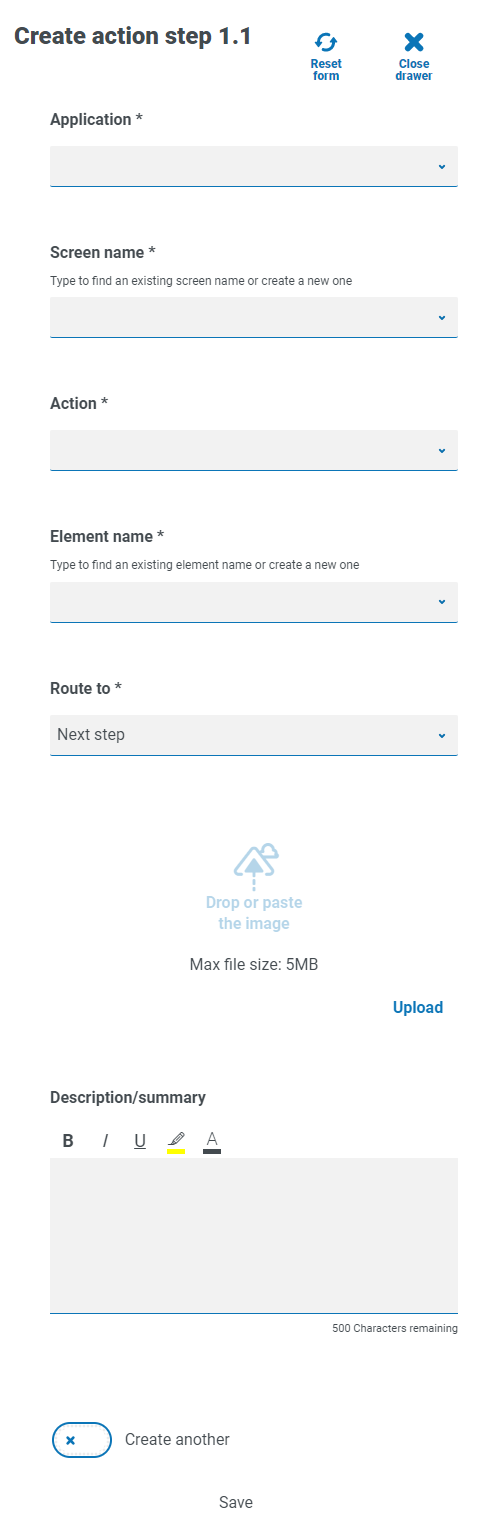
An action step is configured using the following fields:
- Application – Select the required action from the drop-down. Each currently defined application is available.
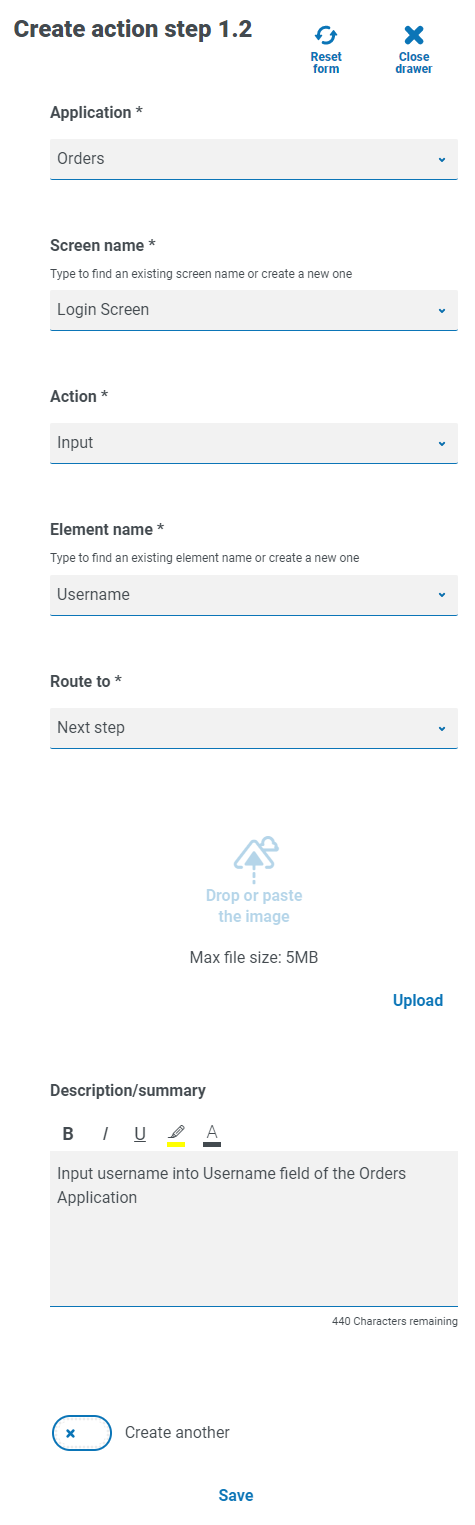
- Screen name – The name of the screen in the application on which the action will occur. As you start to type the screen name, a list of possible names will appear that have been created earlier. If reusing an existing screen name, you can select it from the list. If it is a new name, type the name and then move to the next field to create the new screen name.
- Action – The type of action the step will perform:
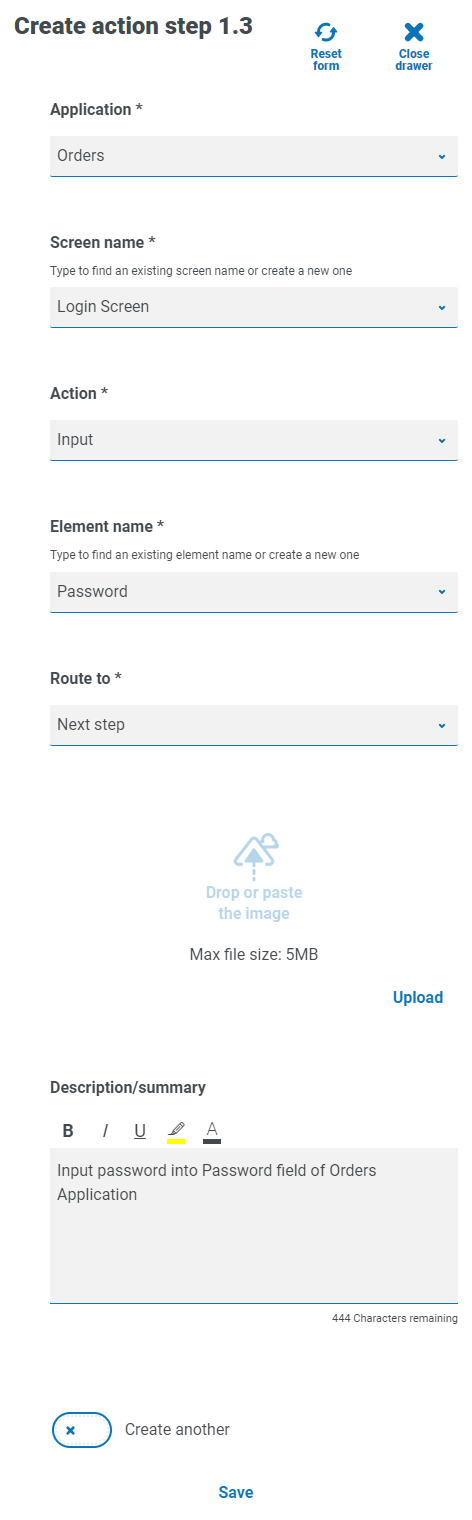
- Input – Inputs data into a field.
- Read – Reads data from a form or field.
- Select – Selects an option, for example, a drop-down menu item.
- Launch – Launches an application.
- Close – Closes an application.
- Drag and drop – Allows a data item to be moved between two applications.
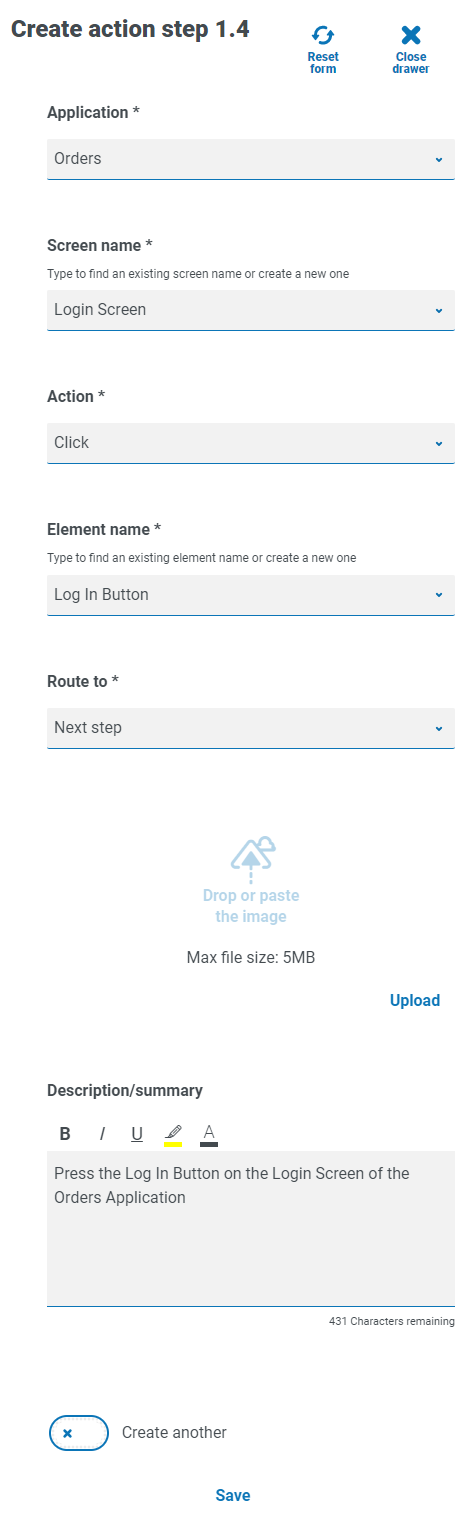
- Click – Presses a button or file menu item.
- Double click – Double-clicks a button
- Right click – Right-clicks a button
- Terminate – Terminates the application following an exception.
- Element name – Enter a name for the element that will enable the automation developer to recognize the field that the automation will interact with, for example, username, password, or login button.
- Route to – Determines what happens when the step is complete:
- Next step – Moves to the next step in the process.
- TBC – A placeholder that is useful if the required step has not yet been configured.
- End – The end of the process. Each process must finish with a step that routes to End.
- Image – Take a snapshot of the application showing the fields and the buttons. The automation developer can then review this during the build to ensure that they are on the correct screen within the application. This also ensures they can recognize fields and buttons correctly.
- Description/summary – An optional description of the step.
To quickly add the next step in the process, select Create another before saving. When you click Save, the dialog will refresh allowing you to quickly configure the action.
Decision
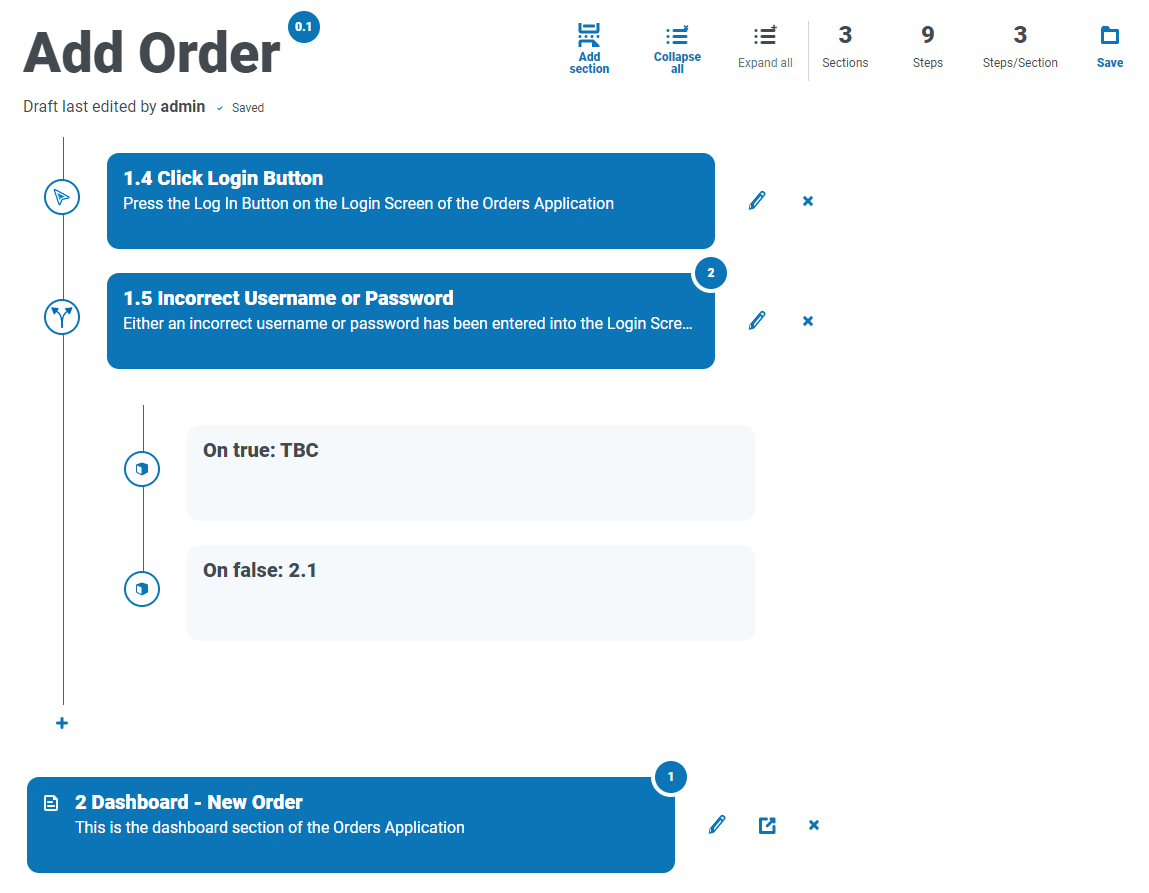
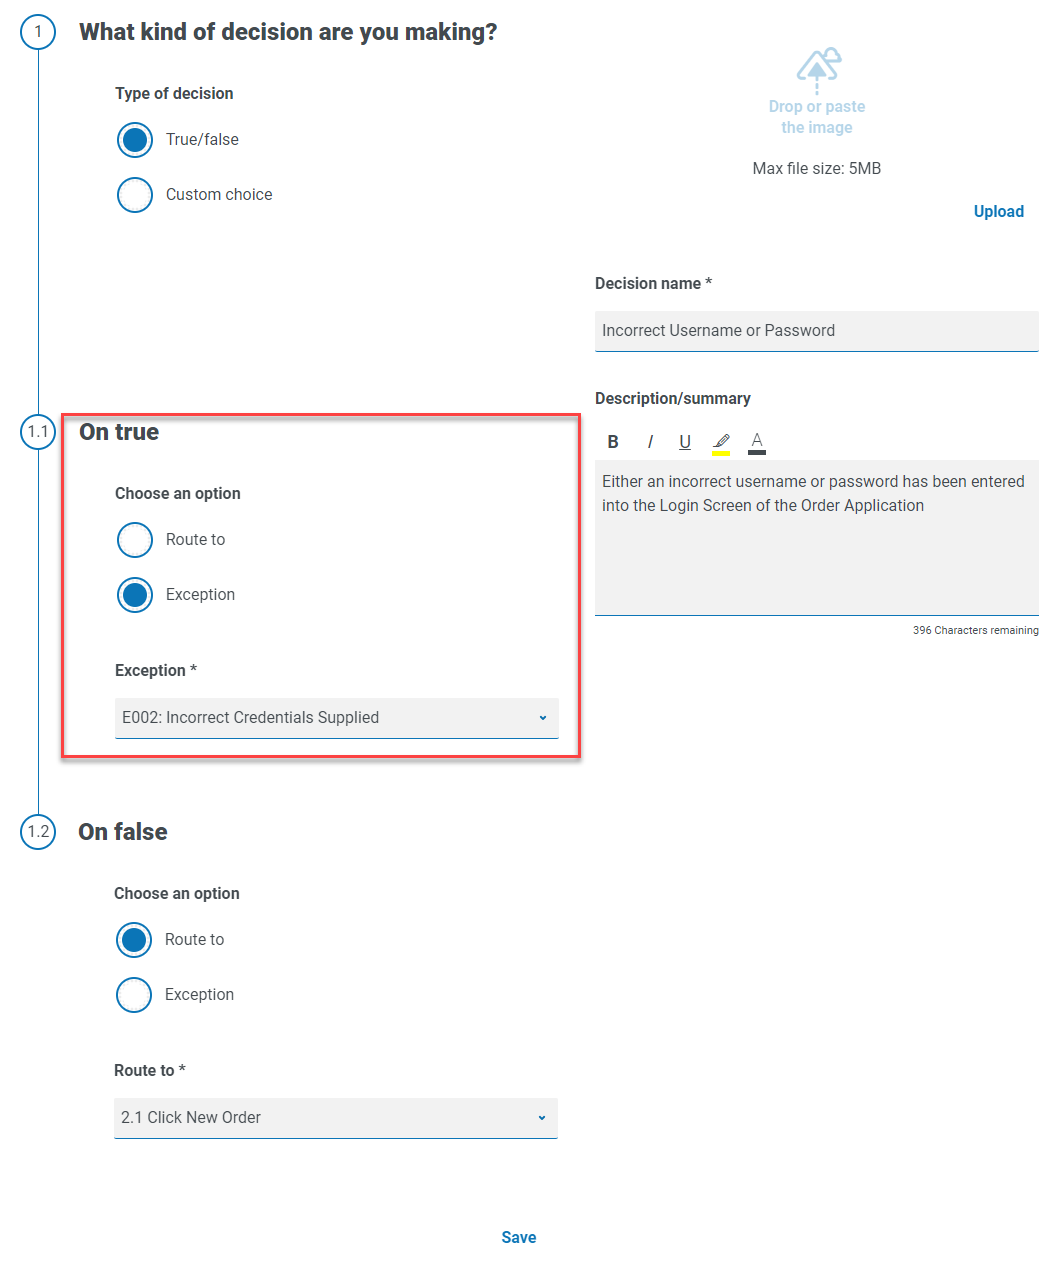
A decision determines what option should be taken if more than one outcome is available. The process can continue to the next step or another defined step. In the example below, a decision has been added after the login button has been pressed. The decision checks whether the incorrect username or password dialog displays. If neither appears, then a decision needs to be made as to the next step undertaken.
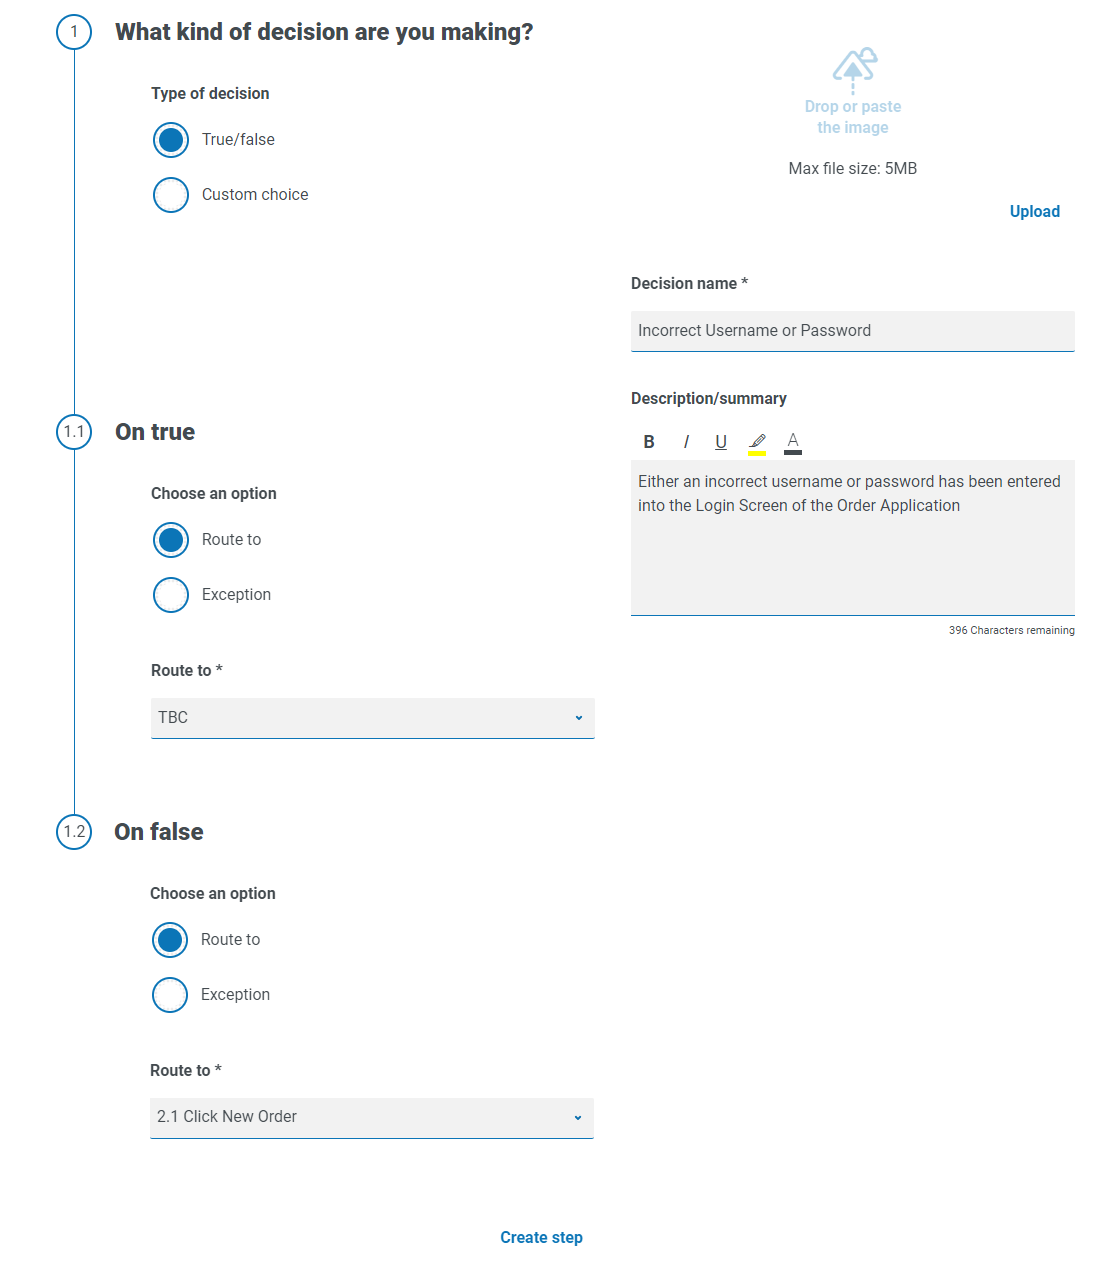
A decision step is configured using the following fields:
- Type of decision – The options that are available for the decision. This could be true/false or a custom choice.
- List of choice – The options available. Once selected, configure what will happen when the outcome of the choice occurs, such as progress to a specified stage.
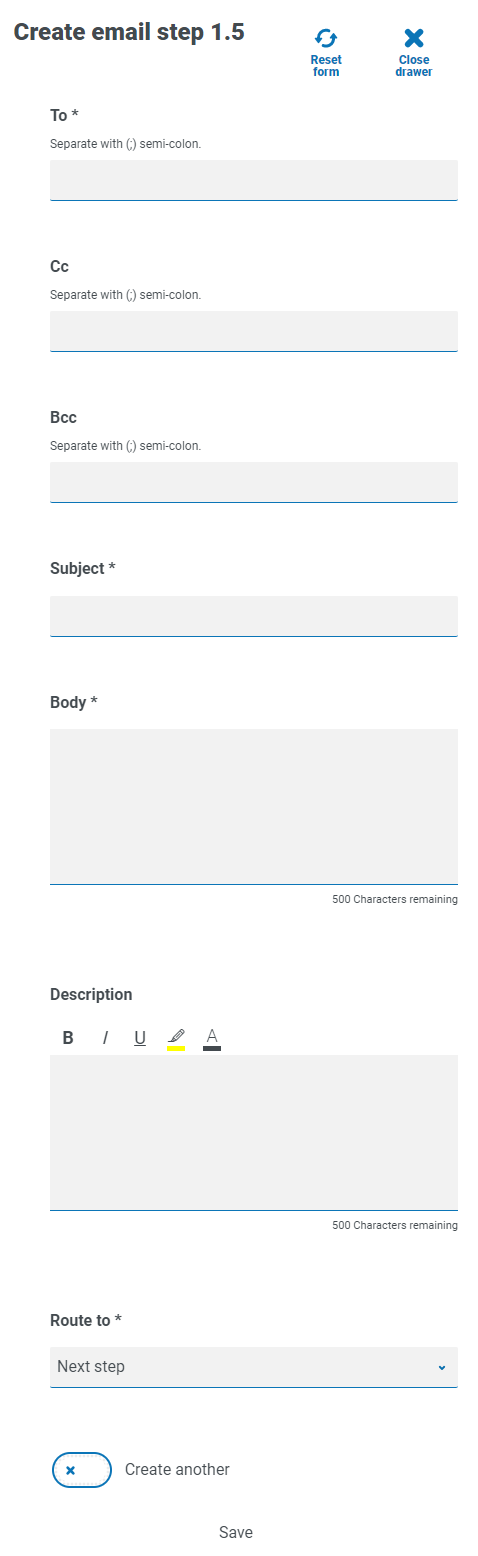
If a business process includes sending an email, configure the contents and recipients in an email step.
Object
Incorporate Blue Prism business objects in process capture.
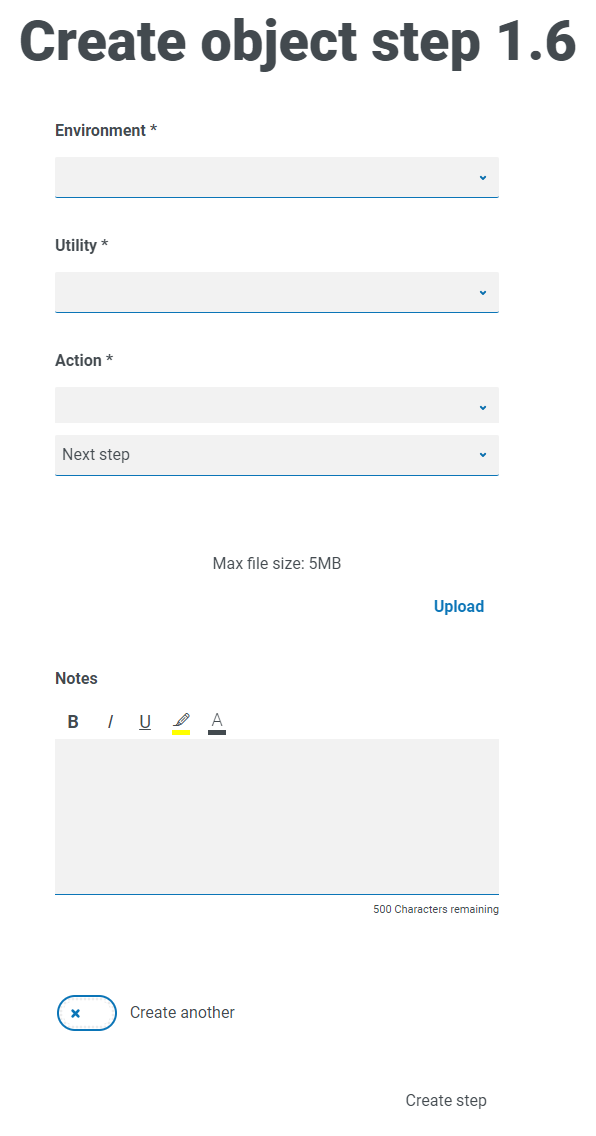
An object step is configured using the following fields:
- Environment – The Blue Prism environment in which the business object/utility file is located in.
- Utility – The name of the business object/utility file that the automation developer will use to call the required action.
- Action – The required action that the developer will use from the business object/utility file.
- Route to – Determines what happens when the step is complete.
Add steps to a process definition
-
On the Edit definition page of a process, click the Create step icon
 below the appropriate section.
 The Choose step type dialog displays.
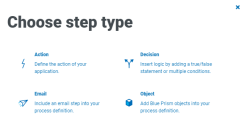
- Select the required step type:
- Configure the step.
-
Add and define all the required steps until you have built up the complete process.

The final step in a business process must be the steps required to exit the application and the final step needs to include a route to End.
-
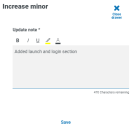
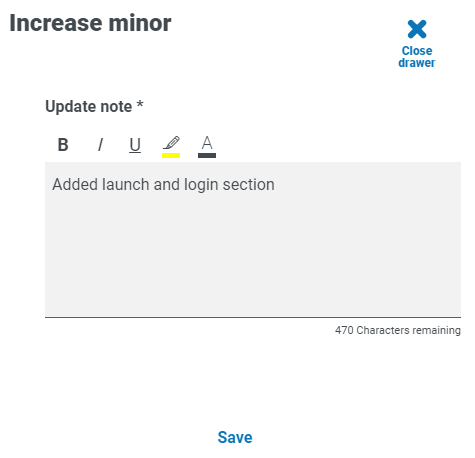
Click Save to create a minor version of the process definition. See Versioning for further information.
The Increase minor
-
Enter a description to remind you where you are up with the process and click Save.
The Process Definition screen displays, updated to show the latest version of the process definition.

Example: Add a login section
This example demonstrates how to create the steps for a simple application login.
|
Step |
Example screen |
Details |
|---|---|---|
|
1 |
|
Launch the application Open the selected application on the login screen and proceed to the next step:
|
|
2 |
|
Enter a username Enter a username in the Username field on the Login screen and proceed to the next step:
|
|
3 |
|
Enter a password Enter a password in the Password field on the Login screen and proceed to the next step:
|
|
4 |
|
Click the log Click the Log
|
|
5 |
|
Process complete All the required actions have been completed and are listed on the |
Add an exception to a process definition
Exceptions can be added to a process to cater for unexpected occurrences when running a process. You will need to have created at least one exception before following the process below.
For information about creating exceptions, see ALM – Exceptions.
-
On the Process definitions page, click Options next to the required process and click Edit definition.
The Edit definition page displays.
-
Locate the step that requires an exception.

-
Click the edit icon
 next to the step.
 The Edit page displays for the step type, for example, the Edit decision page.
-
Select the required exception for this choice. You can:
-
Use an existing exception – Select an exception from the drop-down list.
In the example below, the Incorrect Credentials Supplied exception is being added to the Incorrect Username or Password step.
-
Enter a new exception – If the required exception has not yet been created, you can create the skeleton of an exception by selecting Add new exception and entering a new name.
For further information, see Exception pending.
-
- Click Save.

Exception pending
If you have selected Add new exception for a step choice, when you save the step, a flag is added to the step in the process definition to show that it references an exception that has not yet been populated.

Click the Click here link in the flagged step and configure the exception as described in ALM – Exceptions.
