Set up a new application model
Application Modeller allows you to select various spy modes to identify and map the elements of a target application, gathering the attributes necessary for Blue Prism Enterprise to recognize and successfully interact with the application.
The Application Modeller wizard guides you through the process of setting up a new application model. To access the wizard, after creating and opening a new object:
- In Object Studio, click Enhanced Application Modeller.
The Application Model Set-up wizard displays.
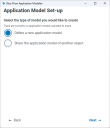
Define a new model (not shared from another object)
|
Step |
Wizard screen |
Details |
|---|---|---|
|
1 |
Select the type of model you would like to create
Select Define a new application model to create a new application model. Click Next. |
|
|
2 |
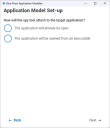
How will the spy tool attach to the target application? Define how the application will be identified when spying. This can be:
Click Next. |
|
|
3 |
Select an available application
If you selected The application will already be open, a list displays of the currently open applications on your system. You can filter by typing the application name, and refresh the list if you open a new application. Where multiple instances of an application exist, the window title is displayed. Select the relevant application. You can click Highlight application to check the correct application is selected. If the required application is not in the list, click Configure application to manually enter the information required to attach to the application and proceed to step 3a. Click |
|
|
3a |
Manually configure application If you selected Configure application, you must define the following items:
Refer to the helper text if required. Click Attach to attach to the application and proceed to step 6. |
|
|
4 |
Application location If you selected The application will be opened from an executable, you must define the Application location of the executable. Click Browse to open File Explorer and locate the relevant file. Once located, click Open to populate the Application location field with the file path. If required, you can also define Website URL and other command line parameters, and the Working directory. Refer to the helper text if required. Click Launch and attach. |
|
|
5 |
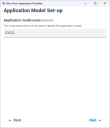
Application model name
Enter a name for the application model. Click Next. |
|
|
6 |
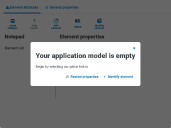
Your application model is empty
The application model is now set up and automatically saved to the object. You can start spying the application by selecting Identify element. Alternatively, click Review properties to view the model's configuration on the General properties page. |
Define a new model shared from another object
|
Step |
Wizard screen |
Details |
|---|---|---|
|
1 |
Select the type of model you would like to create. Select Share the application model of another object. Click Next. Only objects that have their Shareable check box selected in the Object properties Information tab are available to have their application model shared with this object. If no objects are shareable, the Share the application model of another object option is disabled. Only users with the appropriate user roles and permissions can make an object shareable. For more information about the Shareable setting, see Object information. |
|
|
2 |
Select an available application model Start typing in the Search field to filter the available models, and select a model from the list. Click Next. |
|
|
3 |
Application Modeller opens. A banner is displayed at the top of both the Element attributes and General properties tabs informing you that the application model is being shared from another object. The parent application model is locked for all other users and is updated with your changes when you save. If someone else opens the parent model during this time, Application Modeller is read-only. An administrator can force unlock the model, preventing you from saving your changes to the parent. |
Open an existing model in Application Modeller
Once an application model has been defined, you can open and edit it at any time.
- In Object Studio, click the arrow next to the Application Modeller button in the Object Studio toolbar to display a drop-down.
- Make a selection from the drop-down.
After making a selection from the drop-down, the Application Modeller button on the Object Studio toolbar will save your preference. Next time you want to open Application Modeller, click the Application Modeller button on the Object Studio toolbar to open the version of Application Modeller that you previously selected from the drop-down.
If your model was defined in the original Application Modeller, and contains multiple levels of nested elements, for example, a parent region that contains a child region which also contains a child region, the model will open in read-only mode if opened in the Enhanced Application Modeller. 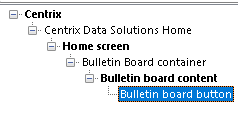
 Docs
Docs