 Docs
DocsTask definition
Before you can use any of the analysis tools, you need to identify the tasks and cut the logs. To define a task:
-
On the project
The
-
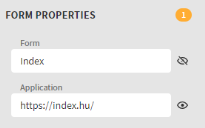
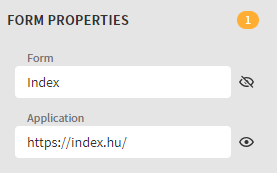
Click a form to see additional information and its associated screenshots. You can move screenshots between forms in the Form editor if required. For more details, see Forms.
-
Drag and drop a form from the log into a New task column and select Mark as Start for Task.
-
Drag and drop another form from the log to the same task column and select Mark as End for Task.
There can be multiple start and end forms for the task. Drag and drop them to the task column and mark them appropriately as start or end.
-
Click the task name in the Task
-
Once the task has been defined, click Apply and cut
The application searches and extracts all task instances from the logs that correspond to the task definition. Each task instance will be treated as a timeline.
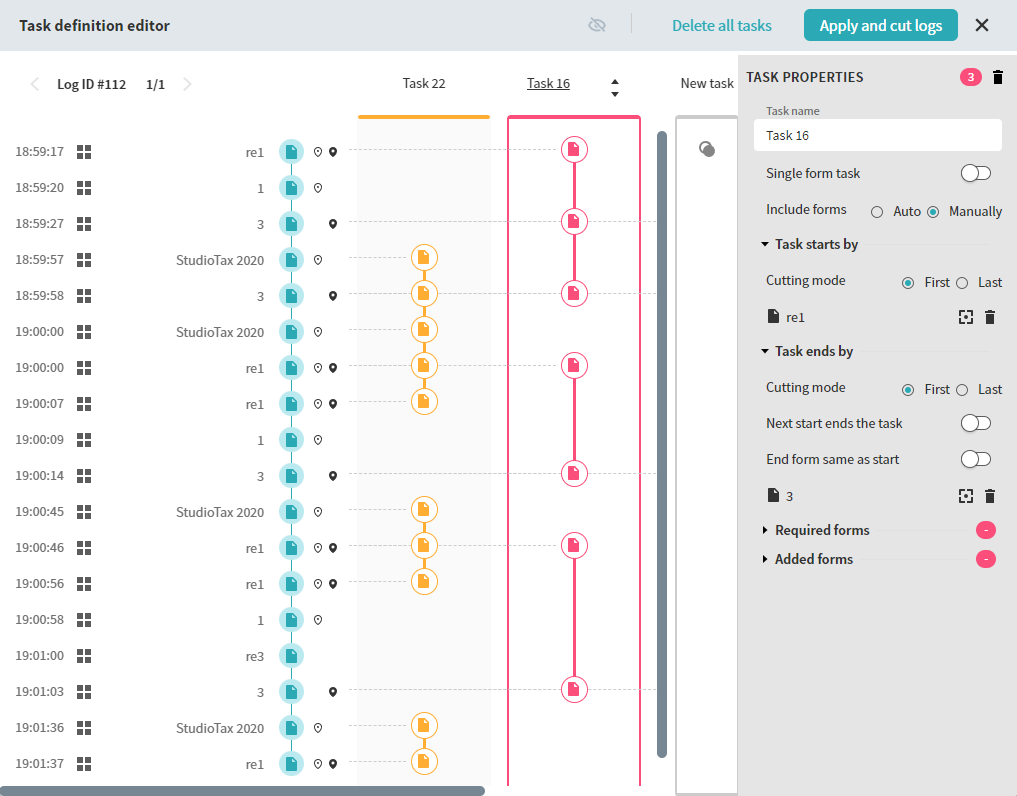
Task properties
The Task properties pane gives a full view of available settings range for a task. To open the Task properties pane, click the Tasks column in the Task
When defining a task, the following additional properties are available:
- Include forms automatically or manually
- Auto – Allows including all forms between the set start and end forms.
-
Manually – Allows adding only start and end forms into task instances.
To include a form in the task definition, drag and drop forms into a task instance and select Add to task. The Added forms section displays a list of all added forms.
To remove a form from the task definition, drag and drop it into the log pane or delete the form from the Added forms.
- Single task form – Creates a task that includes only one form. Drag and drop the required to a New task column. Open the Task properties pane by clicking on the task name and toggle on the Single form task option.
- Next start ends the task – You can end the task with a form that will appear in the log before the next start of the task instance. So any form that goes before the next start form completes the previous task instance. This option also allows to add end or start forms into the task definition by dragging and dropping them into the task column.
-
End form same as start – A task can be started and ended by the same form. Drag and drop the start form to the New task column and select the End form same as start option in the Task properties pane. End forms will duplicate the start ones. The cutting mode for start forms is set to First and cannot be changed.
You cannot delete end forms when this option is enabled.
Required and removed forms
You can set forms to be included in, or excluded from, all task instances.
-
To mark a form as required in all task instances, right-click it in the task column and select Mark as required. You can specify not only the whole form but also a certain control. Click Save controls to apply changes to any controls.
You can also set AND/OR rule for required forms.
- AND – All listed forms should be included into task instances.
- OR – At least one of the required forms should appear in each task instance.
-
To remove a form from all task instances, right-click a form in the task column and select Remove from Task or drag and drop a form from the task instance to the log pane. Removed forms are not deleted from the logs but cannot be a part of a task definition.
Cutting mode
For each task, you can choose a log cutting mode that sets the boundaries for a task with multiple identical start and end forms. The cutting mode is set separately for start and end forms in the Task properties pane.
There are two available cutting modes:
- First – The first valid start/end form that appears in the log is added to the task instance.
- Last – The last valid start/end form that appears in the log is added to the task instance.
Ignored elements
While recording user actions, logged information can contain elements that are not related to the current task. For example, a user can open a messenger to read an urgent message. You can choose to ignore applications, certain forms, or types of events in task definitions. These elements are not deleted from the log but are not taken into consideration when defining tasks. The ignored forms and applications are grayed out in the log.
Ignore forms and applications
To ignore a form or an application related to a form:
-
Open the Task
or
-
Select a form and click the eye icon next to the application or form name to ignore it. Clicking the eye icon again will cancel the ignore action.
To revert ignoring a form or an application, click the ![]() icon in the toolbar of the Task
icon in the toolbar of the Task
You can also ignore applications or forms from the Form editor by hovering over the relevant object and clicking the eye icon.
Ignore types of events
Some user actions may not be useful for analysis, for example, changing tabs or opening a new window. To ignore navigation or execution events:
- Double-click any form in the Task
-
Click Set ignore type and mark the event types that should be ignored.
To cancel ignoring, click Set ignore type and unmark the types of events that should no longer be ignored.
Examples for defining tasks
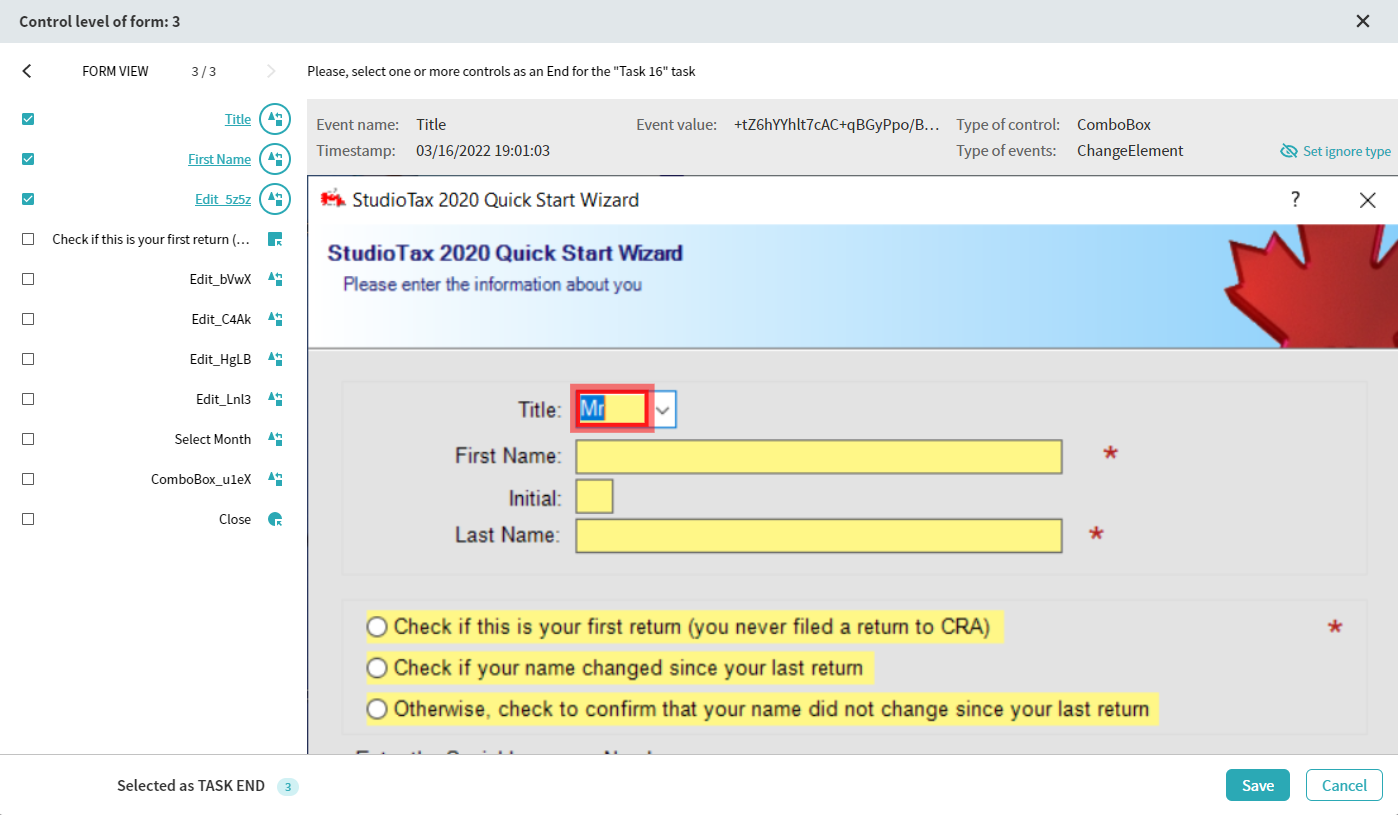
Start or end task with controls
Your log can consist of a single repeated task that can begin with a certain user action.
To start or end a task with a specific control within a form:
- Drag and drop the start form to a New task column.
- Double-click the form in the task column, select the required control(s), and click Save.
You can also:
-
Open the Task properties pane, click the
 icon next to the form name, select the required control(s), and click Save.
or
- Right-click the form and select View form controls.
Concurrent and overlapping tasks
One of the distinctive features of task mining is the ability to set concurrent and parallel tasks. For example, a log contains two concurrent tasks. To set the correct task definition, drag and drop the start and end forms for the first and second tasks to different New task columns. You can also manually specify all forms within a task.
For example, to define the first task, use the Auto mode (Task 22 in the image below) to include all forms between start and end in a task instance. For the second task, you can use the manual mode and drag and drop all forms between start and end related to the task definition (Task 16 in the image below).
Define a single form task
Some tasks may include only one form, which means that a user needs only one application and one form within it to perform a task.
To configure this:
- Drag and drop the required form to a New task column.
- Click the task name to open the Task properties pane.
- Enable the Single task form option.
