 Docs
DocsAutomated file upload via SFTP
One of the channels for uploading data into Blue Prism Process Intelligence is SFTP. You can upload files to Process Intelligence automatically on a schedule or manually using any standard SFTP client that does not require read access to the destination folder. This includes command line OpenSSH on Linux and Mac and WinSCP on Windows and Mac.
Process Intelligence will configure the SFTP destination and share the location and credentials with the client for the scheduled file push. The data upload from the SFTP server is then an automated process where the files are automatically picked up and processed into a project or one or more To-Do lists in ETL which will result in that data being loaded into a project.
You can either create To-Do lists within the Repository (ETL) tool, which are essentially a list of data transformation functions. These typically end in loading that data into a project, or if the file does not require any transformation, they can specify that it be loaded directly into a project using the predefined project table mapping.
Zipped along with each source file, the client should provide a small manifest file, in JSON format (examples below), which includes the instructions as to how the file should be processed.
To set up automatic data upload via SFTP, follow the steps below:
-
Generate your public/private key pair.
Please refer to your SFTP client documentation for instructions.
-
Contact Blue Prism Support at [email protected] and send the public key.
Support will get back with the username and SFTP server name.
-
Create manifest.json file.
The manifest file must be named manifest.json.
For detailed instructions on creating a manifest file, see Manifest file.
-
Add the Manifest and your data files to a ZIP file and upload the ZIP file into the SFTP server. See Data requirements for the requirements that your uploaded data must meet.
-
An email report is sent once the upload and data processing is completed. You may also see the progress in the History section of your repository or project, depending on what token is specified in the Manifest.
If your data has not loaded and you have not received an email, make sure the Manifest file is syntactically valid and named manifest.json.
Manifest file
The Manifest file contains the instructions to the Process Intelligence server what to do with the data files from the ZIP file. The file is in JSON format. It could be created in any simple text editor or using variety of online JSON editors.
The table below describes the nodes that are in the Manifest file.
| Node | Description |
|---|---|
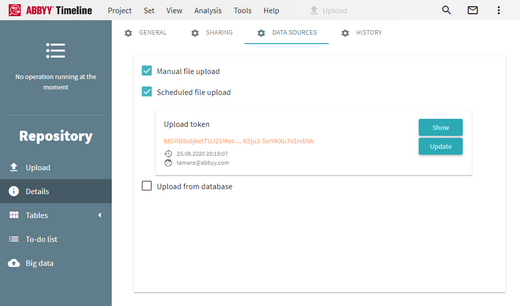
| repositoryToken |
The encrypted strings identifying the repository into which you load the data. To obtain this string:
|
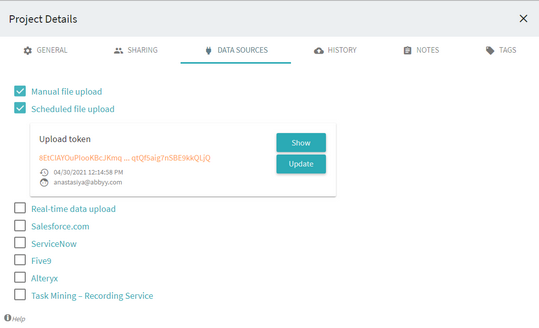
| projectToken |
The encrypted strings identifying the project into which you load the data. To obtain this string:
|
| A list of email addresses, separated by semi-column. The reports about successful or failed uploads will be sent to the specified emails. Timeline also always sends an email to the repository owner. | |
| commands |
A command to be executed once the upload package is received and unzipped. Command has action and optional arguments.
|
The table below describes the nodes that are in the Manifest file.
Manifest file examples
The following Manifest file takes file events.csv from the ZIP, parses it into the repository table mytable, then copies the table into yourtable, the applies To-do list mylist to it. For more help with To-do list refer to the section on ETL in the Cloud. Report will be sent to repository owner and to [email protected] and to [email protected].
{
"repositoryToken": "k2QZiJkZuH … 8v6f8BpQEdekqjgqNxBw-E0AZUz2kdVA",
"email": [ "[email protected]", "[email protected]" ],
"commands": [
{
"action": "upload",
"file": "myfile.csv",
"table": "mytable"
},
{
"action": "clone",
"src": "mytable",
"dst": "yourtable"
},
{
"action": "todo-list",
"table": "yourtable",
"list": "mylist"
}
]
}
Next example parses the file events.csv and loads it into a project identified by the token. Old data from the project is deleted.
{
"projectToken": "",
"email": "[email protected]",
"commands": [
{
"action": "upload",
"file": "events.csv",
"clearProject": true
}
]
}
To check the validity of the JSON, you could use this tool: https://jsonformatter.curiousconcept.com/
