Transpose
The Transpose operation creates multiple rows from a single row by adding values from other fields and some explanatory text.
Suppose your original table has columns with dates and times of various events but has no column listing the names of the events. For example:
| TimelineID | Date_1 | Date_2 | Date_3 |
|---|---|---|---|
| 1234 | 1/16/2017 7:20:15 | 1/16/2017 15:46:17 | 1/17/2017 9:13:22 |
Your task is to associate each date/time value with its respective event.
In this example we assume that the following events occurred for a timeline having ID 1234:
- Order Received at Date_1
- Stock Check at Date_2
- Goods Shipped at Date_3
Using the Transpose operation, you can add the following two columns:
- Selected date – Contains a date/time value picked from one of the Date_ columns. You will also be able to map this column to a time stamp.
- Event – Contains the name of the respective event.
Running the Transpose operation on the above row will produce the following result:
| TimelineID | Date_1 | Date_2 | Date_3 |
Selected date |
Event |
|---|---|---|---|---|---|
| 1234 | 1/16/2017 7:20:15 | 1/16/2017 15:46:17 | 1/17/2017 9:13:22 |
1/16/2017 7:20:15 |
Order Received |
|
1234 |
1/16/2017 7:20:15 |
1/16/2017 15:46:17 |
1/17/2017 9:13:22 |
1/16/2017 15:46:17 |
Stock Check |
|
1234 |
1/16/2017 7:20:15 |
1/16/2017 15:46:17 |
1/17/2017 9:13:22 |
1/17/2017 9:13:22 |
Goods Shipped |
Configuration
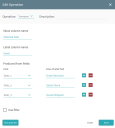
- In the Value column name field, enter a name for the column into which data from other columns should be copied.
- In the Label column name field, enter a name for the column that will contain labels. A label can be any string, for example, event name, comment, or employee name.
- Under Produced from fields, select the desired fields and add their respective labels. Each field—label pair will create a modified copy of the original row. Click the plus icon to add or the minus icon to delete a field-label pair.
-
If required, you can use a filter and preview the results of the operation. For more information, see Using filters with operations.
To preview the results that you can obtain with the operation, click Run preview. The preview will show the first 100 rows in your table. Please note that it may take some time to generate a preview.
-
Click Save.
The Edit Operation dialog closes and the new operation displays in the Operations pane.
Configuration example
This example uses the same table row that was used to describe the purpose of the operation.
Task: We have a table with Date_1, Date_2, and Date_3 columns containing the dates and times of various events.
| TimelineID | Date_1 | Date_2 | Date_3 |
|---|---|---|---|
| 1234 | 1/16/2017 7:20:15 | 1/16/2017 15:46:17 | 1/17/2017 9:13:22 |
We need to associate each date/time value with the name of the respective event as follows:
- Date_1 should be associated with Order Received.
- Date_2 should be associated with Stock Check.
- Date_3 should be associated with Goods Shipped.
Solution: Configure the operation as shown in the figure below.
 Docs
Docs
