Docs
DocsInstall and configure the web server – Hub
Before installing the
Install and configure the web server ensuring that the system can communicate with the RabbitMQ Message Broker
The process consists of the following steps:
Install the prerequisites
The system requires IIS Web Server, IIS features and the .NET Core components to be installed. It is important that IIS is installed before installing the prerequisites below.
Install all of the features listed below before installing the .NET Core Components.
The full list of the prerequisites is detailed below, in the order listed:
- Remote Server Administration Tools\Role Administration Tools\File Services Tools\File Server Resource Manager Tools
- .NET Framework 4.6 Features
- .NET Framework 4.6 Features\.NET Framework 4.6
- .NET Framework 4.6 FeaturesASP.NET 4.6
- .NET Framework 4.6 Features\WCF Services
- .NET Framework 4.6 Features\WCF Services\HTTP Activation
- .NET Framework 4.6 Features\WCF Services\TCP Port Sharing
- File and Storage Services\File and iSCSI Services\File Server
- File and Storage Services\File and iSCSI Services\File Server Resource Manager
- Web Server (IIS)
- Web Server (IIS)\Web Server
- Web Server (IIS)\Web Server\Common HTTP Features
- Web Server (IIS)\Web Server\Common HTTP Features\Default Document
- Web Server (IIS)\Web Server\Common HTTP Features\Directory Browsing
- Web Server (IIS)\Web Server\Common HTTP Features\HTTP Errors
- Web Server (IIS)\Web Server\Common HTTP Features\Static Content
- Web Server (IIS)\Web Server\Common HTTP Features\HTTP Redirection
- Web Server (IIS)\Web Server\Health and Diagnostics
- Web Server (IIS)\Web Server\Health and Diagnostics\HTTP Logging
- Web Server (IIS)\Web Server\Health and Diagnostics\Logging Tools
- Web Server (IIS)\Web Server\Health and Diagnostics\Request Monitor
- Web Server (IIS)\Web Server\Health and Diagnostics\Tracing
- Web Server (IIS)\Web Server\Performance
- Web Server (IIS)\Web Server\Performance\Static Content Compression
- Web Server (IIS)\Web Server\Security
- Web Server (IIS)\Web Server\Security\Request Filtering
- Web Server (IIS)\Web Server\Security\Client Certificate Mapping Authentication
- Web Server (IIS)\Web Server\Security\IIS Client Certificate Mapping Authentication
- Web Server (IIS)\Web Server\Security\Windows Authentication
- Web Server (IIS)\Web Server\Application Development
- Web Server (IIS)\Web Server\Application Development\.NET Extensibility 4.6
- Web Server (IIS) \Web Server\Application Development\Application Initialization
- Web Server (IIS)\Web Server\Application Development\ASP
- Web Server (IIS)\Web Server\Application DevelopmentASP.NET 4.6
- Web Server (IIS)\Web Server\Application Development\ISAPI Extensions
- Web Server (IIS)\Web Server\Application Development\ISAPI Filters
- Web Server (IIS)\Management Tools
- Web Server (IIS)\Management Tools\IIS Management Console
- Web Server (IIS)\Management Tools\IIS 6 Management Compatibility
- Web Server (IIS)\Management Tools\IIS 6 Management Compatibility\IIS 6 Metabase Compatibility
- Web Server (IIS)\Management Tools\IIS Management Scripts and Tools
- Web Server (IIS)\Management Tools\Management Service
Scripted installation
Run the commands below using the PowerShell command prompt:
Install-WindowsFeature -Name FS-FileServer -computerName localhost
Install-WindowsFeature -Name FS-Resource-Manager -computerName localhost
Install-WindowsFeature -Name Web-Default-Doc -computerName localhost
Install-WindowsFeature -Name Web-Dir-Browsing -computerName localhost
Install-WindowsFeature -Name Web-Http-Errors -computerName localhost
Install-WindowsFeature -Name Web-Static-Content -computerName localhost
Install-WindowsFeature -Name Web-Http-Redirect -computerName localhost
Install-WindowsFeature -Name Web-Http-Logging -computerName localhost
Install-WindowsFeature -Name Web-Log-Libraries -computerName localhost
Install-WindowsFeature -Name Web-Request-Monitor -computerName localhost
Install-WindowsFeature -Name Web-Http-Tracing -computerName localhost
Install-WindowsFeature -Name Web-Stat-Compression -computerName localhost
Install-WindowsFeature -Name Web-Filtering -computerName localhost
Install-WindowsFeature -Name Web-Client-Auth -computerName localhost
Install-WindowsFeature -Name Web-Cert-Auth -computerName localhost
Install-WindowsFeature -Name Web-Windows-Auth -computerName localhost
Install-WindowsFeature -Name Web-Net-Ext45 -computerName localhost
Install-WindowsFeature -Name Web-AppInit -computerName localhost
Install-WindowsFeature -Name Web-ASP -computerName localhost
Install-WindowsFeature -Name Web-Asp-Net45 -computerName localhost
Install-WindowsFeature -Name Web-ISAPI-Ext -computerName localhost
Install-WindowsFeature -Name Web-ISAPI-Filter -computerName localhost
Install-WindowsFeature -Name Web-Mgmt-Console  -computerName localhost
Install-WindowsFeature -Name Web-Scripting-Tools  -computerName localhost
Install-WindowsFeature -Name Web-Mgmt-Service  -computerName localhost
Install-WindowsFeature -Name Web-Metabase -computerName localhost
Install-WindowsFeature -Name RSAT-Role-Tools -computerName localhost
Install-WindowsFeature -Name RSAT-File-Services -computerName localhost
Install-WindowsFeature -Name RSAT-FSRM-Mgmt -computerName localhost
Install-WindowsFeature -Name NET-WCF-HTTP-Activation45 -computerName localhost -Restart- .NET Core
- .NET Core
- .NET Core SDK 3.1.300
https://dotnet.microsoft.com/download/dotnet-core/thank-you/sdk-3.1.300-windows-x64-installer
- Visual C++ Redistributable 2012 (x64)
- .NET Framework 4.7.2
https://dotnet.microsoft.com/download/dotnet-framework/thank-you/net472-web-installer
Scripted installation
To install the .NET dependencies, run the commands below using the PowerShell command prompt, updating C:\temp to the appropriate location as required:
start-process "C:\temp\dotnet-hosting-3.1.2-win.exe" /q -wait
start-process "C:\temp\windowsdesktop-runtime-3.1.2-win-x64.exe" /q -wait
start-process "C:\temp\dotnet-sdk-3.1.300-win-x64.exe" /q -wait
start-process "C:\temp\vcredist_x64.exe" /q -wait
start-process "C:\temp\NDP472-KB4054531-Web.exe" /q -wait
Configure SSL certificates
During the installation process you will be asked for the SSL certificates for the websites that are being set up. Depending on your infrastructure and IT organization security requirements, this could be an internally created SSL certificate or a purchased certificate to protect the websites.
The installer can be run without the certificates being present, though for the sites to operate, the bindings in the IIS websites will need to have valid SSL certificates present.
The table below details the required SSL certificates.
|
Website in IIS |
Default URL (example only) |
|---|---|
|
Websites with a user interface for use by end-users |
|
|
Blue Prism – IMS |
https://ims.local |
|
Blue Prism – Hub |
https://hub.local |
|
Websites for use by the application only (services) |
|
|
Blue Prism – Email |
https://email.local |
|
Blue Prism – Audit Service |
https://audit.local |
|
Blue Prism – File Service |
https://file.local |
Self-signed certificates
Self-signed certificates can be used but are only recommended for Proof of Concept (POC), Proof of Value (POV) and Development environments. For production environments, use certificates from your organization's approved certificate authority. It is recommended that you contact your IT Security team to check what their requirements are.
To generate a self-signed certificate:
-
Run PowerShell as an administrator and use the following command, replacing [Website] and [ExpiryYears] with appropriate values:
CopyNew-SelfSignedCertificate -CertStoreLocation Cert:\LocalMachine\My -DnsName "[Website].local" -FriendlyName "MySiteCert[Website]" -NotAfter (Get-Date).AddYears([ExpiryYears])For example:
CopyNew-SelfSignedCertificate -CertStoreLocation Cert:\LocalMachine\My -DnsName "ims.local" -FriendlyName "MySiteCertIMS" -NotAfter (Get-Date).AddYears(10)This example creates a self-signed certificate called MySiteCertIMS in the Personal Certificates store, with the Subject ims.local and is valid for 10 years from the point of creation.

- Open the Manage Computer Certificates application on your web server (type manage computer into the search bar).
-
Copy and paste the certificate from Personal > Certificates to Trusted Root Certification > Certificates.

- Repeat this process for each website.


This process is not recommended for production environments.
Run the following PowerShell command
New-SelfSignedCertificate -CertStoreLocation Cert:\LocalMachine\My -DnsName "ims.local" -FriendlyName "MySiteCertIMS" -NotAfter (Get-Date).AddYears(10)
New-SelfSignedCertificate -CertStoreLocation Cert:\LocalMachine\My -DnsName "hub.local" -FriendlyName "MySiteCertHub" -NotAfter (Get-Date).AddYears(10)
New-SelfSignedCertificate -CertStoreLocation Cert:\LocalMachine\My -DnsName "email.local" -FriendlyName "MySiteCertEmail" -NotAfter (Get-Date).AddYears(10)
New-SelfSignedCertificate -CertStoreLocation Cert:\LocalMachine\My -DnsName "audit.local" -FriendlyName "MySiteCertAudit" -NotAfter (Get-Date).AddYears(10)
New-SelfSignedCertificate -CertStoreLocation Cert:\LocalMachine\My -DnsName "file.local" -FriendlyName "MySiteCertFile" -NotAfter (Get-Date).AddYears(10)
Once created, open the Local Machine certificate manager (certlm) and copy and paste the certificate
Create an offline certificate request
To create an offline certificate request, for each certificate follow this procedure:
- Open the Manage Computer Certificates application on your web server (type managed computer into the search bar).
-
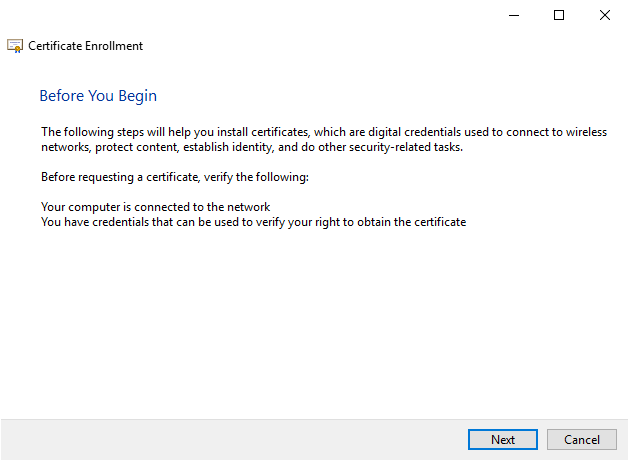
Right-click Personal > Certificates and select All Tasks > Advanced Operations > Create Custom Request from the shortcut menu.
The Certificate Enrollment wizard displays.

-
Click Next.
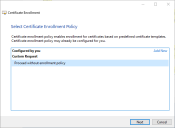
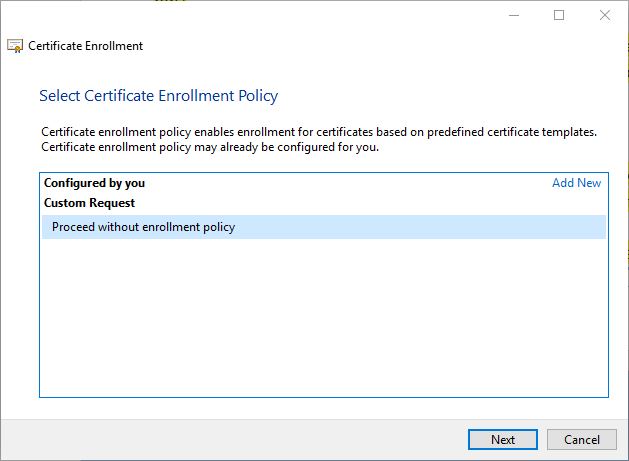
- Select Proceed without enrollment policy and click Next.
-
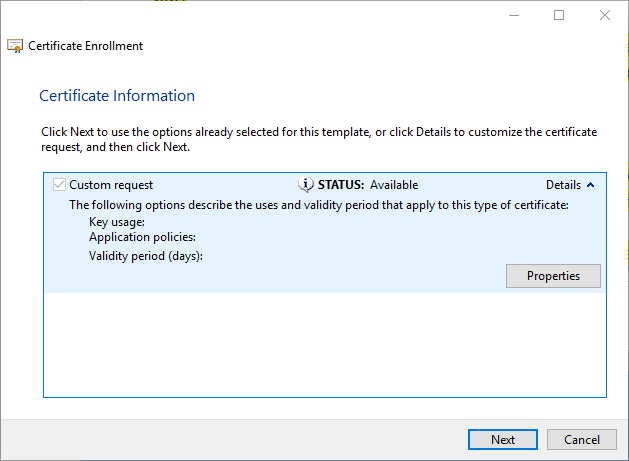
On the Custom request screen, click Next.
-
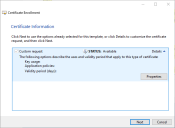
On the Certificate Information screen, click the Details drop-down and click Properties.
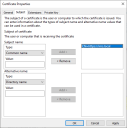
- On the General tab in the Certificate Properties dialog, enter a friendly name and description based on the website this certificate will be applied to.
-
On the Subject tab change the subject name type to Common name, enter the website URL in the Value field and click Add.
The CN (common name) will display in the right-hand panel.
- On the Extensions tab, click Extended Key Usage, select Server Authentication and click Add.
- On the Private Key tab, click Key options, select a key size of your choice and select Make private key exportable.
- Still on the Private Key tab, click Hash Algorithm and select a suitable Hash (optional).
-
Click OK.
You are returned to the Certificate Enrollment screen.
- Click Next.
- Add a file name and path and click Finish.

After creating your certificate request, you will need to submit it to a Certificate Authority so they can process your request and issue a certificate. The certificate request is a text file. Usually, you are required to copy the text from the file and enter it into an online submission form on the Certificate Authority website. You will need to contact your Certificate Authority directly for instructions on the process for submitting your certificate request.
Install Blue Prism Hub
Before you install Blue Prism Hub:
The steps below detail the process for installing the Blue Prism Hub software. This includes the Download and run the Blue Prism Hub installer |
|
Step |
Installer page |
Details |
|---|---|---|
|
1 |
|
Welcome |
|
2 |
|
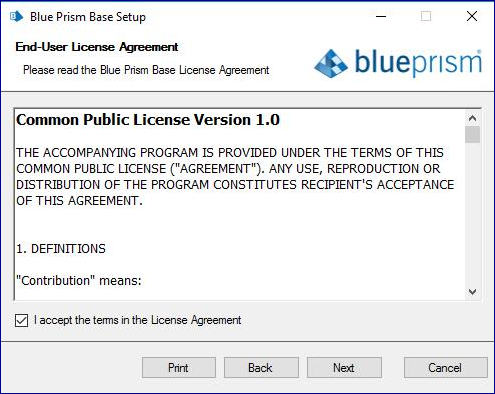
License agreement Read the End-User License Agreement and if you agree to the terms, select the check box. |
|
3 |
|
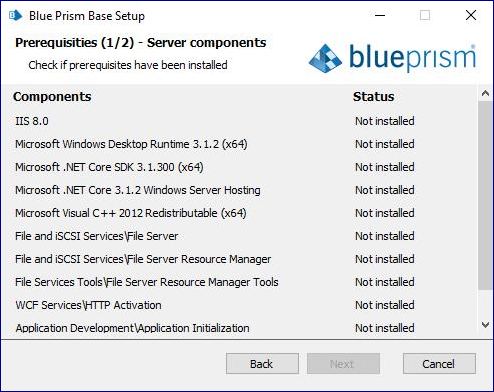
Prerequisites 1 – Server components The installer checks that the prerequisites have been installed. Those that are not installed are identified. You cannot proceed until all the prerequisites are installed. If there are uninstalled prerequisites, cancel the installer and install the missing components before restarting the installer. Otherwise, proceed with the installation. |
|
4 |
|
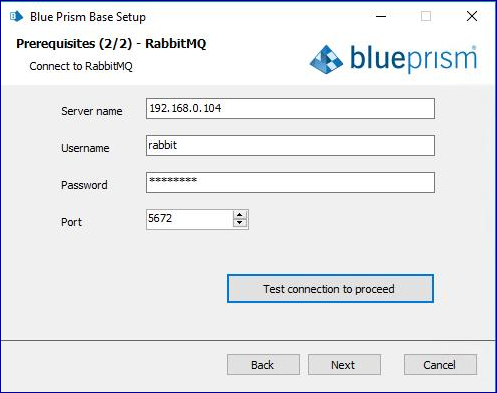
Prerequisites 2 – RabbitMQ Enter the server name or IP address of the Message Broker server and the credentials of the user The default message queuing port is 5672. This should only be changed if the default ports have been changed by your IT support organization. Click Test connection to verify connectivity. |
|
5 |
|
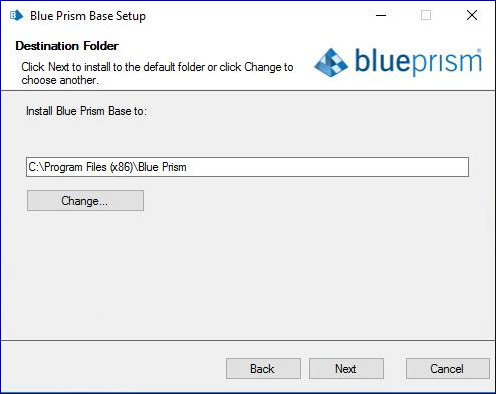
Destination folder
|
|
6 |
|
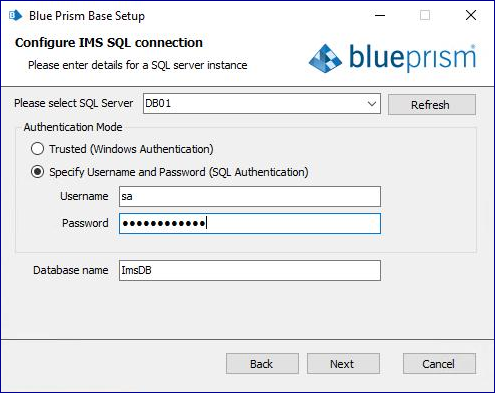
IMS SQL connection Configure the settings for the IMS database by providing the SQL Server host name or IP address, and the credentials for the account to create the database:
If Windows Authentication is the required method, you need to switch to SQL Authentication and back again to enable the Next button. |
|
7 |
|
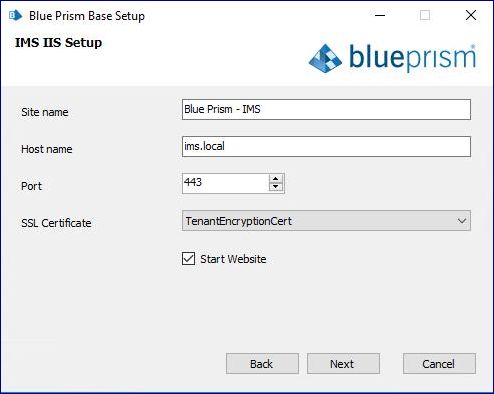
IMS IIS setup Configure IIS for the IMS website.
|
|
8 |
|
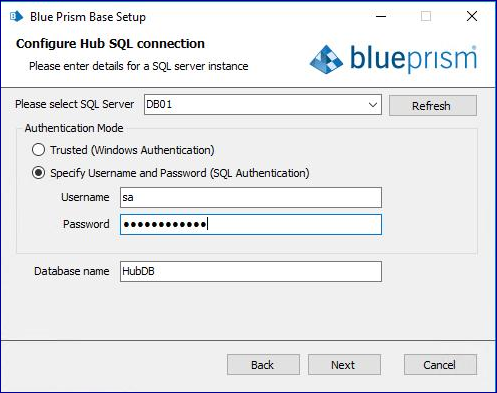
Hub SQL connection Configure the settings for the Hub database by providing the SQL Server host name or IP address, and the credentials for the account to create the database:
The database name can be left as the default value or changed as required. |
|
9 |
|
Hub IIS setup
|
|
10 |
|
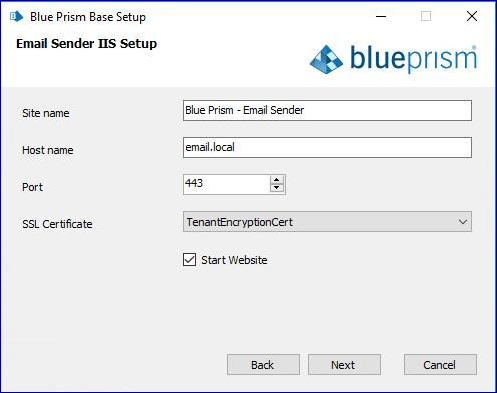
Email Configure the Email
|
|
11 |
|
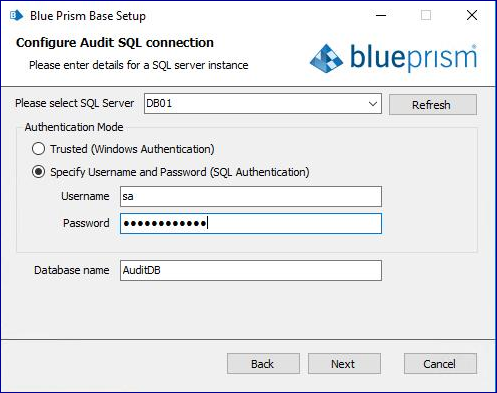
Audit SQL connection configuration Configure the settings for the Audit database by providing the SQL Server host name or IP address, and the credentials for the account to create the database:
The database name can be left as the default value or changed as required. |
|
12 |
|
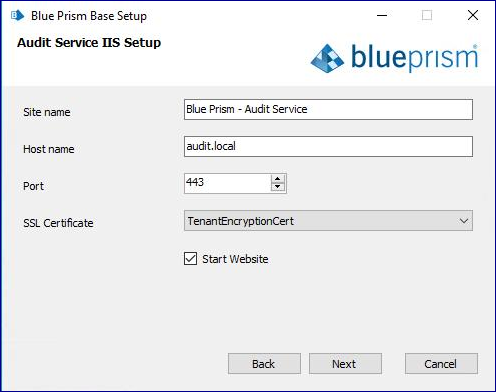
Audit Service IIS setup Configure the Audit Service website.
|
|
13 |
|
File Service IIS setup Configure the File Service website.
|
|
14 |
|
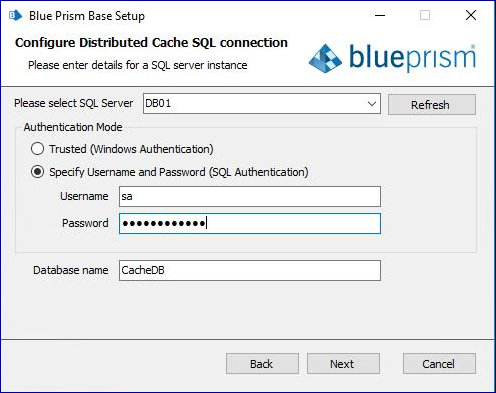
Distributed Cache SQL connection Configure the settings for the Cache database by providing the SQL Server host name or IP address, and the credentials for the account to create the database:
The database name can be left as the default value or changed as required. |
|
15 |
|
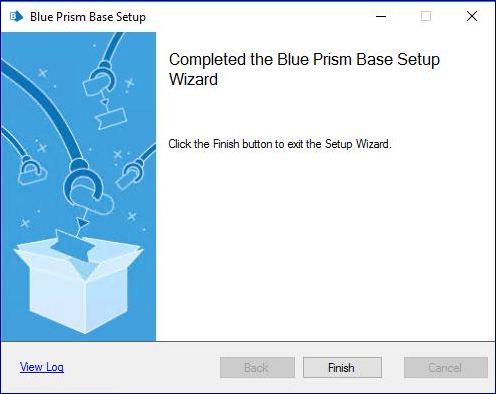
Installation complete If the installation fails, the View Log option gives details of the error that was encountered. |