 Docs
DocsUpgrade Hub and Interact
Upgrading Hub and Interact is a simple process that uses dedicated tools. You need to run the upgrade tools in the following order, starting with the version you are currently using:
- Upgrade from 4.0 to 4.1.
- Upgrade from 4.1 to 4.2.
- Upgrade from 4.2 to 4.3.
- Upgrade from 4.3 to 4.4.
- Upgrade from 4.4 to 4.5.
- Upgrade from 4.5 to 4.6.
- Upgrade from 4.6 to 4.7.
After you have completed the upgrade, advise your users to log into Hub and clear the cache by pressing CTRL + F5. This will refresh all web pages and ensure that any user interface changes are updated.
Upgrade Hub and Interact 4.0 to version 4.1
It is recommended that you schedule the upgrade to take place outside of working hours.
Prerequisites
- Version 4.0 of Hub and Interact is installed.
-
Everyone is logged out of the IMS Server.
-
You have backed up all relevant databases. Although the databases are not impacted by the upgrade, it is recommended that databases are backed up before performing any upgrade.
The upgrader automatically stops any running websites as part of the upgrade process. You do not need to manually stop them.
Upgrade steps
- Download the Blue Prism Interact and Hub Upgrader
- Run the upgrader and follow the instructions.
-
Once the upgrader has completed, log in to Hub and open the plugin repository.
The repository will show that there are plugins ready to update with details of the currently installed and available versions displayed.
-
Select the All check box and click Complete updating.
The new versions of the selected plugins are installed and the upgrade to version 4.1 is complete.
- Repeat the process on all machines on which Hub is installed.
Upgrade Hub and Interact 4.1 to version 4.2
It is recommended that you schedule the upgrade to take place outside of working hours.
Prerequisites
- Version 4.1 of Hub and Interact is installed.
-
Everyone is logged out of the IMS Server.
-
You have backed up all relevant databases. Although the databases are not impacted by the upgrade, it is recommended that databases are backed up before performing any upgrade.
- You have created DNS records for the License Manager and Notification Center to use during this upgrade. This prerequisite is not required for single machine environments.
- SSL certificates for the new web sites; License Manager and Notification Center. See the Hub Install Guide for more information about SSL certificates.
- You have sufficient database permissions to configure the new databases created as part of this upgrade, such as, dbcreator or sysadmin.
-
GB of free disk space on the server where Hub and/or Interact are installed – This is required for the backup that is created until the installation process is complete.
The upgrader automatically stops any running websites as part of the upgrade process. You do not need to manually stop them.
Upgrade steps
- Download the Blue Prism Interact and Hub Upgrader for version 4.1 to 4.2 from the Blue Prism Portal.
-
Unzip the installer on the machine where Hub and Interact 4.1 are installed. It contains two files:
- Blue Prism Interact and Hub Upgrader.exe – The upgrader executable.
- BluePrismHubAndInteractUpdate4.2.bin – The binary file needed to upgrade to 4.2.
These files must be saved in the same directory.
- Double-click the upgrader executable to start the upgrader wizard, and on the Welcome to the Hub and Interact Upgrader screen, click Next.
- On the End-User License Agreement screen, read the End-User License Agreement and, if you agree to the terms, select the check box and click Next.
-
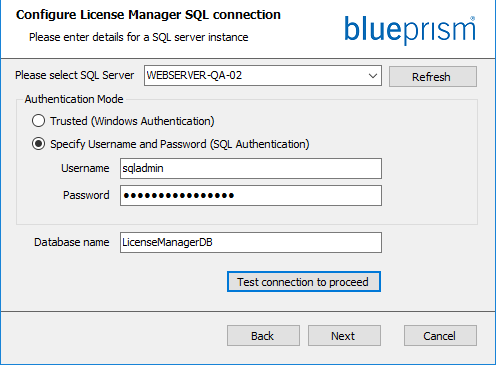
On the Configure License Manager SQL connection screen:

- Configure the settings for the License Manager database by providing the SQL Server host name or IP address, and the credentials for the account to create the database:
- If Windows Authentication is selected, the account must have the appropriate permissions.
-
You must ensure that your database password does not contain an equals sign (=), semi‑colon (;), or speech marks ("). These characters are not supported, and will lead to issues when trying to connect to the database.
-
Click Test connection to proceed
A notification will display the result of the test. You will only be able to move on to the next step if the test is successful - Click Next.
The database name can be left as the default value or changed as required.
-
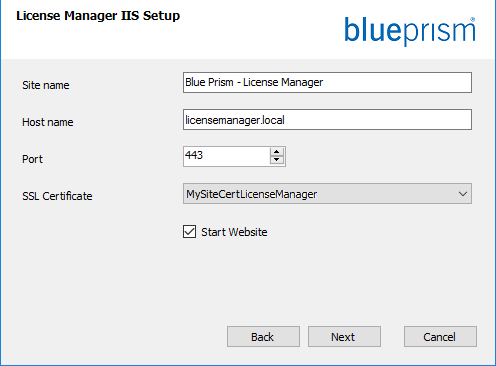
On the License Manager IIS setup screen:

-
Configure the License Manager website.
- Enter a site name.
-
Enter a host name in lowercase characters – This will be used as the URL for the site. The first part of the default host name must not be changed. You can only change the .local part of the host name. Ensure that you consider your DNS and Domain structure when choosing a host name.
The use of uppercase characters in URLs is not supported.
- Enter the port number.
- Select the appropriate SSL certificate.
- Leave Start Website selected, unless you do not want the website to automatically start at the end of the installation.
- Click Next.
-
-
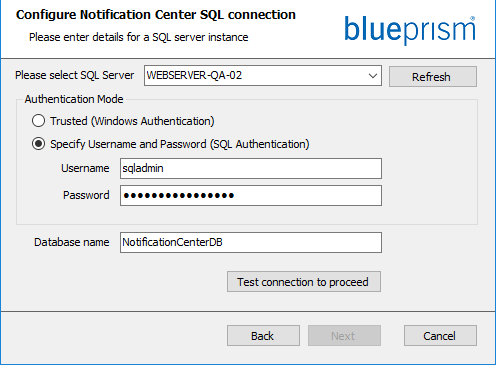
On the Notification Center SQL connection screen:

- Configure the settings for the Notification Center database by providing the SQL Server host name or IP address, and the credentials for the account to create the database:
- If Windows Authentication is selected, the account must have the appropriate permissions.
-
You must ensure that your database password does not contain an equals sign (=), semi‑colon (;), or speech marks ("). These characters are not supported, and will lead to issues when trying to connect to the database.
-
Click Test connection to proceed
A notification will display the result of the test. You will only be able to move on to the next step if the test is successful - Click Next.
The database name can be left as the default value or changed as required.
-
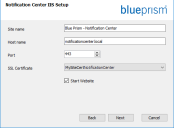
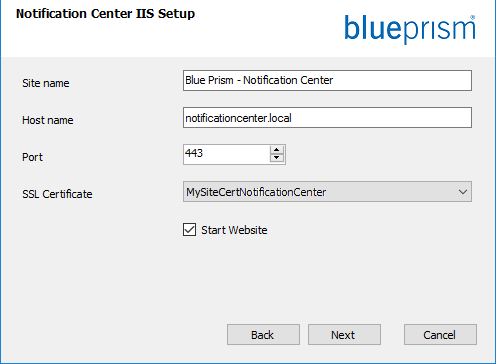
On the Notification Center IIS setup screen:
-
Configure the Notification Center website.
- Enter a site name.
-
Enter a host name in lowercase characters – This will be used as the URL for the site. The first part of the default host name must not be changed. You can only change the .local part of the host name. Ensure that you consider your DNS and Domain structure when choosing a host name.
The use of uppercase characters in URLs is not supported.
- Enter the port number.
- Select the appropriate SSL certificate.
- Leave Start Website selected, unless you do not want the website to automatically start at the end of the installation.
- Click Next.
-
-
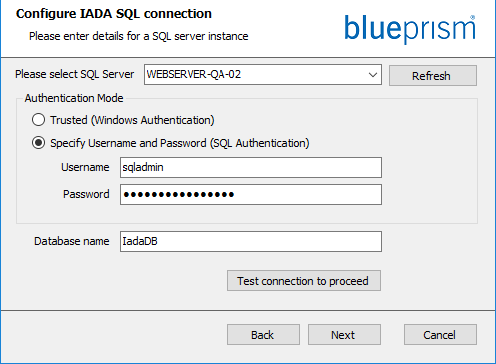
On the Configure IADA SQL configuration screen:

- Configure the settings for IADA by providing the SQL Server host name or IP address, and the credentials for the account to create the database:
- If Windows Authentication is selected, the account must have the appropriate permissions.
-
You must ensure that your database password does not contain an equals sign (=), semi‑colon (;), or speech marks ("). These characters are not supported, and will lead to issues when trying to connect to the database.
-
Click Test connection to proceed
A notification will display the result of the test. You will only be able to move on to the next step if the test is successful - Click Next.
The database name can be left as the default value or changed as required.
- On the Ready for Upgrade to 4.2 screen, click Next to upgrade Hub and Interact to 4.2.
-
On the Completed the Blue Prism Hub and Blue Prism Interact upgrade screen:
- When the upgrade completes successfully, click Finish.
-
If the installation failed, the View Log option will give you details of the error that was encountered. For more information, see Troubleshooting upgrades.
-
Ensure the database permissions for the new databases are:
Application name
Example service account name for SQL Windows Authentication
SQL Server permissions required during installation
Database permissions required during application running
Default database name
Blue Prism - Notification Center
IIS APPPOOL\ Blue Prism – Notification Center
dbcreator / sysadmin
db_datawriter / db_datareader
NotificationCenterDB
Blue Prism - License Manager
IIS APPPOOL\ Blue Prism – License Manager
dbcreator / sysadmin
db_owner
Or
db_datawriter / db_datareader with execute permissions (see below)
LicenseManagerDB
When the application is running, the License Manager requires appropriate permissions to execute stored procedures. If you do not want to use db_owner as the permission level, you can use db_datawriter/db_datareader and run the following SQL script to provide the required level to that user:
CopyUSE [LicenseManagerDB]
GRANT EXECUTE to "IIS APPPOOL\Blue Prism - License Manager"Where:
- [LicenseManagerDB] is the database name for License manager.
- "IIS APPPOOL\Blue Prism - License Manager" is the username.
-
If using Windows Authentication:
- Change the Application Pools Identity of the newly installed License Manager and Notification Center to match the Application Pools that already exist for Hub and Interact.
-
Give the Identity, under which the IIS pools run, access to the BPC_SQL_CERTIFICATE certificate. To do this, open Manage Computer Certificates from the Windows taskbar. In the Personal folder, right-click the certificate and select All tasks > Manage Private Keys. Add the user that matches the Identity and give the user Full control.
Access to this certificate is required by Identity running the Blue Prism – Hub and Blue Prism – IADA Application Pools.
- Check the file permission is set to Full Control for the service account on the new folders:
- C:\Program Files (x86)\Blue Prism\Notification Center
- C:\Program Files (x86)\Blue Prism\License Manager.
- Restart the RabbitMQ Service.
- Restart all Application Pools.
- Restart IIS.
- Repeat the process on all machines on which Hub is installed.
The plugins are automatically updated to the latest version as part of the upgrade process.
Upgrade Hub and Interact 4.2 to version 4.3
It is recommended that you schedule the upgrade to take place outside of working hours.
In 4.3, IMS has been replaced with Authentication Server, any new installs will create a URL, Application Pool and database name that reflect this change. Using this upgrader, only the IMS folder and site name are changed from IMS to Authentication Server, however, your Application Pool, URL and IMS database name remain unchanged. It will also rename the Blue Prism – Email Sender site to Blue Prism – Email Service, however, the address remains unchanged. It is important that everyone is logged out of the IMS Server when you perform this upgrade.
Prerequisites
- Version 4.2 of Hub and Interact is installed.
-
Everyone is logged out of the IMS Server.
-
You have backed up all relevant databases. Although the databases are not impacted by the upgrade, it is recommended that databases are backed up before performing any upgrade.
- Sufficient database permissions to configure the new database created as part of this upgrade, such as, dbcreator or sysadmin.
-
The upgrader automatically stops any running websites as part of the upgrade process. You do not need to manually stop them.
Upgrade steps
- Download the Blue Prism Interact and Hub Upgrader for version 4.2 to 4.3 from the Blue Prism Portal.
-
Unzip the installer on the machine where Hub and Interact 4.2 are installed. It contains two files:
- Blue Prism Interact and Hub Upgrader.exe – The upgrader executable.
- BluePrismHubAndInteractUpdate4.3.bin – The binary file needed to upgrade to 4.3.
These files must be saved in the same directory.
- Double-click the upgrader executable to start the upgrader wizard, and on the Welcome to the Hub and Interact Upgrader screen, click Next.
- On the End-User License Agreement screen, read the End-User License Agreement and, if you agree to the terms, select the check box and click Next.
-
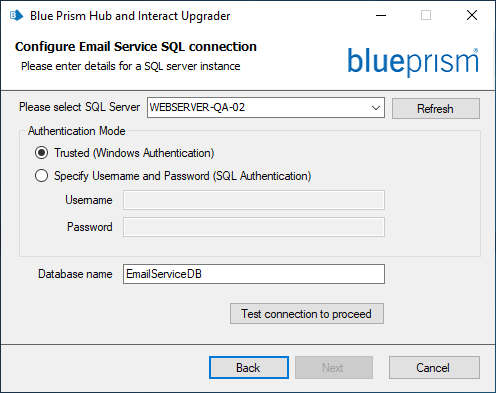
On the Configure Email Service SQL connection screen:
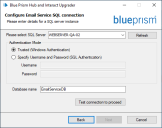
- Configure the settings for the Email Service database by providing the SQL Server host name or IP address, and the credentials for the account to create the database:
- If Windows Authentication is selected, the account must have the appropriate permissions.
-
You must ensure that your database password does not contain an equals sign (=), semi‑colon (;), or speech marks ("). These characters are not supported, and will lead to issues when trying to connect to the database.
-
Click Test connection to proceed
A notification will display the result of the test. You will only be able to move on to the next step if the test is successful - Click Next.
The database name can be left as the default value or changed as required.
-
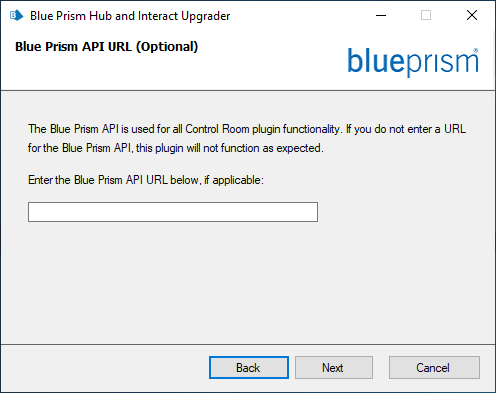
On the Blue Prism API URL (Optional) screen:
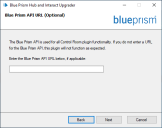
If required, enter the URL for the Blue Prism API. This URL is essential if you want to use the Control Room plugin. The Control Room plugin is compatible with Blue Prism 7.0 or later.
If you decide to use the Control Room plugin and you have not entered a URL at this point, you will need to update the configuration file.
- On the Ready for Upgrade to 4.3 screen, click Next to upgrade Hub and Interact to 4.3.
-
On the Completed the Blue Prism Hub and Blue Prism Interact upgrade screen:
- When the upgrade completes successfully, click Finish.
-
If the installation failed, the View Log option will give you details of the error that was encountered. For more information, see Troubleshooting upgrades.
-
Ensure the database permissions for the new database is:
Application name
Example service account name for SQL Windows Authentication
SQL Server permissions required during installation
Database permissions required during application running
Default database name
Blue Prism ‑ Email Service
IIS APPPOOL\ Blue Prism – Email Service
dbcreator / sysadmin
db_datawriter / db_datareader
EmailServiceDB
- Restart the RabbitMQ Service.
- Restart all Application Pools.
- Restart IIS.
- Repeat the process on all machines on which Hub is installed.
The plugins are automatically updated to the latest version as part of the upgrade process.
Upgrade Hub and Interact 4.3 to version 4.4
For new installations of 4.4, the Cache database is no longer used and there is now a File Service database to store files, rather than storing files within a folder. For upgrades, these changes are not applied and this functionality remains as it was.
It is recommended that you schedule the upgrade to take place outside of working hours.
Prerequisites
- Version 4.3 of Hub and Interact is installed.
-
Everyone is logged out of Authentication Server.
-
You have backed up all relevant databases. Although the databases are not impacted by the upgrade, it is recommended that databases are backed up before performing any upgrade.
- Sufficient database permissions to configure the new database created as part of this upgrade, such as, dbcreator or sysadmin.
-
The upgrader automatically stops any running websites as part of the upgrade process. You do not need to manually stop them.
Upgrade steps
-
Hub 4.4 requires version 3.1.11 of the .NET Framework. If you do not have this version, you will need to update your Hub web server.
Step
Details
Video
1
Download the following components and store them in a temporary location, for example, C:\temp:
-
.NET Core 3.1.11 Windows Server Hosting
-
.NET Core 3.1.11 Windows Desktop Runtime
https://dotnet.microsoft.com/download/dotnet/thank-you/runtime-desktop-3.1.11-windows-x64-installer
2
To install the .NET dependencies, run each of the following commands using the PowerShell command prompt, waiting until each completes, before running the next command:
Copystart-process "C:\temp\dotnet-hosting-3.1.11-win.exe" /q -wait
start-process "C:\temp\windowsdesktop-runtime-3.1.11-win-x64.exe" /q -waitEnsure the file path matches the location where the files were stored in step 1.
To watch this installation step, see our .NET installation video.
-
- Download the Blue Prism Interact and Hub Upgrader for version 4.3 to 4.4 from the Blue Prism Portal.
-
Unzip the installer on the machine where Hub and Interact 4.3 are installed. It contains two files:
- Blue Prism Interact and Hub Upgrader.exe – The upgrader executable.
- BluePrismHubAndInteractUpdate4.4.bin – The binary file needed to upgrade to 4.4.
These files must be saved in the same directory.
-
Double-click the upgrader executable to start the upgrader wizard, and on the Welcome to the Hub and Interact Upgrader screen, click Next.
If you have not installed .NET Framework 3.1.11 or later, the Prerequisites screen displays and you will need to exit the installer and update the .NET Framework.
- On the End-User License Agreement screen, read the End-User License Agreement and, if you agree to the terms, select the check box and click Next.
- On the Ready for Upgrade to 4.4 screen, click Next to upgrade Hub and Interact to 4.4.
-
On the Completed the Blue Prism Hub and Blue Prism Interact upgrade screen:
- When the upgrade completes successfully, click Finish.
-
If the installation failed, the View Log option will give you details of the error that was encountered. For more information, see Troubleshooting upgrades.
- Restart the RabbitMQ Service.
- Restart all Application Pools.
- Restart IIS.
- Repeat the process on all machines on which Hub is installed.
The plugins are automatically updated to the latest version as part of the upgrade process.
Upgrade Hub and Interact 4.4 to version 4.5
It is recommended that you schedule the upgrade to take place outside of working hours.
Prerequisites
- Version 4.4 of Hub and/or Interact is installed.
-
Everyone is logged out of Authentication Server.
-
You have backed up all relevant databases. Although the databases are not impacted by the upgrade, it is recommended that databases are backed up before performing any upgrade.
- Sufficient database permissions to configure the new database created as part of this upgrade, such as, dbcreator or sysadmin.
-
The upgrader automatically stops any running websites as part of the upgrade process. You do not need to manually stop them.
Additional prerequisites for Blue Prism Decision
Blue Prism® Decision is a new optional license-controlled plugin that is available in Hub 4.5. If your organization wants to use Decision, the following additional prerequisites are required before you run the upgrader:
- You will need an SSL certificate for the new Blue Prism Decision Model Service container.
- You will need to install the Blue Prism Decision Model Service container used by Decision.
For more information, see Installing Blue Prism Decision.
The URL and SSL certificate details need to be entered in the Blue Prism Interact and Hub Upgrader, see step 5 below.
Upgrade steps
- Download the Blue Prism Interact and Hub Upgrader for version 4.4 to 4.5 from the Blue Prism Portal.
-
Unzip the installer on the machine where Hub and Interact 4.4 are installed. It contains two files:
- Blue Prism Interact and Hub Upgrader.exe – The upgrader executable.
- BluePrismHubAndInteractUpdate4.5.bin – The binary file needed to upgrade to 4.5.
These files must be saved in the same directory.
-
Double-click the upgrader executable to start the upgrader wizard, and on the Welcome to the Hub and Interact Upgrader screen, click Next.
The Welcome to the Hub and Interact Upgrader screen enables you to run the upgrader in any of the Blue Prism supported languages. If required, select another language for the upgrader from the drop-down list. The default language is English (United States).
- On the End-User License Agreement screen, read the End-User License Agreement and if you agree to the terms, select the check box and click Next.
-
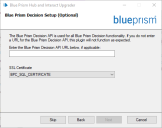
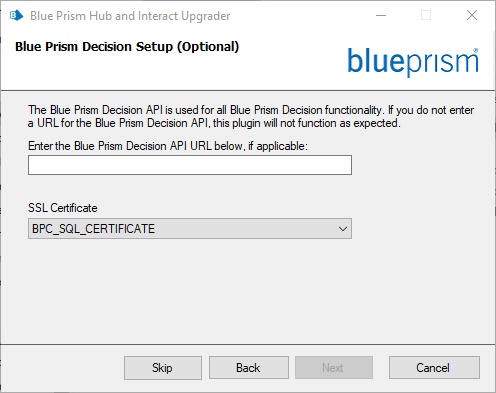
On the Blue Prism Decision Setup (Optional) screen, if you want to use Decision, complete the following information:
This step is only required if you are going to use Blue Prism Decision. Otherwise, click Skip to jump to step 7.
-
Enter the URL for the Blue Prism Decision Model Service container followed by the port number. The URL should be in the format https://<FQDN>:<port number>, for example, https://decision.blueprism.com:50051.
The URL must match the FQDN that was specified in the certificate. The port number must match the port that was defined when the container was set to run. For more information, see Installing Blue Prism Decision.
-
Select the appropriate SSL Certificate.
- Click Next.
-
-
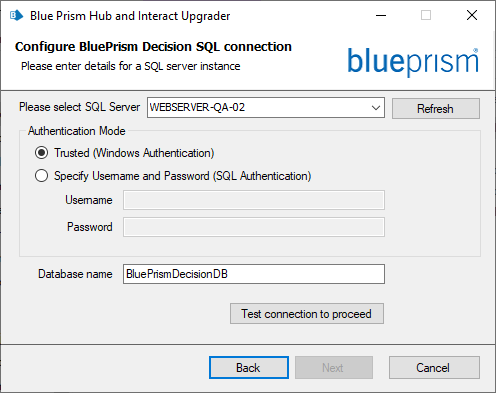
On the Configure Blue Prism Decision SQL connection screen:
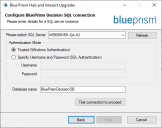
- Configure the settings for the Blue Prism Decision database by providing the SQL Server host name or IP address, and the credentials for the account to create the database:
- If Windows Authentication is selected, the account must have the appropriate permissions.
-
You must ensure that your database password does not contain an equals sign (=), semi‑colon (;), or speech marks ("). These characters are not supported, and will lead to issues when trying to connect to the database.
-
Click Test connection to proceed
A notification will display the result of the test. You will only be able to move on to the next step if the test is successful - Click Next.
The database name can be left as the default value or changed as required.
- On the Ready for Upgrade to 4.5 screen, click Next to upgrade Hub and Interact to 4.5.
-
On the Completed the Blue Prism Hub and Blue Prism Interact upgrade screen:
- When the upgrade completes successfully, click Finish.
-
If the installation failed, the View Log option will give you details of the error that was encountered. For more information, see Troubleshooting upgrades.
- Restart the RabbitMQ Service.
- Restart all Application Pools.
- Restart IIS.
- Repeat the process on all machines on which Hub is installed.
The plugins are automatically updated to the latest version as part of the upgrade process.
Upgrade Hub and Interact 4.5 to version 4.6
As part of this upgrade:
- The Windows Authentication feature is installed in IIS and applied to the Authentication Server website.
- New queues are created in RabbitMQ – you will need to manually remove the old queues.
-
The Blue Prism API URL is removed from the web server configuration file – this prevents Control Room from being able to communicate with Blue Prism. To continue using Control Room, you will need to re-enter this URL by logging into Hub as an administrator and entering the URL in the API configuration section on the Environment management page.
You must enter the full URL including the protocol, such as, http:// or https://. For example: https://bpapi.yourdomain.com
It is recommended that you schedule the upgrade to take place outside of working hours.
Prerequisites
- Version 4.5 of Hub and/or Interact is installed.
-
Everyone is logged out of Authentication Server.
-
The user account performing the upgrade has sysadmin level access to the databases.
- You have backed up all relevant databases.
-
The upgrader automatically stops any running websites as part of the upgrade process. You do not need to manually stop them.
Upgrade steps
- Stop all the Application Pools for the Hub and Interact sites.
-
Stop the following three Windows services on the web server:
- Blue Prism - Audit Service Listener
- Blue Prism - Log Service
- Blue Prism - Submit Form Manager
-
Open RabbitMQ and delete all the queues that start with the following:
- BPC.*
- Connect.*
- ImsServer.*
- Interact.*
Alternatively, you can use the following PowerShell script to carry out this step. You must run this script on the server hosting RabbitMQ, and replace the folder path in the first line of the code with the path to the sbin folder for your implementation.
Copy$rmqsbindir = "C:\Program Files\RabbitMQ Server\rabbitmq_server-3.8.17\sbin"
set-location $rmqsbindir
$queues = ./rabbitmqctl list_queues
foreach ($queue IN $queues)
{
$queuenozero = $queue.TrimEnd("0"," ")
$queuetrimmed = $queuenozero.TrimEnd()
if ($queuetrimmed -like 'BPC.*' -or $queuetrimmed -like 'Connect.*' -or $queuetrimmed -like 'ImsServer.*' -or $queuetrimmed -like 'Interact.*')
{
./rabbitmqctl delete_queue $queuetrimmed
}
} - Download the Blue Prism Interact and Hub Upgrader for version 4.5 to 4.6 from the Blue Prism Portal.
-
Unzip the installer on the machine where Hub and Interact 4.5 are installed. It contains two files:
- Blue Prism Interact and Hub Upgrader.exe – The upgrader executable.
- BluePrismHubAndInteractUpdate4.6.bin – The binary file needed to upgrade to 4.6.
These files must be saved in the same directory.
- Double-click the upgrader executable to start the upgrader wizard, and on the Welcome to the Hub and Interact Upgrader screen, click Next.
- On the End-User License Agreement screen, read the End-User License Agreement and, if you agree to the terms, select the check box and click Next.
- On the Ready for Upgrade to 4.6 screen, click Next to upgrade Hub and Interact to 4.6.
-
On the Completed the Blue Prism Hub and Blue Prism Interact upgrade screen:
- When the upgrade completes successfully, click Finish.
-
If the installation failed, the View Log option will give you details of the error that was encountered. For more information, see Troubleshooting upgrades.
- Repeat the process on all machines on which Hub and/or Interact is installed.
- Check that the services and application pools stopped in steps 1 and 2 have restarted. If they have not, restart them.
- If you are using the Blue Prism API, log into Hub as an administrator and enter the API URL on the Environment management page.
The plugins are automatically updated to the latest version as part of the upgrade process.
Upgrade Hub and Interact 4.6 to version 4.7
This upgrade updates Blue Prism Hub, Blue Prism Interact, and the supporting sites to use the following .NET components:
-
.NET Desktop Runtime 6.0.9 or 6.0.10
-
ASP.NET Core Runtime 6.0.9 or 6.0.10 (Windows Hosting Bundle)
-
.NET Framework 4.8 – Installed by default on Windows Server 2022.
This upgrade also enforces SSL encryption requirements. For more information, see Prerequisites.
It is recommended that you schedule the upgrade to take place outside of working hours.
Prerequisites
- Version 4.6 of Hub and/or Interact is installed.
-
Everyone is logged out of Authentication Server.
-
You have backed up all relevant databases. Although the databases are not impacted by the upgrade, it is recommended that databases are backed up before performing any upgrade.
-
-
SQL Server must be configured to use SSL encryption. If your organization does not already use SSL encryption (you have been running your environment without certificates for your SQL Server, or you have been using a self‑signed certificate), your organization should obtain a certificate from a trusted certificate authority and import it into SQL Server to enable this. For more information, see Microsoft's documentation.
If you have not previously used SSL encryption for your SQL Server, you will need to update the connection strings in the application settings files for the Blue Prism applications before running the upgrader. For more information, see Update application settings.
Certificates from trusted certificate authorities should be used for Production environments. However, a self-signed certificate could be used for Proof of Concept, or Development environments. It is important that the fully qualified domain name (FQDN) used by SQL Server matches the FQDN defined in the certificate. If these do not match, a connection to the database will not be established and your installation will not function correctly. For information on using and configuring self-signed certificates, see Self-signed certificates
To import the certificate into SQL Server:
-
From the Windows task bar, open SQL Server Configuration Manager.
-
In the SQL Server Configuration Manager, expand SQL Server Network Configuration and right-click Protocols for <SqlServerInstanceName>, and then click Properties.
-
In the Protocols for <SqlServerInstanceName> Properties dialog, select the Certificate tab, and then select or import the required certificate.
-
Click Apply.
-
The upgrader automatically stops any running websites as part of the upgrade process. You do not need to manually stop them.
Update application settings
You only need to update the appsettings.json files for the Blue Prism applications if you have not previously been using SSL encryption for your SQL Server. You can update the application settings using the script that Blue Prism has created, or manually.
To update the application settings using the script:
- Import a certificate into SQL Server. For more information, see Prerequisites.
- If you do not already have the Blue Prism Data Protector, download it from the Blue Prism Portal and save it to your Hub and/or Interact web server. You can remove it once this procedure is complete.
- If you do not already have the application settings script (update‑connectionStrings.ps1), download it from the Blue Prism Portal and save it to your Hub and/or Interact web server.
-
Open PowerShell as an administrator and run the update‑connectionStrings.ps1 script. When prompted, enter the following information:
-
installationDirectory – Type the directory path for where Hub is installed and press Enter. For example, if the default installation location was used, the path will be C:\Program Files (x86)\Blue Prism.
-
sqlSource – Type the SQL Server name that was used during the creation of the SSL certificate and press Enter.
-
dataProtectorPath – Type the full path to the Blue Prism Data Protector and press Enter. For example, if you save it directly onto the C: drive, enter C:\BluePrismDataProtector.Console.exe.
-
interactInstallationDirectory – Type the directory path for where Interact is installed and press Enter. For example, if the default installation location was used, the path will be C:\Program Files (x86)\Blue Prism. If you have not installed Interact, do not enter any information and press Enter.
The script runs and updates the connection strings in the application settings with the new value for SQL Server.
-
-
Repeat the process on all machines on which Hub and/or Interact is installed.
To update the application settings manually:
- Import a certificate into SQL Server. For more information, see Prerequisites.
- If you do not already have the Blue Prism Data Protector, download it from the Blue Prism Portal.
- Open PowerShell as an administrator in the folder where BluePrismDataProtector.Console.exe is located. You are going to use this tool to update the connection strings in the appsettings.json files. For more information on using the tool, see Blue Prism Data Protector Tool.
-
On the Hub and Interact web servers, navigate to the following files and find the sections indicated in the code snippets below:
The file paths shown below are the default installation locations. If you installed your applications to a different folder, you should navigate to that folder.
C:\Program Files (x86)\Blue Prism\Audit Service\appsettings.json
"ConnectionStrings": {
        "AuditServerConnection": <Replace the string here>
C:\Program Files (x86)\Blue Prism\Audit Service Listener\appsettings.json
"ConnectionStrings": <Replace the string here>C:\Program Files (x86)\Blue Prism\Authentication Server\appsettings.json
"ConnectionStrings": {
        "IdentityServerConnection": <Replace the string here>
"Storage": {
     "Type": "Database",
      "ConnectionString": <Replace the string here>
C:\Program Files (x86)\Blue Prism\Email Service\appsettings.json
"Database": {
        "ConnectionString": <Replace the string here>
C:\Program Files (x86)\Blue Prism\File Service\appsettings.json
"Storage": {
        "Type": "Database",
        "ConnectionString": <Replace the string here>
C:\Program Files (x86)\Blue Prism\Hub\appsettings.json
"Data": {
      "Connect": {
        "ConnectionName": "Connect",
        "ConnectionString": <Replace the string here>

      "BluePrismDecision": {
        "ConnectionName": "BluePrismDecision",
        "ConnectionString": <Replace the string here>

"DistributedCache": {
  "Type": "Database",
  "DefaultExpirationMinutes": 0,
  "SqlServer": {
    "ConnectionString": <Replace the string here>

"Storage": {
  "Type": "Database",
  "ConnectionString": <Replace the string here>
C:\Program Files (x86)\Blue Prism\IADA\appsettings.json
"Database": {
        "ConnectionString": <Replace the string here>
C:\Program Files (x86)\Blue Prism\Interact\appsettings.json
"InteractDatabases": {
      "InteractConnectionString": <Replace the string here>

"DistributedCache": {
  "Type": "Database",
  "DefaultExpirationMinutes": 0,
  "SqlServer": {
    "ConnectionString": <Replace the string here>
C:\Program Files (x86)\Blue Prism\Interact Remote API\appsettings.json
"InteractRemoteDatabases": {
        "InteractConnectionString": <Replace the string here>

"InteractRemoteStorage": {
    "Type": "Database",
    "ConnectionString":    <Replace the string here>
C:\Program Files (x86)\Blue Prism\License Manager\appsettings.json
"Database": {
        "ConnectionString": <Replace the string here>
C:\Program Files (x86)\Blue Prism\Notification Center\appsettings.json
"Database": {
        "ConnectionString": <Replace the string here>
C:\Program Files (x86)\Blue Prism\Submit Form Manager\appsettings.json
"SubmitFormManagerDatabases": {
"InteractConnectionString": <Replace the string here> -
For each of these files in turn:
-
Use the Blue Prism Data Protector Tool to decrypt the connection string and copy to a temporary text file, for example:
 "InteractDatabases": {
      "InteractConnectionString": "CfDJ8MILtsx8cQBOrqrAatl5A1aLmLP1GodoFWTnhvaHwh0ryabXaXW2i-KTfsq2XTYuAzct_ZXIFS3ILFv4Zu5ozmtvHv9aOLCxZjQJEUm7Ytwx8dK1Zqapywv2s5TCoi4X_9MGselkrRmbknBuQ_zWE93ozrNlBUVCQNHVedkyjTTPmPnxyeIgJJdoZRbkKOupnSrJwTt95SCmvo2SLLhZZFR5e2s24smn72PKNGrga8fksbIDpalDFwRc-i6_kkEinp5qA-FBFfIbVZzBD5ZN1dyuaC2jM7V4dxKt5tea1NP-_vauczgCLBp88WdmNEe0Ew"
Becomes:
"InteractDatabases": {
      "InteractConnectionString": "Data Source=existed-name-without-certificate; Initial Catalog=Interact; User Id=sa; Pass=Pass***; Max Pool Size=500; Encrypt=False; MultiSubnetFailover=True"
The examples in step 4 above show the extract from the appsettings.json file to illustrate the location of the settings. The decryption and encryption is only carried out on the connection string setting, not on the settings also shown in these code examples.
Only the Data Source in the connection string needs to be updated. The other parameters in the connection string setting should be left unchanged. The upgrade script will make any changes that are required when run, such as updating the Encrypt parameter.
-
In the copied connection string, replace the value for the Data Source parameter with the name from the certificate, for example:
"InteractDatabases": {
      "InteractConnectionString": "Data Source=name-with-certificate; Initial Catalog=Interact; User Id=sa; Password=Pass***; Max Pool Size=500; Encrypt=False; MultiSubnetFailover=True"
The certificate name can be found in SQL Server Configuration Manager.
- In SQL Server Configuration Manager, expand SQL Server Network Configuration, right-click Protocols for <SqlServerInstanceName>, and then click Properties.
- In the Protocols for <SqlServerInstanceName> Properties dialog, select the Certificate tab. The certificate name is shown in the Issued To field – this displays in the format: short name followed by the common name (which is usually the FQDN). Either name can be used as the Data Source, however, if both names are present, it is recommended that the common name (FQDN) is used.
- Optionally, for additional clarity, click View, and select Subject Alternative Name. The names are shown in the text area below the fields.
-
Use the Blue Prism Data Protector Tool to encrypt the new connection string and overwrite the string in the appsettings.json file with this new value.
For information on decrypting and encrypting the connection strings, see Blue Prism Data Protector Tool.
-
-
Open IIS Manager and restart the appropriate Application Pool to ensure it uses the new connection string.
-
Repeat the process on all machines on which Hub and/or Interact is installed.
Upgrade steps
-
Blue Prism Hub and Blue Prism Interact 4.7 require .NET Core 6.0 and .NET Framework 4.8. If you do not have these versions, you will need to update your Hub and/or Interact web server.
Step
Details
Video
1
Download the following components and store them in a temporary location, for example, C:\temp:
-
ASP.NET Core Runtime 6.0.9 or 6.0.10 (Windows Hosting Bundle)
https://dotnet.microsoft.com/download/dotnet/6.0 – Select the version you require. Under ASP.NET Core Runtime, select Hosting Bundle.
-
.NET Desktop Runtime 6.0.9 or 6.0.10
https://dotnet.microsoft.com/download/dotnet/6.0 – Select the version you require. Under .NET Desktop Runtime, select the appropriate download.
-
.NET Framework 4.8
This is installed by default on Windows Server 2022. You only need to install the .NET Framework if you are using Windows Server 2016 Datacenter or Windows Server 2019.
The video above acts as a visual guide only. The version of .NET contained in this video may be different to the actual version required.
2
To install the .NET dependencies, run each of the following commands using the PowerShell command prompt, waiting until each completes, before running the next command:
For Windows Server 2016 and Windows Server 2019:
Copystart-process "C:\temp\dotnet-hosting-6.0.0-win.exe" /q -wait
start-process "C:\temp\windowsdesktop-runtime-6.0.0-win-x64.exe" /q -wait
start-process "C:\temp\ndp48-x86-x64-allos-enu.exe" /q -waitFor Windows Server 2022 (.NET Framework is already installed by default):
Copystart-process "C:\temp\dotnet-hosting-6.0.0-win.exe" /q -wait
start-process "C:\temp\windowsdesktop-runtime-6.0.0-win-x64.exe" /q -waitEnsure the file name and file path match the files that were stored in step 1.
3
Restart your server before installing Blue Prism Hub to ensure the components are fully installed and registered.
To watch this installation step, see our .NET installation video.
-
-
Download the Blue Prism Interact and Hub Upgrader for version 4.6 to 4.7 from the Blue Prism Portal.
-
Unzip the installer on the machine where Hub and Interact 4.6 are installed. It contains two files:
- Blue Prism Interact and Hub Upgrader.exe – The upgrader executable.
- BluePrismHubAndInteractUpdate4.7.bin – The binary file needed to upgrade to 4.7.
These files must be saved in the same directory.
-
Double-click the upgrader executable to start the upgrader wizard, and on the Welcome to the Hub and Interact Upgrader screen, click Next.
The upgrader checks that the prerequisite software from step 1 is installed. If it is not, the Prerequisites screen displays and you will need to close the installer and perform step 1.
- On the End-User License Agreement screen, read the End-User License Agreement and, if you agree to the terms, select the check box and click Next.
- On the Ready for Upgrade to 4.7 screen, click Next to upgrade Hub and Interact to 4.7.
-
On the Completed the Blue Prism Hub and Blue Prism Interact upgrade screen:
- When the upgrade completes successfully, click Finish.
-
If the installation failed, the View Log option will give you details of the error that was encountered. For more information, see Troubleshooting upgrades.
- Repeat the process on all machines on which Hub and/or Interact is installed.
The plugins are automatically updated to the latest version as part of the upgrade process.
Upgrade Interact API VBO
The Interact API VBO is used within the Blue Prism interactive client, and it is updated independently to utilize any new features within the Interact API Service that are available when Interact is upgraded. The latest version of the VBO is available in the Interact API Service release zip file on the Blue Prism Portal.
To upgrade the VBO, you only need to update the Utility - Interact VBO:
- Download the Interact API Service release file from the Blue Prism Portal.
- Unzip the Interact API Service release file.
-
In the Blue Prism interactive client and select File > Import > Release/Skill.
The Choose the input file screen displays.
-
Click Browse and select the extracted Interact API Release.bprelease file, then click Next.
The Resolve Import Conflicts screen displays.
-
In the Resolution column:
-
Leave the setting for Utility - Interact API as Overwrite the existing business object.
-
Change the settings for all the other components to Don't import this business object.
-
-
Click Next.
The Process logging overview screen displays.
-
Ensure that only Utility - Interact API is listed for import. If:
- Other components are listed, click Back and change the settings as detailed in step 5 above.
- It is the only component, click Next to complete the import.
-
Click Finish.
Troubleshooting upgrades
The upgrade says it ended prematurely, what happens now.
The upgrade process has been designed so that if a failure is encountered, it rolls back the install and reinstates the version you were upgrading from. During the upgrade, the folder backup_4.n is created in the installation location (by default, C:\Program Files (x86)\Blue Prism\), where 4.n reflects the existing version number. This contains a copy of the existing installed files and is used as the roll back source if an error is encountered during the installation.
You can try running the upgrader again. Before retrying an upgrade, read any error messages and log files created during the upgrade and ensure any issues have been addressed before attempting the upgrade again.
If this issue persists, please contact Blue Prism Support.
I have upgraded to version 4.7 but the 4.1 user interface still displays.
If this is encountered, clear your browser cache and reload the page.
I have upgraded from 4.1, however, none of my new queues are being created.
This is likely due to the quorum queue feature not being enabled in RabbitMQ. If you check the Hub logs, you will see the error "the 'quorum_queue' feature is disabled".
-
On the Message Broker server, run the RabbitMQ command:
rabbitmqctl enable_feature_flag quorum_queue
-
On the Hub web server, restart the application pools.
The queues are created.
Following an upgrade, when I attempt to log into Interact or Hub, I am seeing an error related to SignalR about overloading the web server in IIS.
This error is very rare but if it does occur, reload the site and restart the application pools in IIS.
I canceled an installation during the upgrade process and I am now seeing errors.
It is recommended that installations are not canceled during the upgrade process. However, although errors may be seen, the rollback operation will complete successfully.
