Docs
DocsEmail configuration
Email settings allows you to change the configuration of SMTP and configure email for notifications, such as password reset requests from users.
You can configure your email settings to use one of the following authentication methods:
Whenever you save the SMTP settings, a test email is sent to you to ensure the setup is correct. If you don’t receive a test email after saving the changes, check the details and update accordingly.
To open the Email configuration page, click your profile icon to open the Settings page, and then click Email configuration.
Update the email settings
The email settings are entered as part of the initial configuration of Hub. You only need to change these settings in the event of an IT infrastructure change, such as a different SMTP host, or a change to the existing host which affects these settings.
Username and password authentication
- On the Email configuration page, click Edit.
-
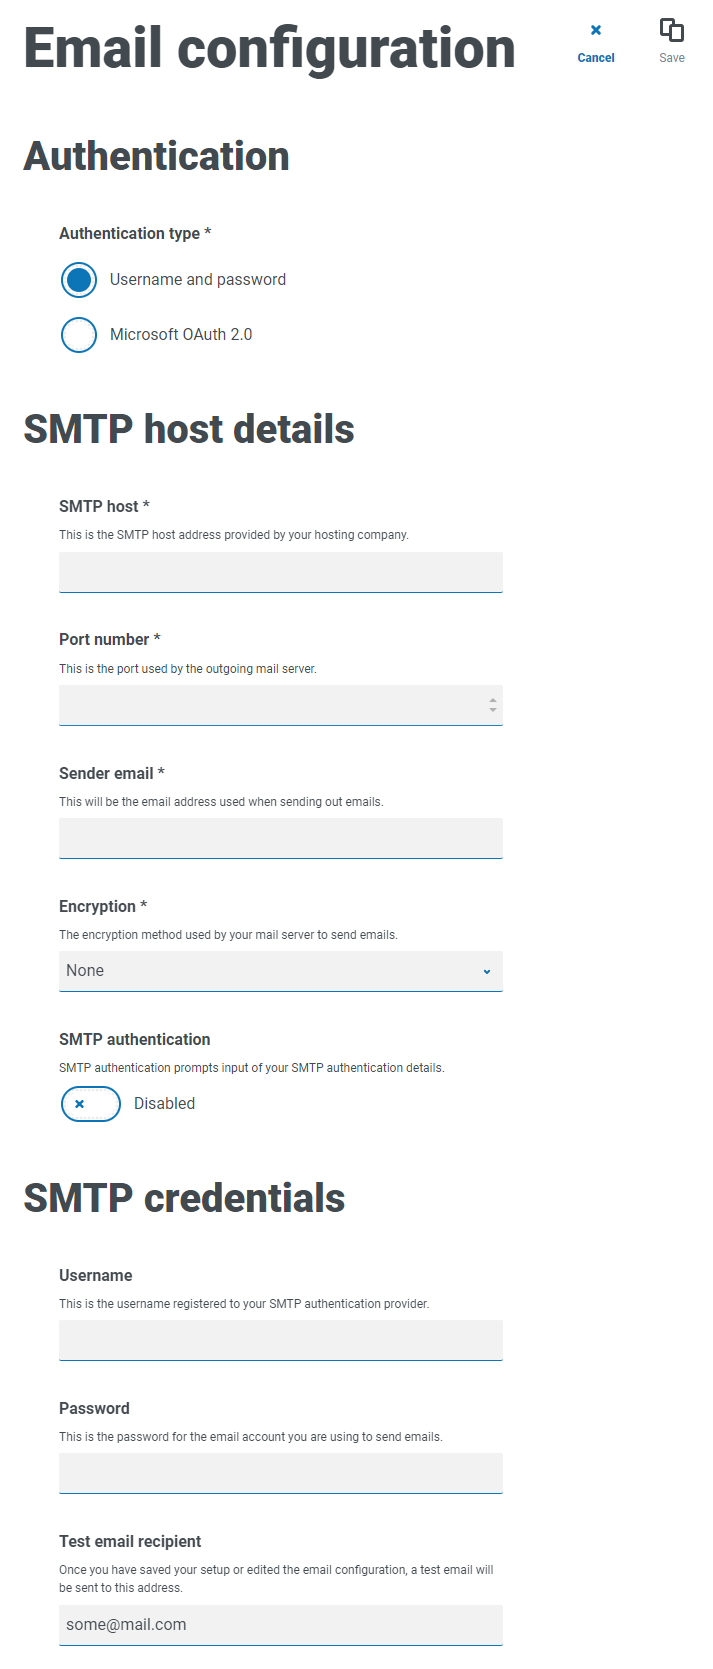
In the Authentication section, under Authentication type, select Username and password.
The Email configuration page refreshes to display the appropriate fields:

-
Enter the following information:
-
SMTP host – The address of your SMTP host.
-
Port number – The port number used by the outgoing mail server.
-
Sender email – The email address that is used when sending emails. The email recipients will see this as the From address.
-
Encryption – The encryption method used by the email server to send the emails.
- SMTP authentication – Select this if the SMTP authentication prompts for input of authentication details. If you set this to Enabled, the Username and Password become mandatory fields.
-
Username – The username for the SMTP authentication.
-
Password – The password for the account.
-
Test email recipient – The test email will be sent to this email address. This defaults to the email address of the user who is making the changes and cannot be changed.
-
- Click Save to save your changes.
Microsoft OAuth 2.0 authentication
You can use the Microsoft OAuth 2.0 authentication service provided by Azure Active Directory to connect to the SMTP host. Your IT Support team will need to register an application in Azure AD and provide you with the Application (client) ID, Directory (tenant) ID and the client secret to complete the information in step 3. For information about finding these details in Azure AD, see the Microsoft documentation.
If you are using Microsoft OAuth 2.0, the Mail.Send permission in Azure Active Directory must be enabled. This must be configured by your IT Support team in Azure Active Directory. For more information, see Troubleshoot a Hub installation.
- On the Email configuration page, click Edit.
-
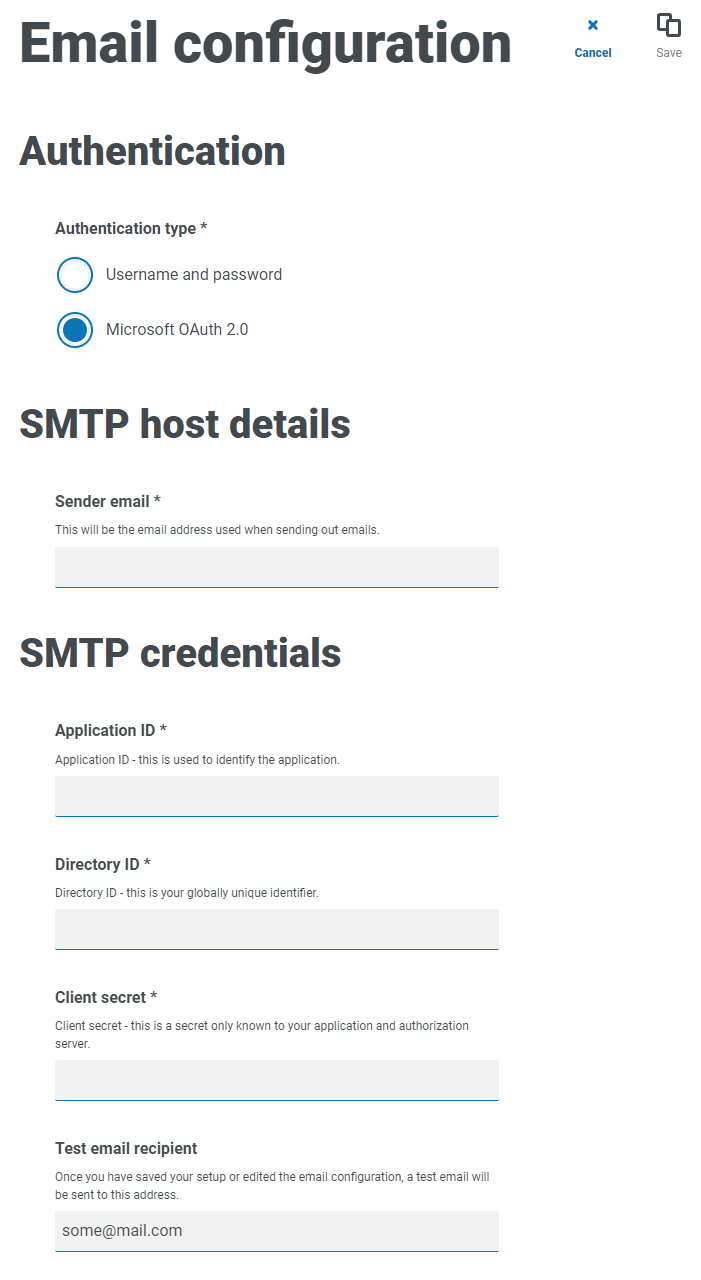
In the Authentication section, under Authentication type, select Microsoft OAuth 2.0.
The Email configuration page refreshes to display the appropriate fields:

-
Enter the following information:
-
Sender email – The email address that is used when sending emails. The email recipients will see this as the From address.
-
Application ID – This information is the Application (client) ID defined in Azure AD and will be provided to you by your IT Support team.
-
Directory ID – This information is Directory (tenant) ID defined in Azure AD and the will be provided to you by your IT Support team.
-
Client secret – This is the client secret as generated by Azure AD and will be provided to you by your IT Support team and controls the authentication process
-
Test email recipient – The test email will be sent to this email address. This defaults to the email address of the user who is making the changes and cannot be changed.
-
- Click Save to save your changes.