 Docs
DocsCreating a new model
SS&C | Blue Prism® Decision is designed to enable you to automate decision making by utilizing machine learning model-based training. Decision is highly flexible, enabling you to create scenarios to meet your organization's requirements.
When you create a decision model, you need to:
- Define your model – Add a title, description, decision type, and decision variables.
- Train your model – Add rules and samples that will be used to form a decision.
- Calibrate your model – Review your model decision outcomes and make any corrections.
The information below uses the example of a simple decision model called Refund. This model will determine whether or not a refund should be given based on the entered criteria.
Defining your model
-
On the Decision Library page, click Create New Model.
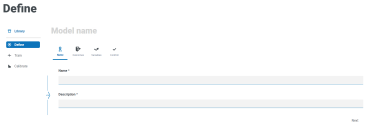
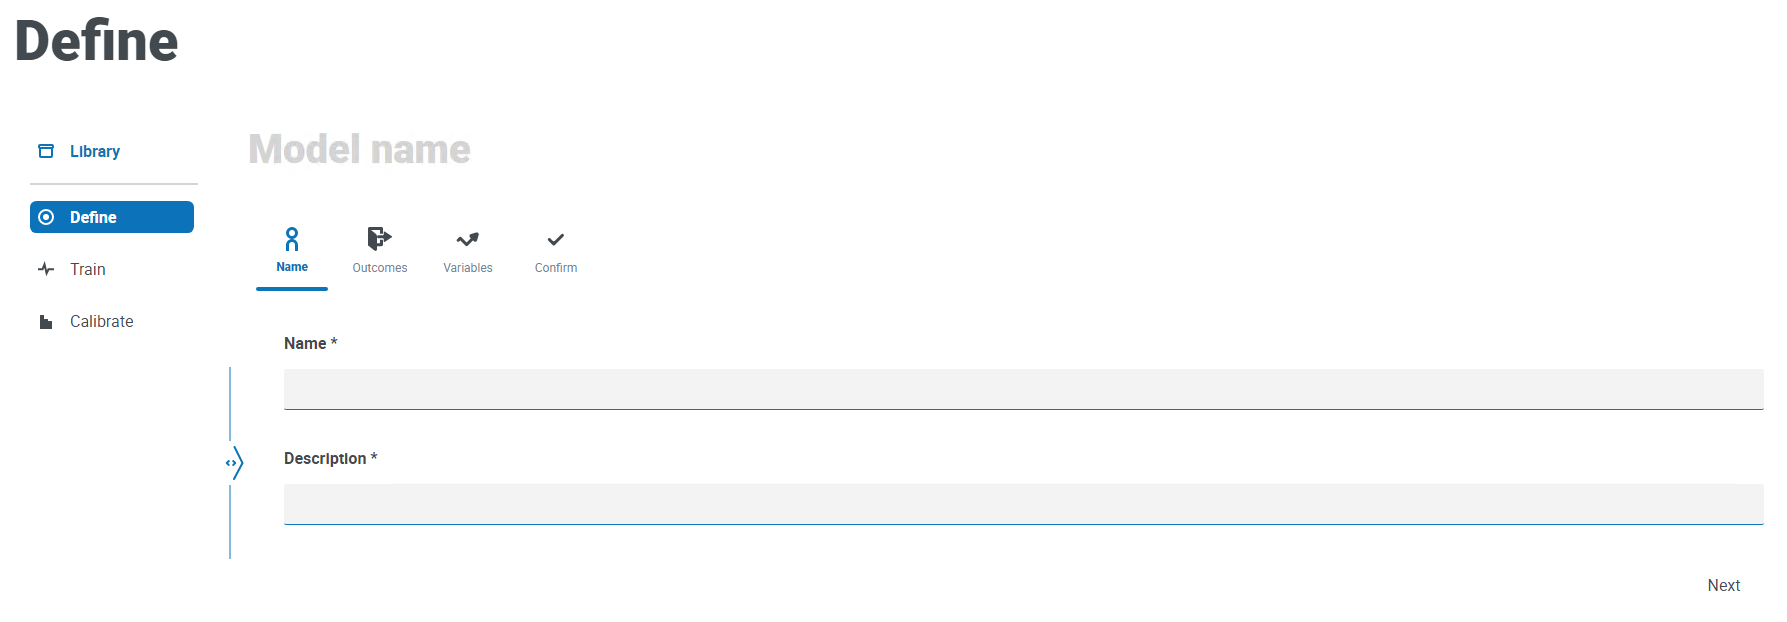
The Define page displays with the Name icon active.
-
On the Name tab:
-
Enter a name and description for your model.
As you type in the name, the Model name above the icons changes to reflect what you have entered.
- Click Next.
The Outcomes tab displays.
-
-
On the Outcomes tab:
-
In Question, enter the main question that this decision model is intended to answer. For example, Should I give a refund?
-
Select whether the answer should be Numerical or Categorical. For more information, see What are Numerical and Categorical answers?.
-
Enter the required values based on the type selected. For example:
-
Click Next.
The Variables tab displays.
-
-
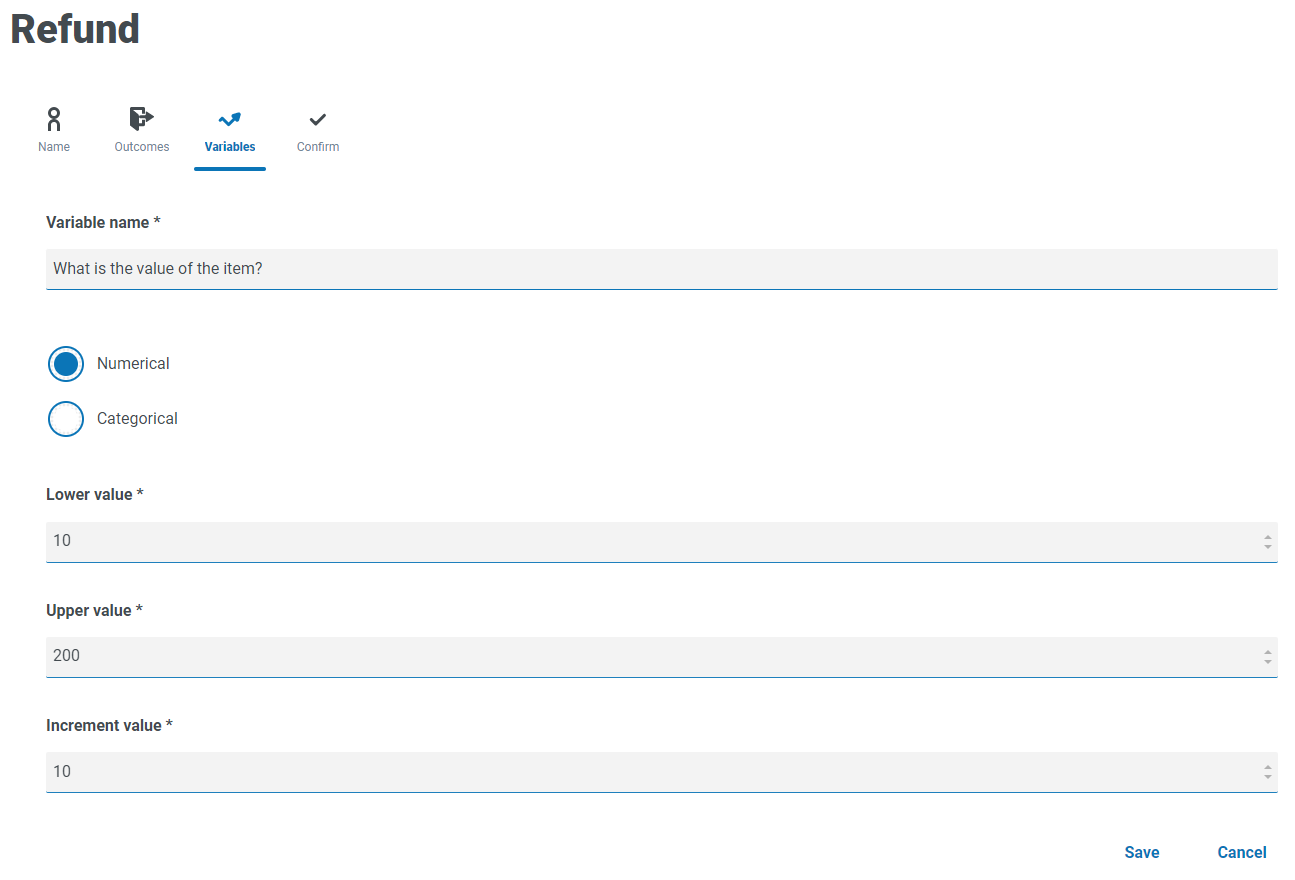
On the Variables tab:
- Click Add
- In Variable name, enter information that is relevant to the model you are creating. You may find it useful to structure this as a question, for example, What is the value of the item? or Have they returned the item?
- Select whether the variable is Numerical or Categorical. For more information, see What are Numerical and Categorical answers?.
-
Enter the required values based on the type selected. For example:
- Click Save.
- Repeat this process until you have defined all the variables that need to be considered in order to make a decision.
- Click Next.
The Confirm tab displays showing a summary of all the information you have entered.
- Click Add
-
On the Confirm tab, click Next to save the model.
The Rules tab of the Train page displays. You are now ready to train your model.

What are Numerical and Categorical answers?
When you are defining your model, you can determine whether the answer to your model question and the individual variables is:
-
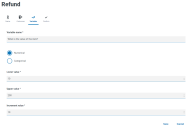
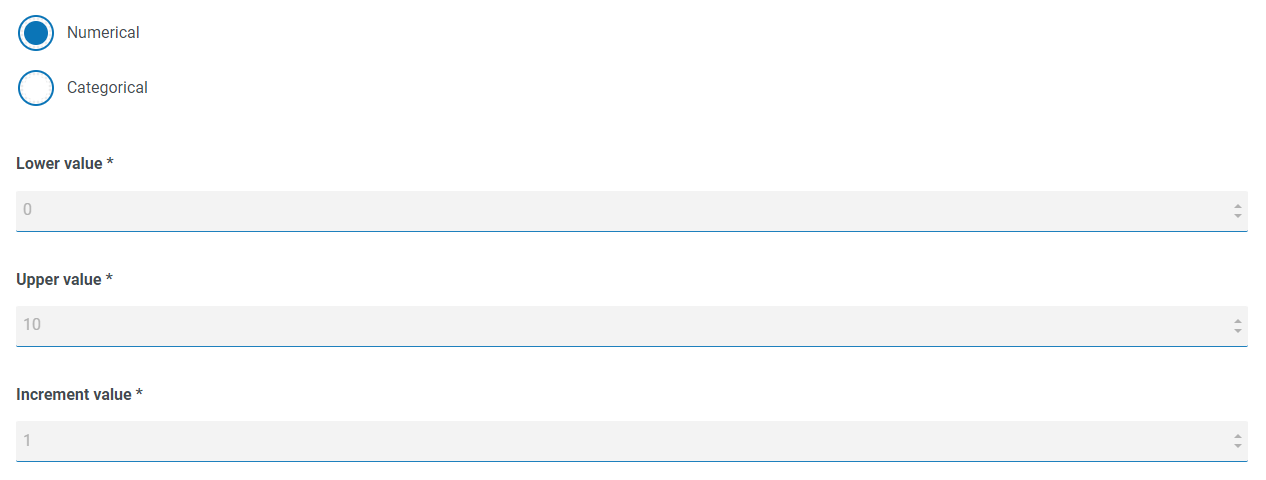
Numerical – Defines that the answer has a numerical value. You must enter a range along with an increment. An example of fields that display when Numerical is selected is shown below:
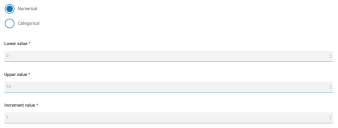
To define your answer, in:
- Lower value – Enter the minimum number that can be accepted.
- Upper value – Enter the maximum number that can be accepted.
- Increment value – Enter the expected increment.
When entering your range and increment, you should consider the number of possible data points this will generate. The greater the number of data points, the longer Decision will take to process the information when training the model. For example, if you have a lower value of 0 and an upper value of 50,000 with an increment of 1, this will generate 50,000 data points. If you change the increment to 2, this will generate 25,000 data points and reduce the processing time.
For variables, Decision has a limit of approximately 70,000 data points (the total sum over all input variables). This many data points can take up to 10 minutes to return a test question when training the model.
For outcomes, Decision has a limit of approximately 100,000,000 data points.
If you exceed these limits, your model will time out and cause an error.
You must use a range and increment that will minimize the processing time, whilst providing the level of information that you need.
-
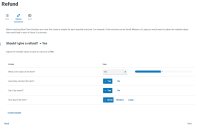
Categorical – Defines that the answer has a text-based categorical answer. You must enter a selection of valid answers to the question or variable. Decision has a number of predefined options that you can select, or you can defined your own answers. An example of the fields and options that display when Categorical is selected is shown below:
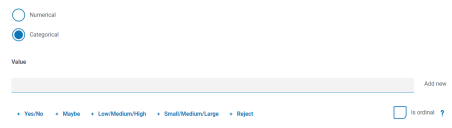
To define your answer:
- You can do one of the following:
- Select one of the predefined options below the Value field.
- Enter your own entry in Value and click Add new.
- Combine these methods – select a predefined option and add some additional values.
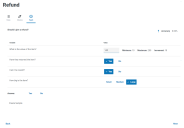
- If required, select Is ordinal – the answer values have a priority based on the order you have entered them in.
As you add the values, they display in a summary below the fields, for example:
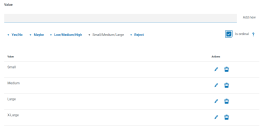
You can edit or delete any of these values.
- You can do one of the following:


Training your model
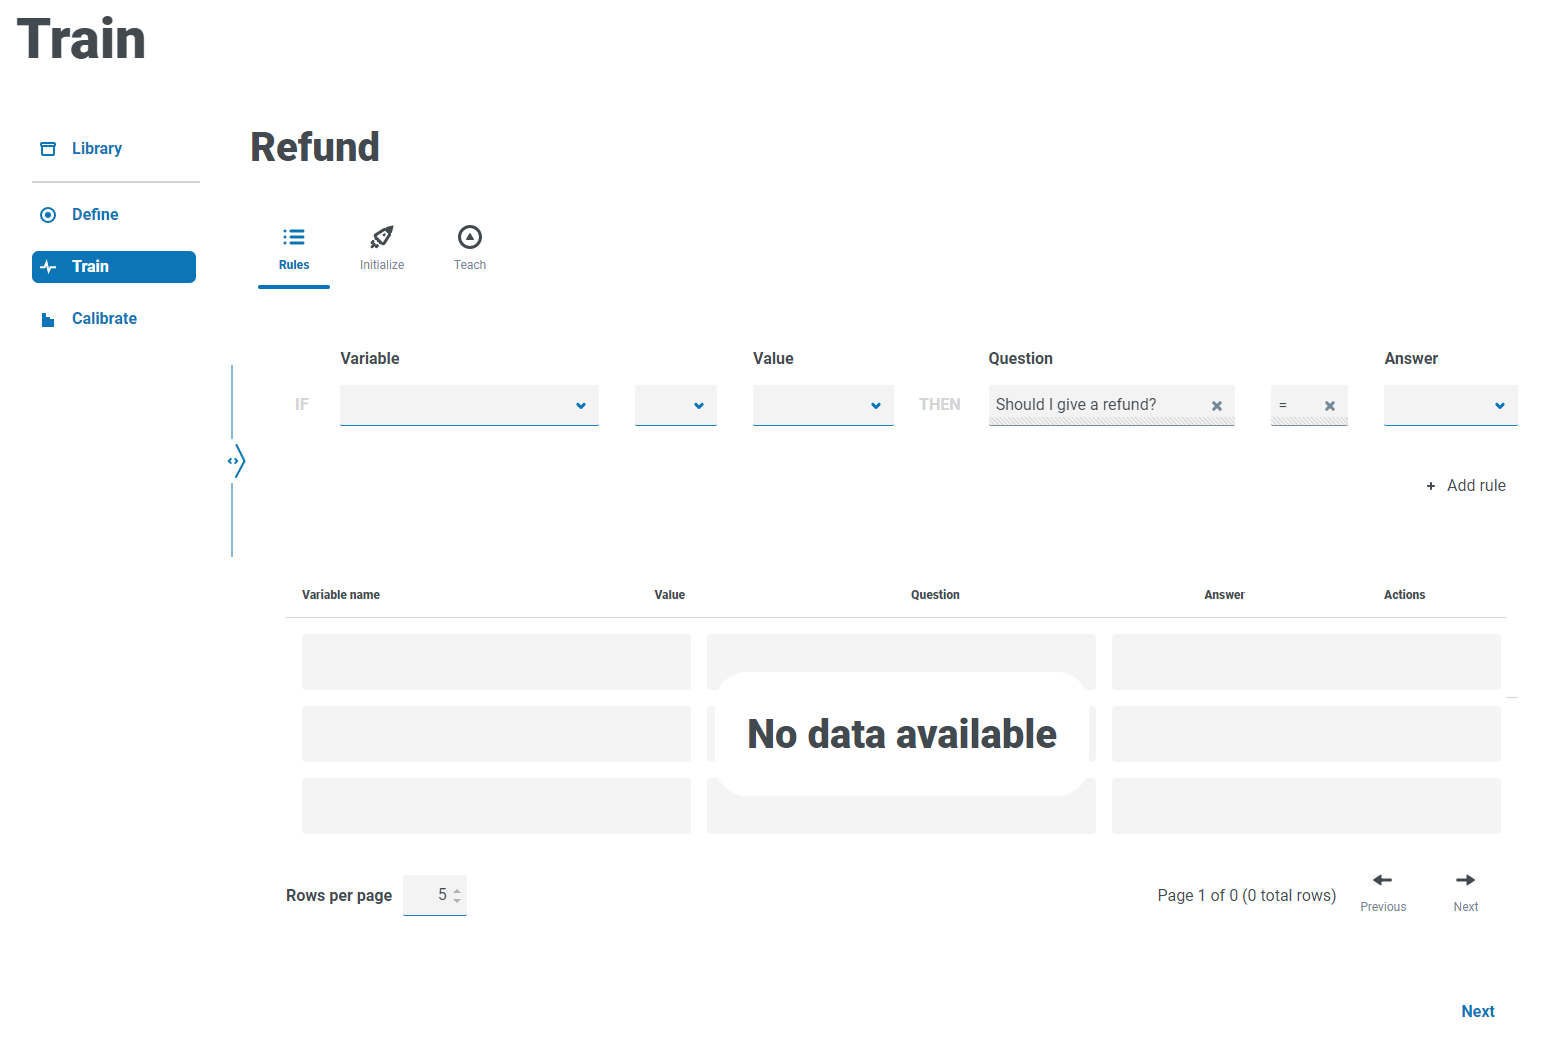
When you have defined your model, you are ready to train your model. When you first open the Train page, the Rules tab displays with the model name and rule question visible:
-
On the Rules tab of the Train page, you can define hard-coded rules. Rules are defined as conditions on input variables and override all other outcomes. Multiple rules can be created and they will be applied in the order they are created, with the oldest first.
Rules are not required for most models. Training the model and creating samples should be enough to achieve the desired outcome. Only add a rule if you have a definitive outcome that will always be true based on a specific condition.
If you require any rules, follow the steps below. Otherwise, click Next and move to the Initialise tab in step 2:
-
In Variable, select the variable you want to define an answer for.
-
Select the appropriate validator. The options available depend on whether the values are categorical or numerical. They are:
=
Equal to
!=
Is not equal to
<
Less than
<=
Less than or equal to
>
More than
>=
More than or equal to
-
In Value, select the appropriate value based on the variable and the validator.
-
In Answer, select the appropriate answer for the model question based on the variable critera you have defined, for example:

-
Click Add rule.
The rule appears in the summary at the bottom of the Rules tab.
Rules appear in the order newest to oldest – they are applied in the order oldest to newest.
-
Repeat the process building up any other rules that are needed.
-
Click Next.
The
-
-
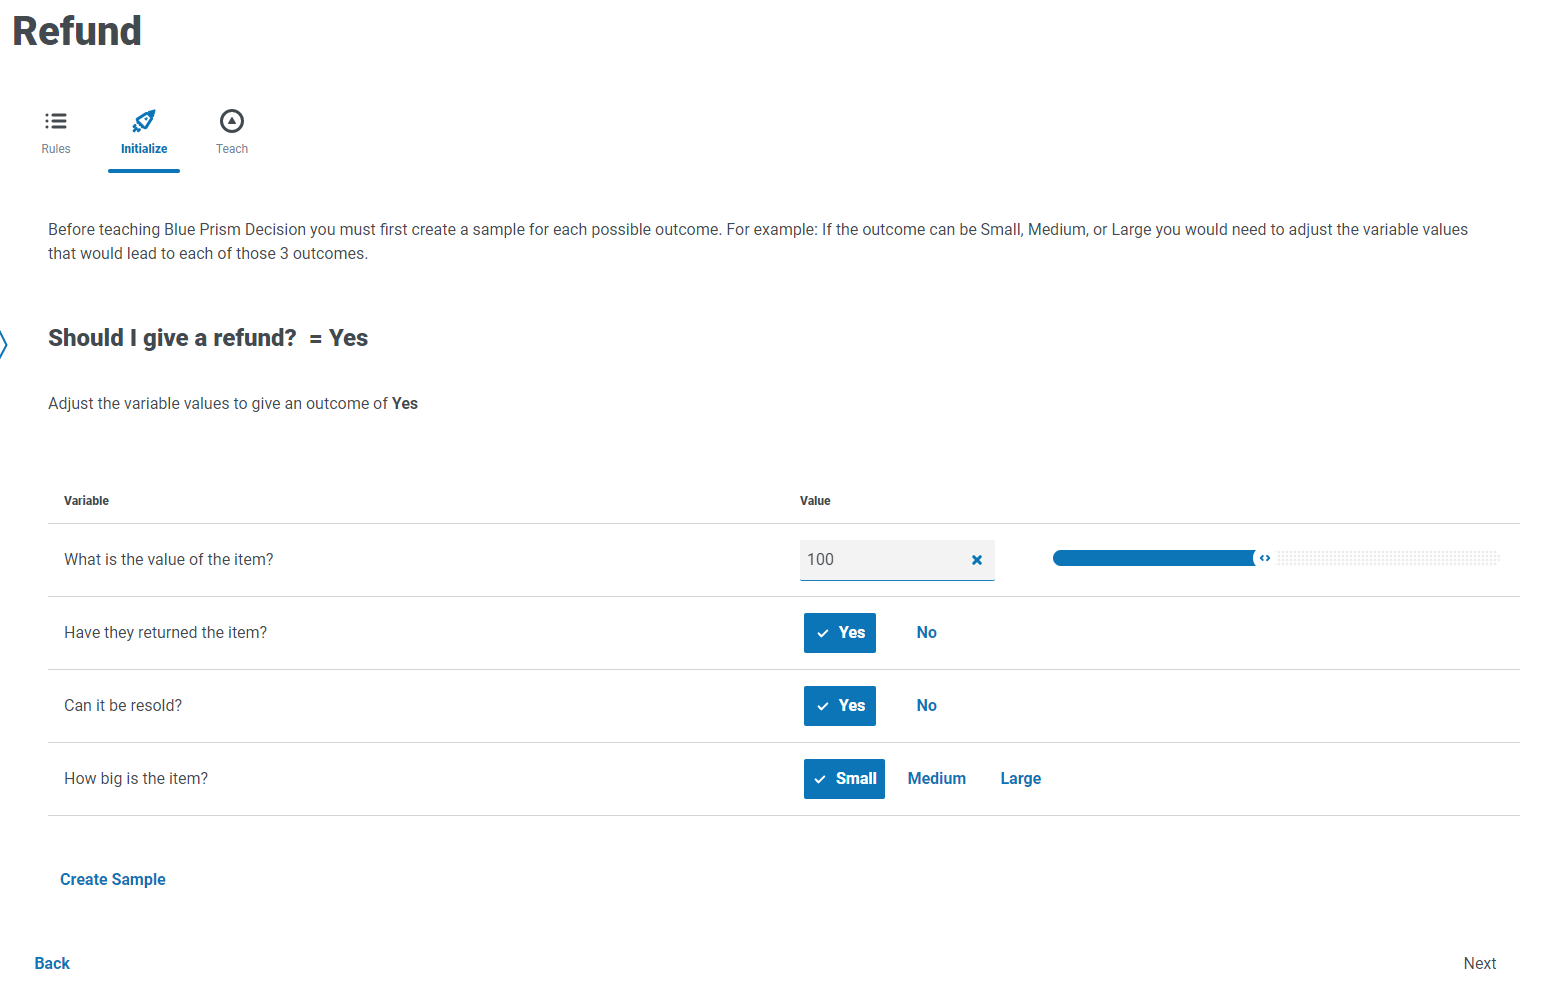
On the
- Categorical outcome – you are prompted to create a sample for each outcome. This is required so that the model is aware of which values can be returned. If a possible outcome value does not have at least one sample, then the model will be unable to predict this value.
- Numerical outcome – you do not need to initialize your model, click Next and move to the Teach tab in step 3.
You can only perform the
For a categorical model:
-
Adjust the values of the variables until they are appropriate for the shown outcome, for example:
-
Click Create Sample.
The values are stored and a new sample outcome displays.
- Repeat the process until new sample outcomes are no longer displayed.
- Click Next.
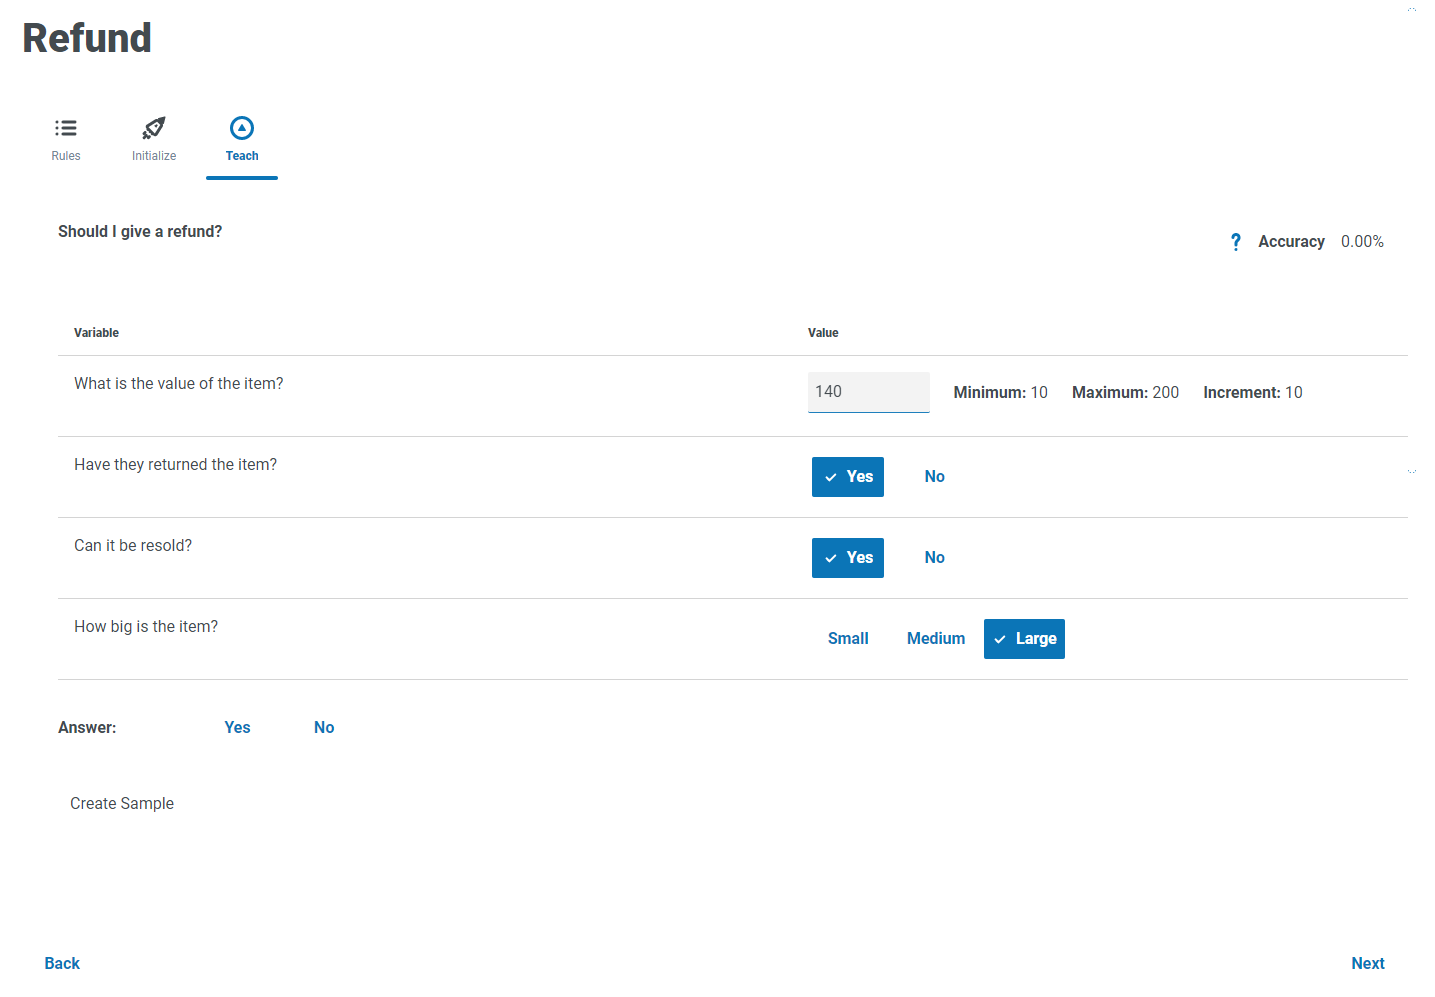
The Teach tab displays.
-
On the Teach tab, you are presented with a generated scenario that you need to provide a response to, for example:
The Accuracy displays a percentage indicating how often the model is expected to be correct based on the training data. This value will change as you create samples.
-
Click the appropriate answer.
-
Click Create Sample.
The values are stored and a new sample displays.
-
Repeat the process until you have created enough samples to cover different scenarios. The more samples you create, the more accurate your model will be.
Consider the types of variables your model contains when deciding on the number of samples you want to use to train your model. For models with variables which have:
- Multiple values, you could start with around 15 samples.
- Values with two options (binary values), such as Yes/No or True/False, you may only need a handful of samples as the number of value combinations will be less. For example, if you had three variables all with binary values, you can only have eight possible combinations.
You can create more samples later if needed.
If required, you can change the generated scenario before you answer it. To do this:
-
For Categorical variables, click the appropriate value.
-
For Numerical variables, enter the value directly into the field. The value you enter must match the increment requirements, for example, you can not enter 18 if the increment is set to 10 and the minimum value is 10, you would need to enter 20.
- Click Next.
The Ask tab of the Calibrate page displays. You are now ready to calibrate your model.
-

Calibrating your model
When you have trained your model, you are ready to calibrate your model. You can review the model's predicted outcomes for your chosen inputs and correct as needed. When you first open the Calibrate page, the Ask tab displays with the model name, the model variables, the model's prediction, and the basis that this has been made on – a rule, matching sample or a decision based on a match to a nearest sample from a selection of similar samples. For example:
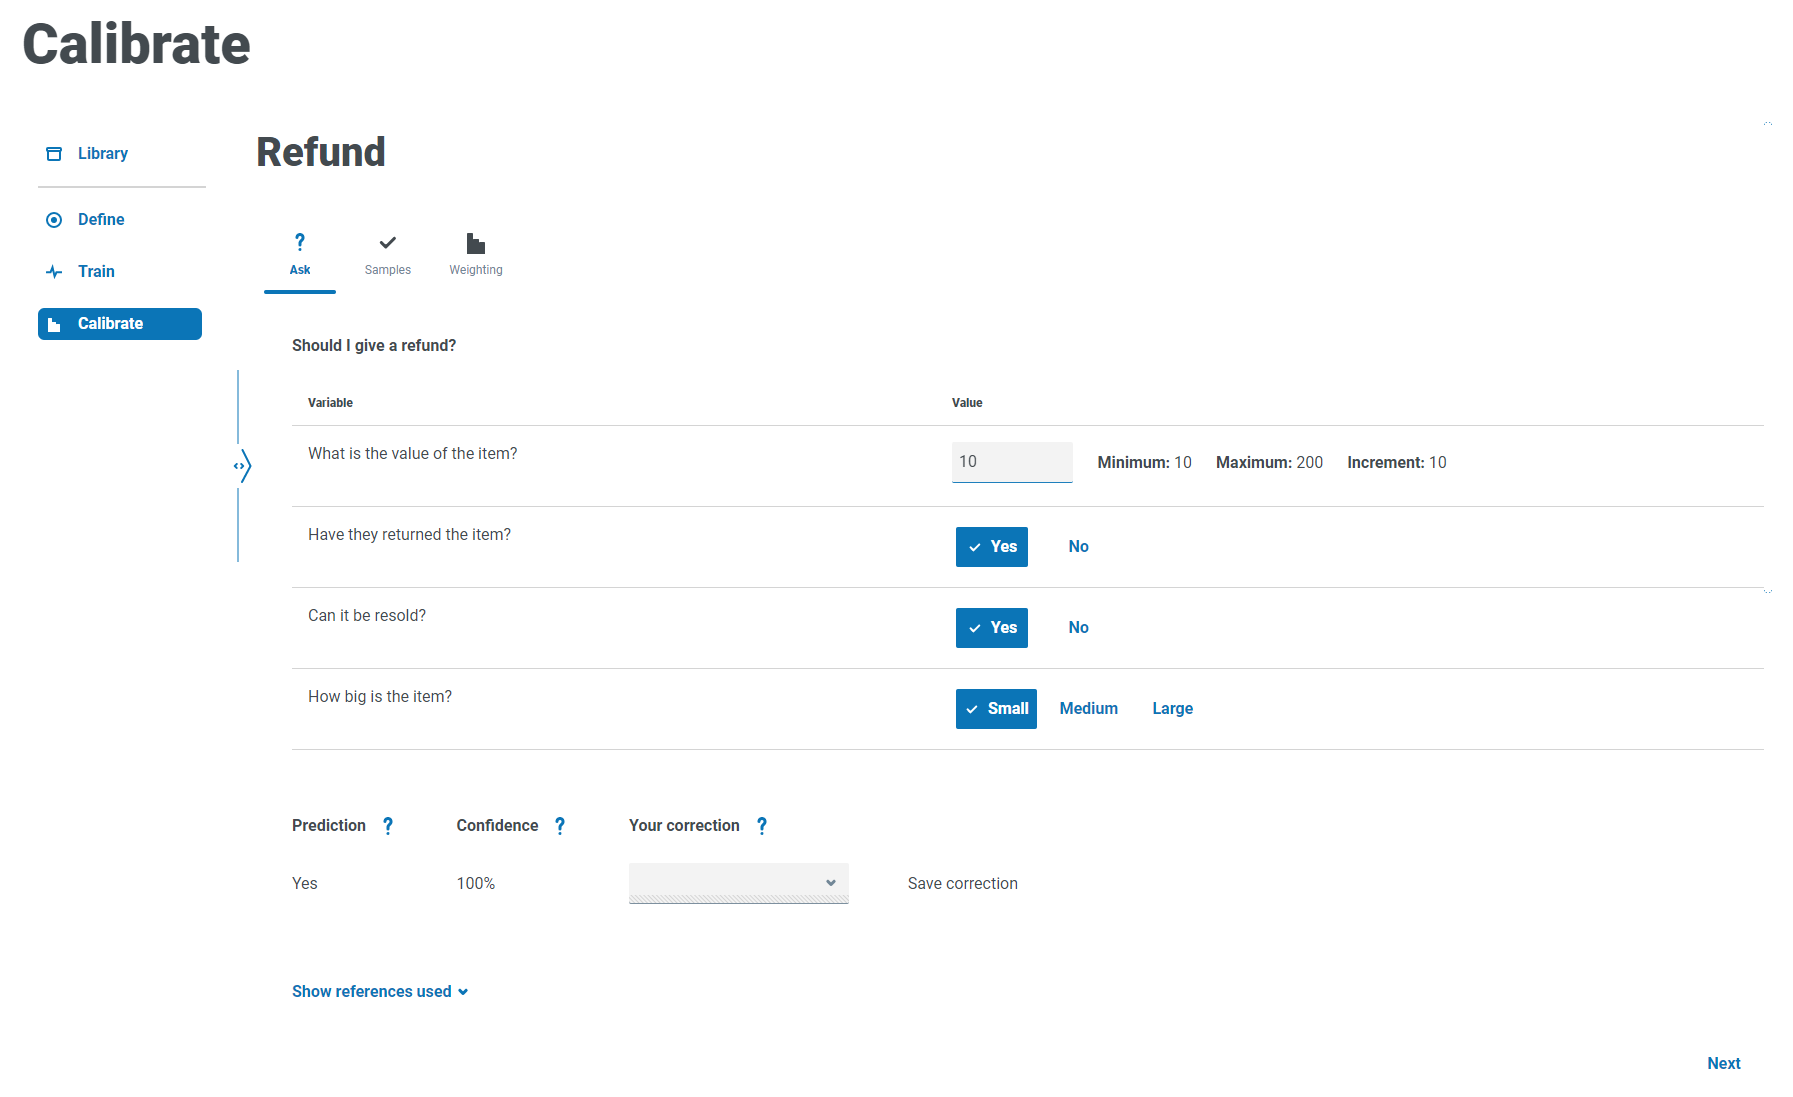
The format of Ask tab is similar to the Teach tab. On the Teach tab, Decision was asking you for the outcome based on the variable values it provided. On the Ask tab, Decision provides you with the outcome based on the variable values you set.
-
On the Ask tab of the Calibrate page, you must review and correct the predicted outcomes from the model:
-
Review the outcome under Prediction based on the variable values that display.
The Confidence of the model also displays – the higher the percentage, the more likely it is that the model provides you with the answer you expect.
-
If the Prediction is based on a match to a similar sample
You cannot correct a prediction that is based on a matching sample or a rule.
If you disagree with the prediction outcome that is based on a rule or matching sample, you will need to re-train your model. You will either need to correct:
- Change the values of the variables and repeat the steps above. To do this:
For Categorical variables, click the appropriate value.
For Numerical variables, enter the value directly into the field. The value you enter must match the increment requirements, for example, you can not enter 18 if the increment is set to 10 and the minimum value is 10, you would need to enter 20.
- When you feel that you have reviewed enough combinations, click Next.
The Samples tab displays.
-
-
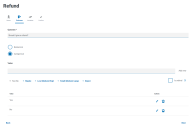
On the Samples tab, you can see a summary of the samples that were created when you trained your model, for example:
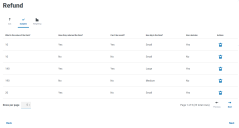
-
Review the samples.
You can see more samples on a page by increasing the value in Rows per page.
-
If required, delete any obsolete or incorrect samples by clicking the associated delete icon in the Actions column.
-
Click Next.
The Weighting tab displays.
-
-
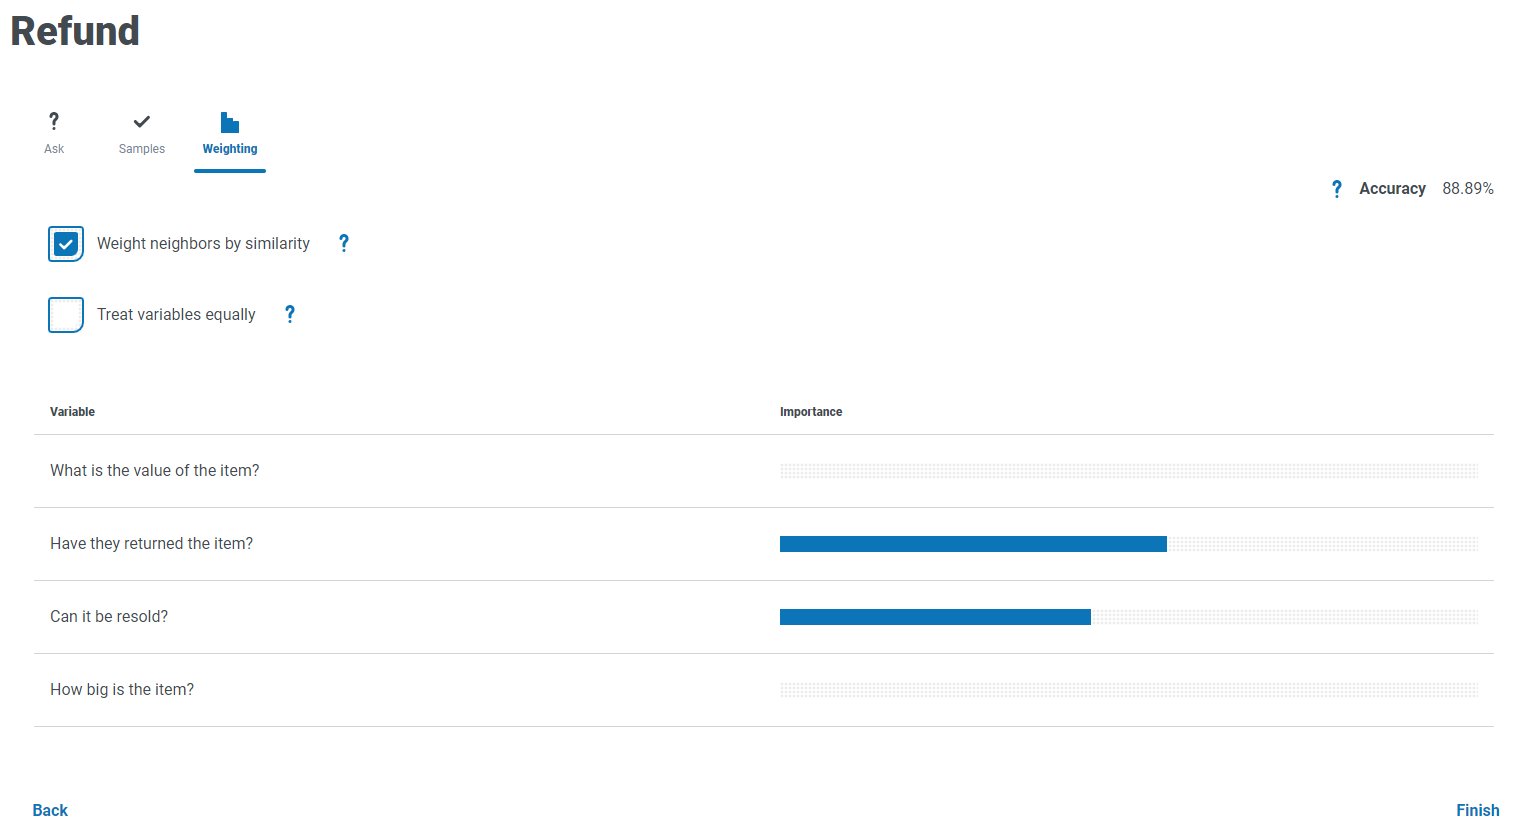
On the Weightings tab, the model displays its assessment of the importance of the variables based on the answers you provided when training the samples, for example:

It is recommended that the default values are used. However, if required, you can adjust these:
-
If required, clear Weight neighbors by similarity. This is selected by default.
Neighbors are a sub-set of the samples that are considered to be similar to the values that have been entered for the variables. When this option is:
- Selected – Neighbors that are most similar to the values supplied will have a greater influence on the outcome than other neighbors.
- Unselected – All neighbor samples will have the same influence on the outcome.
-
If required, select Treat variables equally. This is unselected by default. When this option is:
- Selected – All the variables will have the same level of influence on the outcome.
- Unselected – The model dynamically determine each variable's influence on the outcome, and this is demonstrated by the importance bars in the summary displayed.
- Click Finish.
Your model is now ready to use.
-

If required, you can re-train and re-calibrate your model at any point. The more you train your model, the greater the accuracy and confidence of the model.
However, if you create samples for all possible combinations of the variables on the Teach tab on of the Train page, you will not be able to create any samples to calibrate your model.
