Docs
DocsTroubleshoot an Interact installation
The following sections seek to provide guidance if specific issues are experienced either during the install or when verifying that the installation has been successful.
Database connectivity
The Test connection to proceed button within the installer checks the following:
- If the database exists:
- That it can be connected to.
- That the account has the rights to read, write and edit the database.
- If the database does not exist:
- That the account has the right to create the database.
If these requirements cannot be met, the installation will stop.
There are a number of checks that can be performed when a connection cannot be made to a SQL Server over the LAN:
- Verify Network Connectivity – Ensure that all relevant devices are connected to the same network and are able to communicate.
- SQL Credentials – Verify the SQL credentials and that the user has appropriate permissions on the SQL Server.
- Firewall – Check that the firewalls on the servers themselves or within the network are not preventing communication.
- SQL Browser Service – Ensure the SQL Browser Service on the SQL Server is enabled to allow for a SQL Instance to be found. For SQL Server Express this service is typically disabled by default.
- Enabling TCP/IP Connectivity – Where remote connectivity is required for SQL, check that TCP/IP connectivity is enabled for the SQL Instance. Microsoft provide articles specific to each version of SQL that provide instructions to Enable the TCP/IP Network Protocol for SQL Server.
Another potential reason for failure is that the account used to create the databases within the installer has insufficient privileges to create the databases.
Web server
During the installation process the installer will check that all prerequisites are installed. It is recommended that if the prerequisites are not installed, that the installer is canceled, the prerequisites installed, and the installer process restarted.
Windows Authentication
The account used when running the installation must have the relevant SQL Server permissions to carry out the installation, that is, membership in either the sysadmin or dbcreator fixed server roles. See Preparation for details.
If Windows Authentication is chosen during the installation process, it is recommended that a Windows service account is used that has the necessary permissions to execute the tasks and processes during normal operation. The Windows service account will need:
- The ability to perform the SQL database processes, see Minimum SQL permissions.
- Ownership over the IIS Application Pool.
- Permissions for the required certificates.
Assigning the Windows service account as an owner on certificates
The Windows service account needs to be granted permissions to the BluePrismCloud certificates. To do this:
- On the web server, open the Certificate Manager. To do this, type Certificates in the search box on the Windows taskbar, and then click Manage Computer Certificates.
- In the navigation pane, expand Personal and click Certificates.
-
Follow the steps below for both the BluePrismCloud_Data_Protection and BluePrismCloud_IMS_JWT certificates:
-
Right-click the certificate and select All Tasks, and click Manage Private Keys....
The Permissions dialog for the certificate displays.
-
Click Add, then enter the service account and click OK.
-
With the service account selected in the Group or user name list, ensure that Full control is selected in the Permissions for {account name} list.
-
Click OK.
The service account now has access to the certificate.
-
Assigning a Windows service account to the application pool
By default, the application pools are created with the identity ‘ApplicationPoolIdentity’. After the installer has completed, the Windows service account will need to be allocated to manage the application pools. To do this:
- On the web server, open Internet Information Services (IIS) Manager.
- In the Connections panel, expand the host and select Application Pools.
-
Review the Identity column values.
The identity for an application pool should match the specific Windows service account.
-
For any application pools that have ApplicationPoolIdentity in the Identity column, right-click the row and select Advanced Settings....
The Advanced Settings dialog displays.
-
Select the Identity setting then click the ... (ellipsis) button:

-
In the Application Pool Identity dialog, select Custom account and then click Set....

The Set Credentials dialog displays.
- Enter the credentials for the required Windows service account and click OK.
- Repeat for any applications pools that need changing.
- Restart the RabbitMQ Service.
- Restart all application pools.
- Restart IIS.


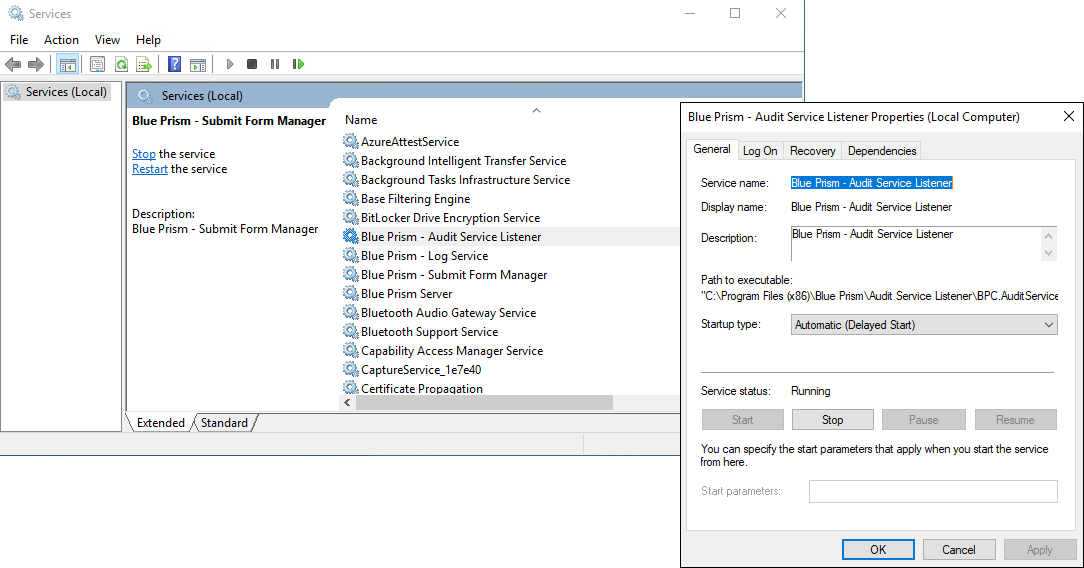
If there are issues with the Audit Service, make sure that the Windows service account has access to the Audit Service Listener as well as the Audit Database.
Assigning a Windows service account to a service
The Windows service account needs to be allocated to manage the following services:
- Blue Prism - Audit Service Listener
- Blue Prism - Log Service
- Blue Prism - Submit Form Manager
To do this:
- On the web server, open Services.
-
Right-click the service and click Properties.

-
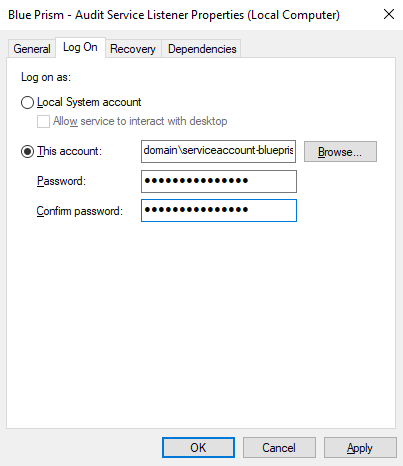
On the Log on tab, select This account and then either enter the account name or click Browse to find the account you want to use.

- Enter the password for the account and click OK.
- In the Services window, right-click the service and click Restart.
- Repeat for the other Blue Prism services.