 Docs
DocsInitial Hub configuration
You can now log in for the first time and carry out some system-wide configuration.
When you open the login page for
To watch the Hub installation and configuration process, see our Blue Prism Hub installation video.
|

Database settings
To configure access to the Blue Prism database:
-
Click your profile icon to open the Settings page, and then click Environment manager.
The Environment management page displays.
-
Click Add connection and enter the details of the Blue Prism database. An example is shown below:

The Timeout value is in seconds.
-
Click Add connection to save the details.
The connection is created and displays in the Environment manager.
-
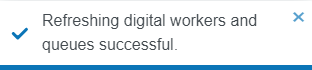
In the Environment manager, click the refresh icon on your new connection. This updates the information in Hub with the digital workforce and queues held in the database.
If the connection is successful, the following message displays in the top right corner of the Hub user interface, which verifies the installation.

If the message does not display, see Troubleshoot a Hub installation for more information.

Email settings
It is recommended that the SMTP setup is completed. This enables system emails to be sent, such as forgotten password emails.
The email address used to send emails is configured when setting up your profile.
To configure the email settings:
-
Click your profile icon to open the Settings page, and then click Email configuration.

- Click Edit.
- Enter the required information.
- Click Save.

If the email settings cannot be successfully configured, it is likely that the Message Broker server cannot be reached
For more information about configuring email settings, see
Install Plugins
|
As part of the installation, Hub automatically installs the Hub plugins. However, if you want to use ALM or Interact, you will need to install the freely available Business processes plugin first. To watch this installation step, see our Business Processes plugin installation video.
|


