 Docs
Docs
Hub administration and configuration
When
Hub utilizes Role Based Access Control (RBAC) to ensure that users can only access functionality required to perform their role within their organization.
There are six main areas of functionality that the administrator role gives access to:
- Basic administration – Manage your profile, environment, and other settings.
- System configuration – Configure email and database settings.
- Plugin management – Install, update, and license Hub plugins.
- Roles and user management – Configure user accounts and manage registration.
- Authentication settings – Configure a Lightweight Directory Access Protocol (LDAP) to you Active Directory environment.
- Customization settings – Configure the look and feel of the Hub user interface.
Basic administration
When an administrator logs into Hub, a number of additional functions are available from the top navigation menu which are not available to users without administrator capabilities enabled on their account.
The features on the top navigational menu bar include:

The features on the top navigational menu bar include:
- Expand or collapse the menu to see the installed plugins.
- Collapse or expand the left navigational bar.
- The area of the Hub user interface you are currently using.
- The currently selected environment. Environments are set up in the database connections screen and any present can be selected here.
- The Hub settings – available only to administrators.
- The plugin repository – available only to administrators.
-
Your notifications. Only notifications that you are authorized to see or that are applicable to you will show.
Notifications are only used by the Automation Lifecycle Management plugin.
-
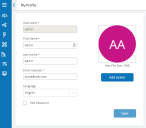
Your profile. The drop-down menu lets you edit your profile or log out from Hub.
You can change your email address, password, your first and last names but you cannot change your username. An avatar image, which by default is your initials, can be assigned by clicking on Add Avatar. Avatars cannot be greater than 1 MB in size.

System configuration
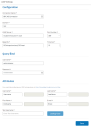
Once Hub has been successfully installed you are required to configure the email and database settings essential for normal operation and are accessed through the administration settings cog.
Email settings
Email settings allows you to change the configuration of SMTP and configure email for notifications, such as password reset requests from users. Changes should be done in conjunction with your own IT Support team to ensure that the configuration and credentials match what they have set up on your organization’s email server. The following information is required:
- SMTP host
- Port
- Sender email
- Encryption method
- Username
- Password
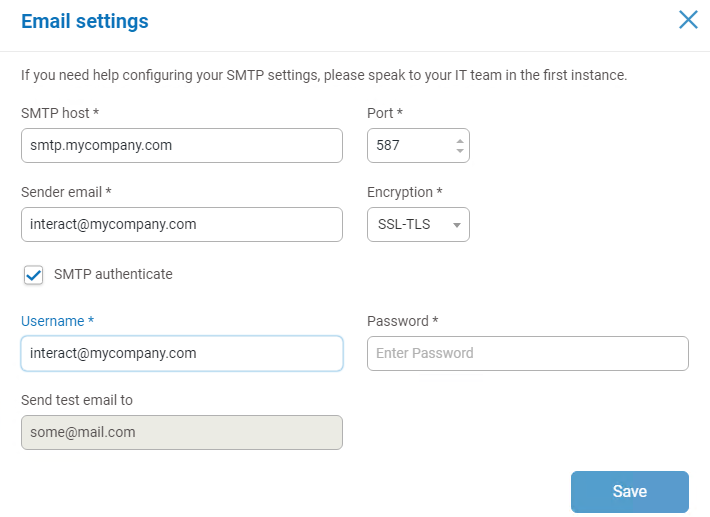
Whenever you save the SMTP settings, a test email is sent to the user you’re logged in as to ensure the set up is correct. If you don’t receive a test email after saving changes, check the details and update accordingly.
Database settings
The database connection option under the administration settings cog allows you to add a connection string to the Blue Prism RPA database and the Hub database.

Add a Blue Prism database connection
To add an additional RPA database connection to the database list, click Add New and provide the necessary configuration parameters. Click Save to add the connection.
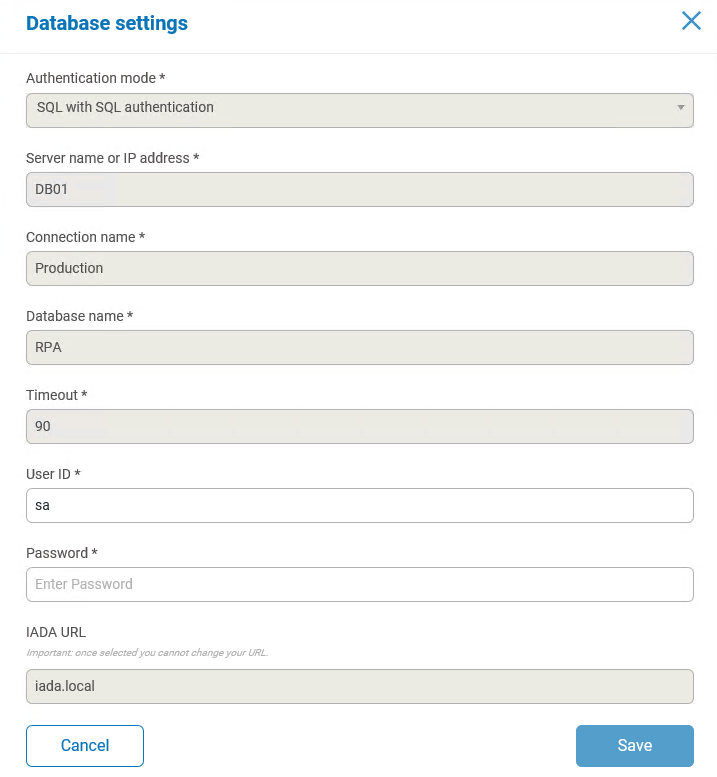
The IADA URL sets up the connection of the IADA web service in order to push items to the RPA database and Blue Prism queue mechanism. It is created during installation and cannot be edited.
Once a new RPA database has been added or changes have been made to an existing RPA database, for example adding a new Digital Worker, then the database settings will need to be “refreshed” to bring details of the digital workforce and queues across. If this is not done, you will not be able to see the Digital Workers or queues in that particular RPA environment.
Plugin management
Plugins are the heart of Hub and are self-contained features that can be individually installed and customized to provide information about your digital workforce. Some plugins also provide the user with development tools to assist in the build of automations.
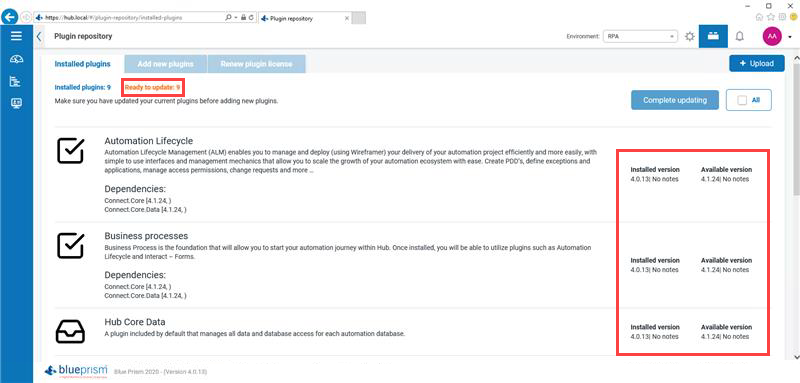
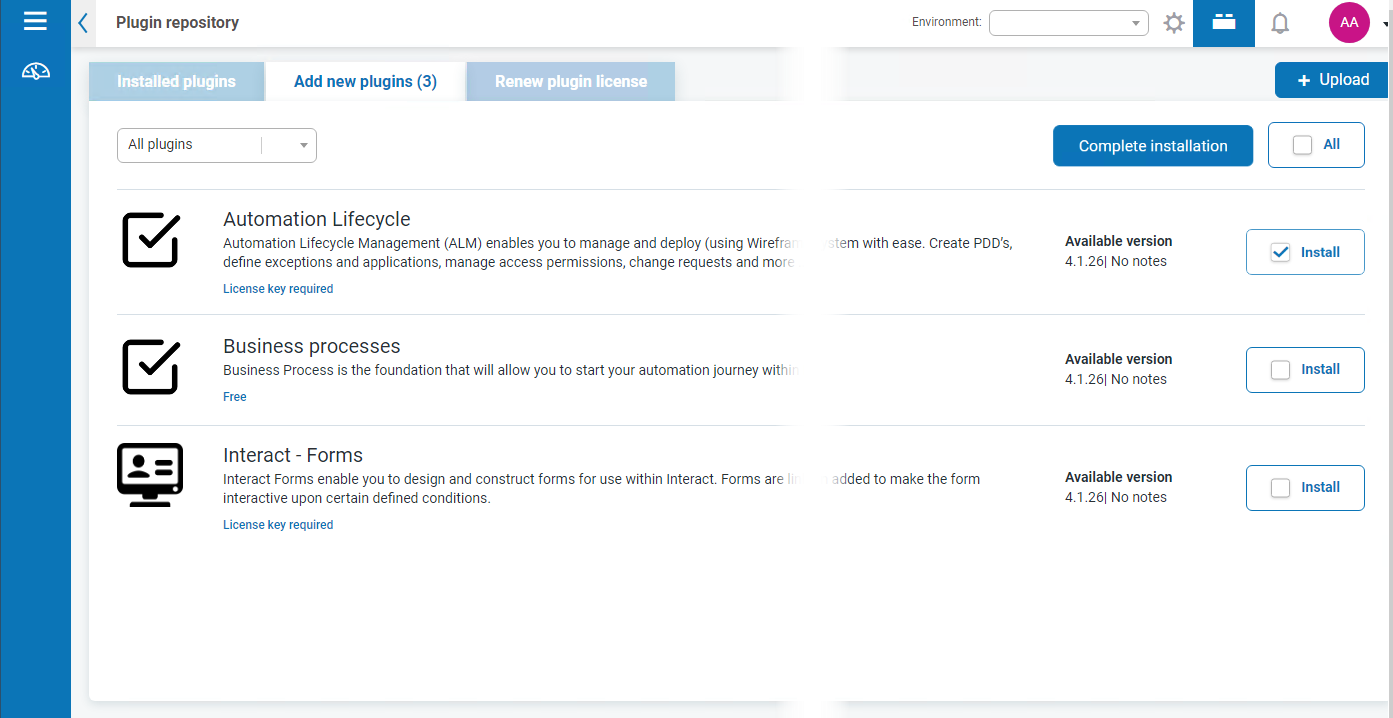
When an administrator selects the plugin repository, details of the installed plugins are displayed, some of these are available by default during the installation process.
For each plugin a description details the functionality and the version number is displayed. If any updates are available for a plugin, this will also show and let you update
This screen is also where you apply updates to plugins. Where an update is available this will also be highlighted, showing details of the new version and giving you the option to update. To update, select the All check box and click Complete updating.
Add a plugin
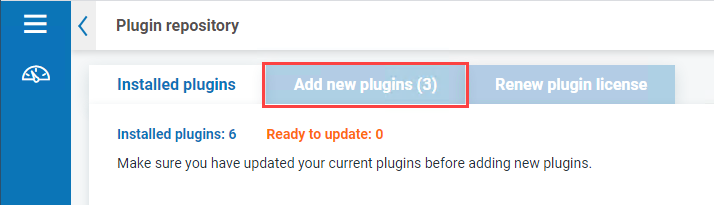
You are notified in the plugin repository if new plugins are available. The Add new plugins tab will show a number in brackets representing how many new plugins are available. Multiple plugins can be installed at any one time and if the plugin is dependent on another plugin which isn’t currently installed, that plugin is automatically installed.
When a plugin is installed or updated, the website will automatically restart. It is therefore essential that the installation of plugins is performed out of hours, during maintenance windows.
To add a plugin:
- In the Installed plugins tab, apply any available updates to your installed plugins. It is essential that all plugins are up-to-date before adding new ones.
-
Click Add New Plugins.

- Select the Install check box for a plugin, or to install all the available plugins, select the All check box.
-
Click Complete installation to update the selected plugins.
The website automatically restarts to complete the installation.
Plugin licensing
Included in the Plugin Repository is a license manager that lets you add and renew the licenses for any licensed plugins.
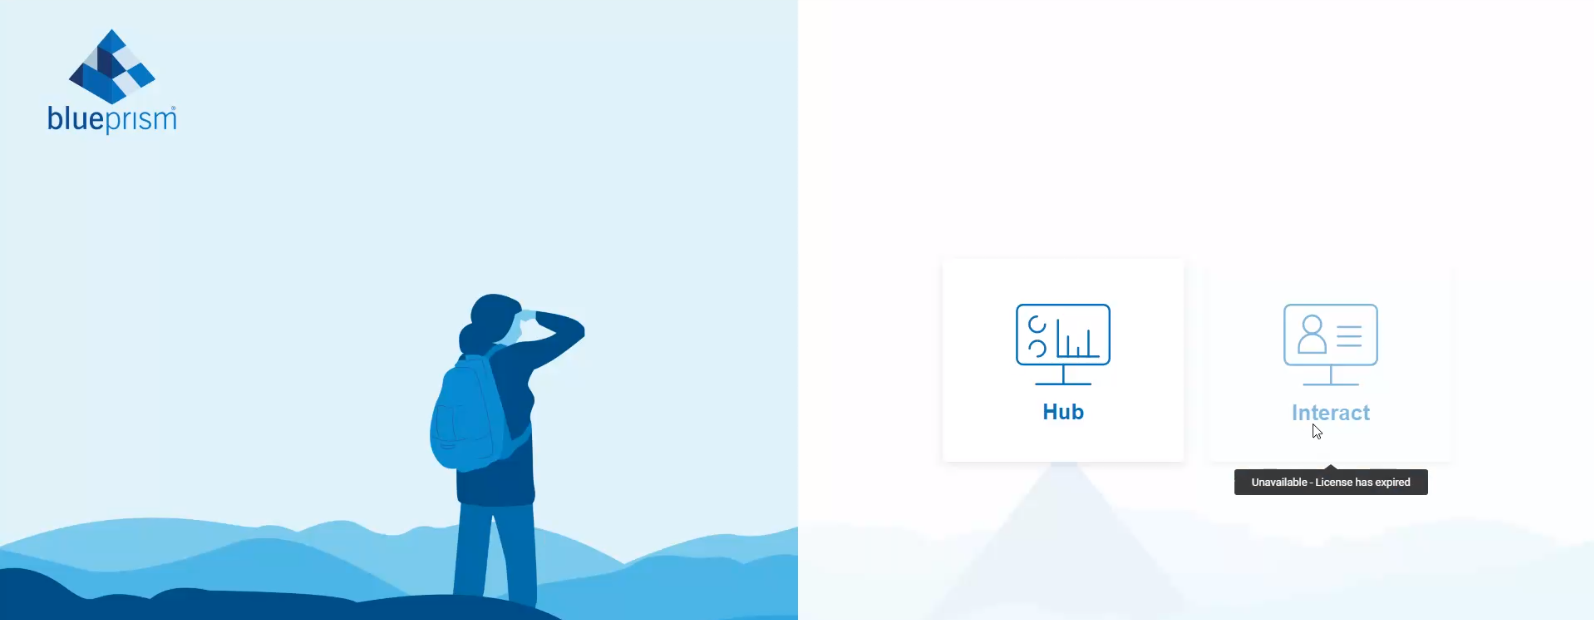
If a license has expired this will be indicated on the IMS login page as illustrated below.
Select the Renew plugin license tab to see a list of installed plugins and their license status.
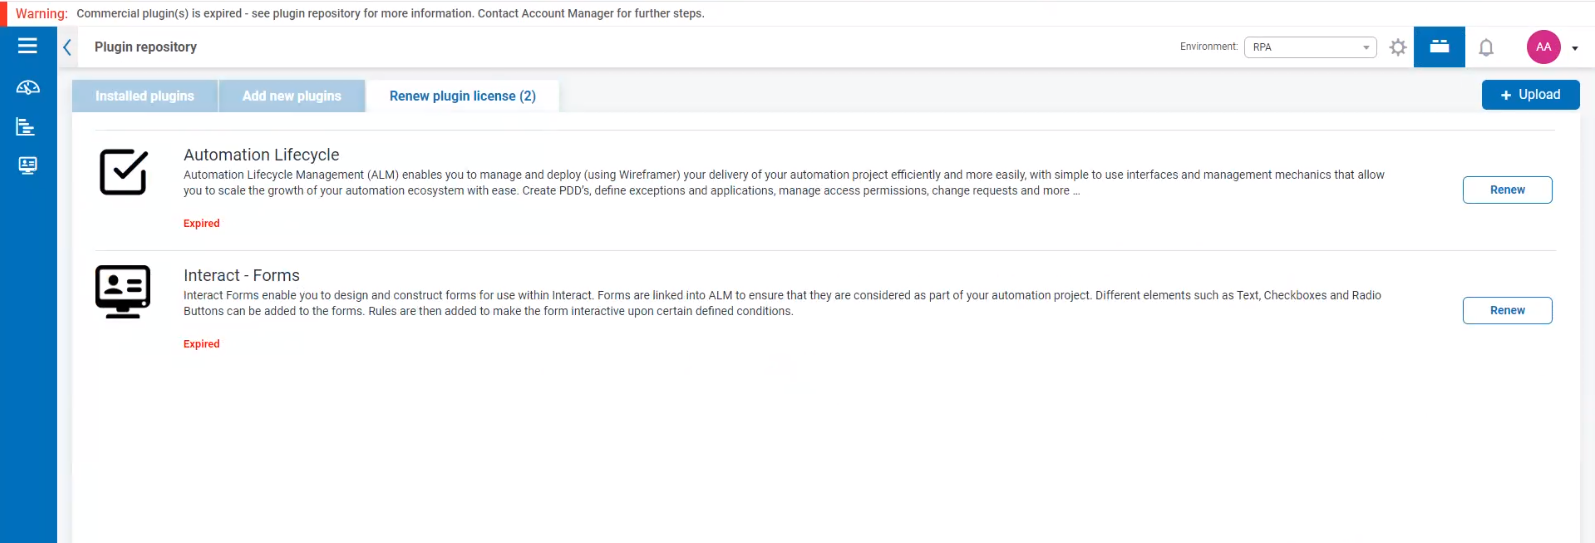
You are warned 14 days before the license is due to expire.
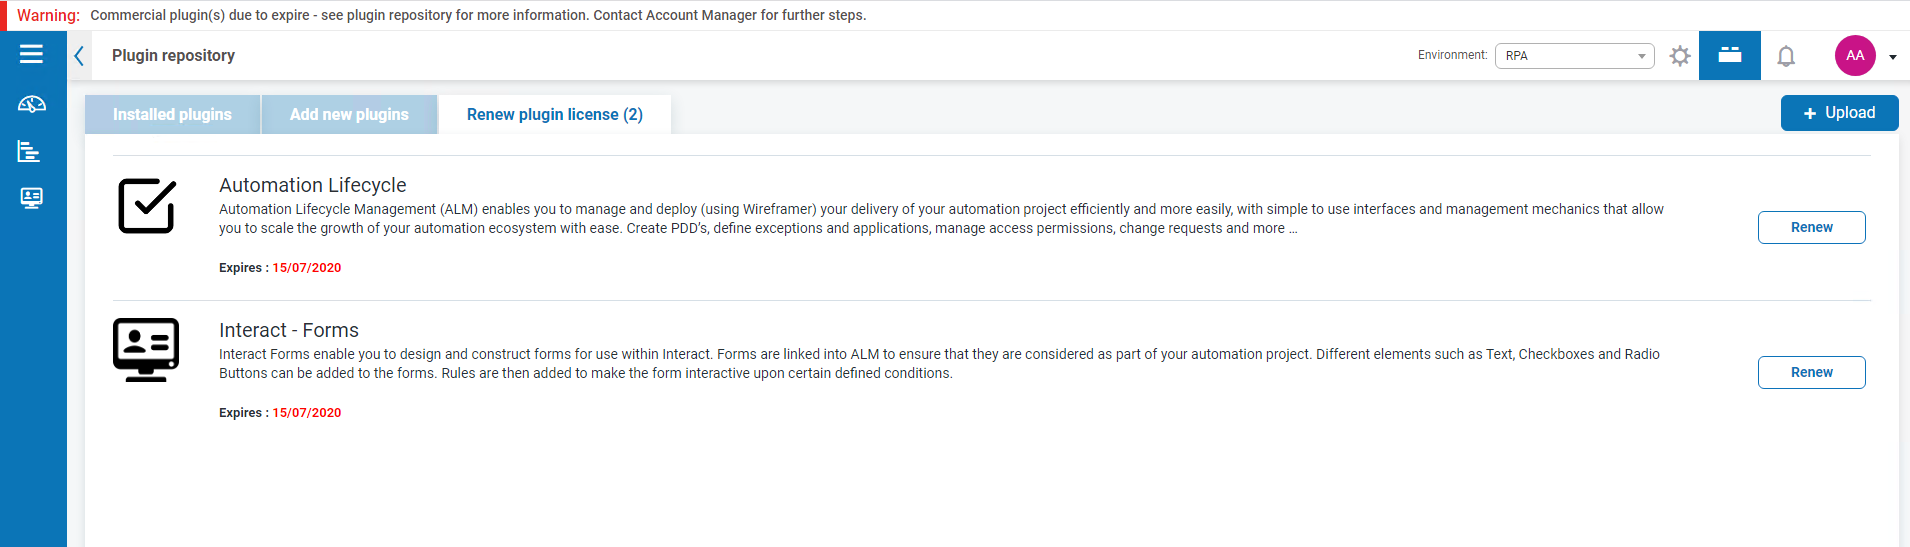
To renew a license, click Renew for the required license to display your licensing options.
Upload a valid license and click Finish to apply.

Roles and user management
User management is split into three areas – roles, users, and registration and is accessed by selecting Users, Roles and Registration Approval from the settings menu. Before you configure users, it is recommended that user roles are configured first. If this is not performed users will be able to log on once their accounts are created but without a role assigned, they will get a limited display and no access to features or functionality.
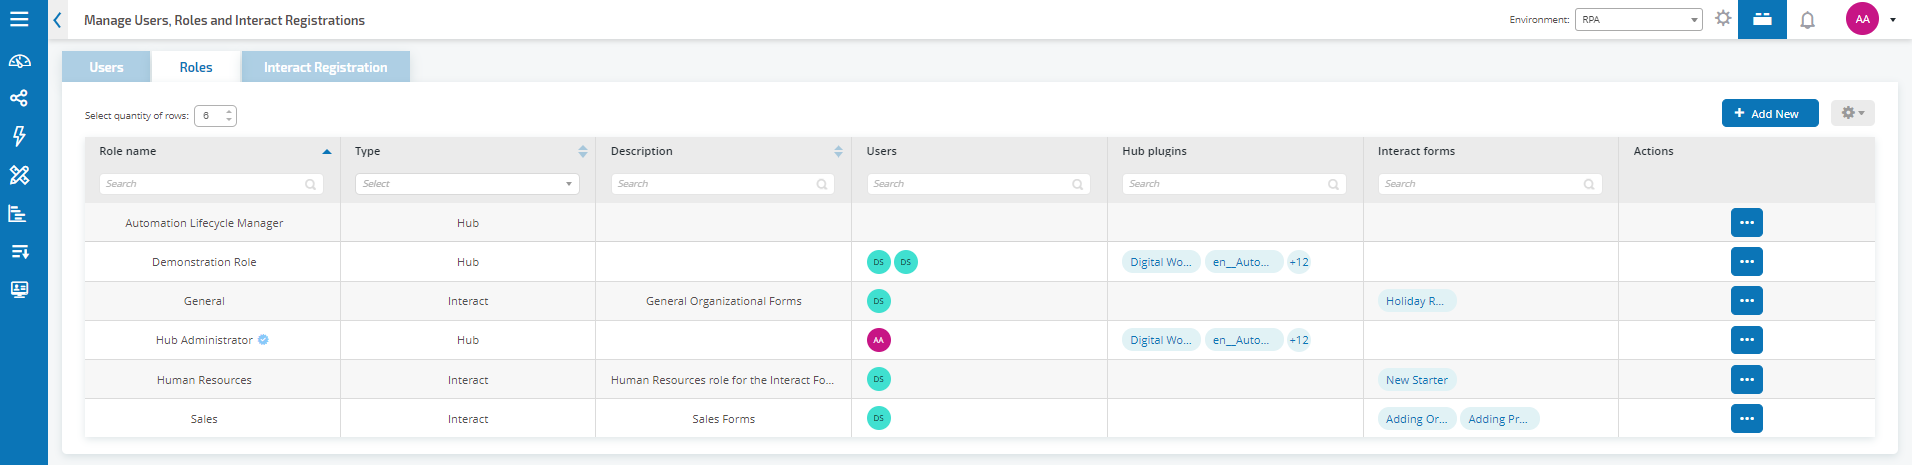
Roles
Role management is performed by an administrator using the Users, Roles and Registration Approval option under the administration settings cog. The default display will show you the current users registered in Hub, their roles, and access rights.
Select the Roles tab to display the current users registered in Hub, their roles, and access rights. If this is the first access only the automatically created administrator role will be listed. This is a locked role and cannot be changed or deleted.
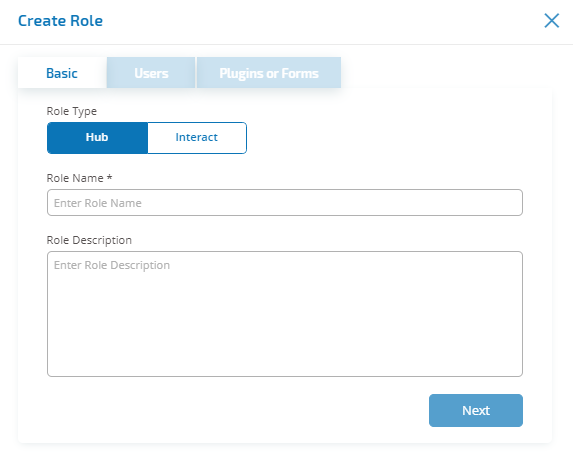
Add a role
- On the Manage Users, Roles and Registrations screen, select the Roles tab.
- Click Add New to display the Create Role dialog.
-
In the Basic tab, enter a name for the role and a suitable description to describe what the user has access to.

- Click Next.
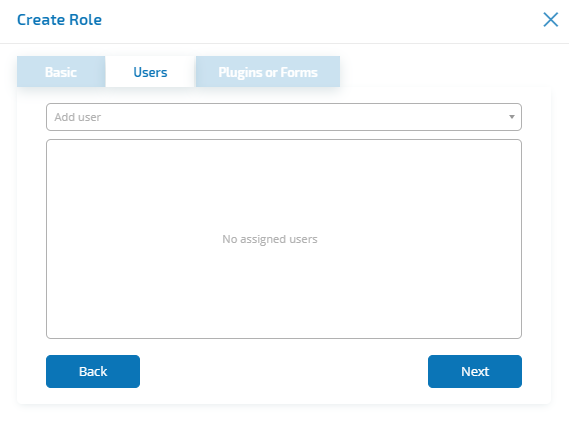
-
In the Users tab, select the users that will be assigned this role.
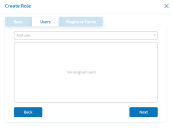
- Click Next.
-
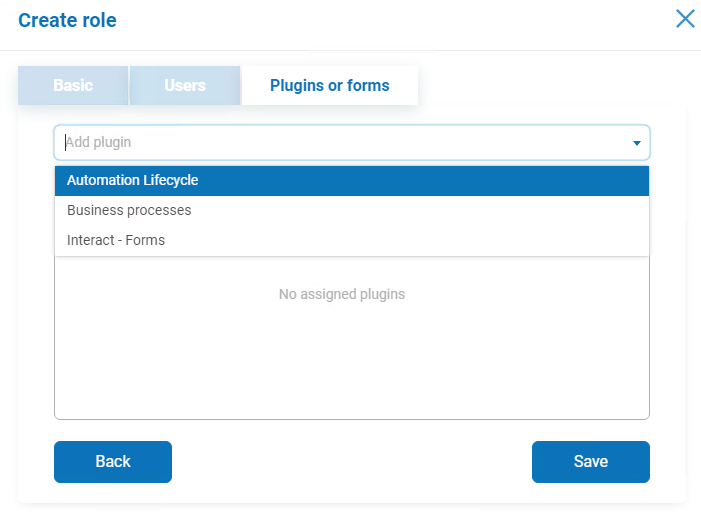
In the Plugins or Forms tab, select the plugins that you want the user role to have access to.

- Click Save to create the role.
Users
Create accounts for your users.
Add a user
- On the Manage Users, Roles and Registrations screen, select the Users tab.
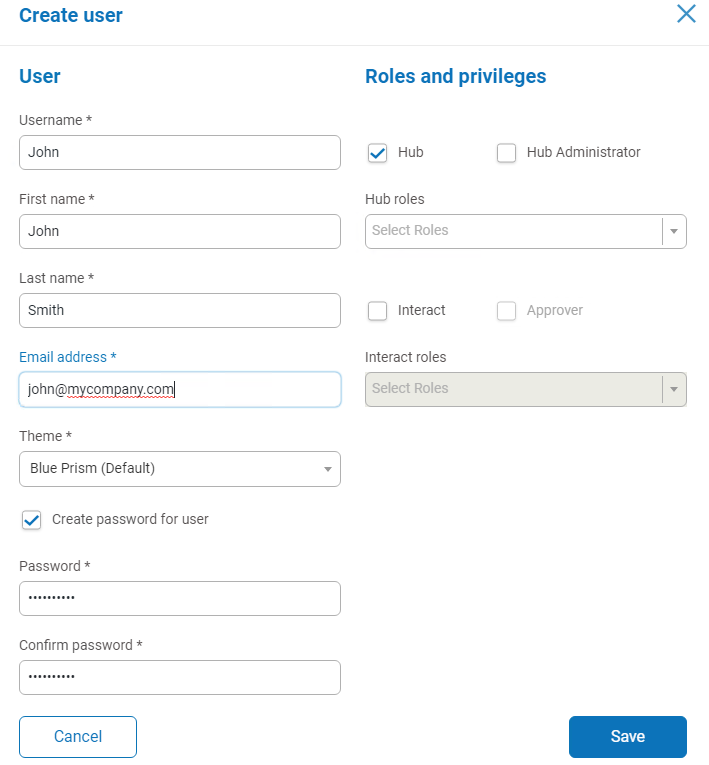
- Click Add New to display the Create user dialog.
- Enter the user's details:
- Username
- First name
- Last name
- Email address
- Theme
- To create a default password for the user, select the Create password for user check box and add a password. If this option is not selected, the user will be prompted to enter a password on log on using a link that is emailed to them when the account is created.
- Configure the roles and privileges for the user:
- Hub – Select this check box for standard hub users.
- Hub Administrator – Select this check box to give the user role administrator permissions.
- Hub roles – Select the Hub roles required for the user. If the role has not yet been created, you can edit the user at a later date to assign new roles. If the user was created without a Hub Role being assigned in the Setup Status column of the User form an exclamation mark will illustrate that the user setup has not been completed. Though the user will be able to log in to Hub, they will not be able to perform any tasks as they will not have access to any plugins.
- Interact – Enables users to be assigned Interact Forms. See the Interact user guide for more information.
- Approver – Select this check box to give the user role approval rights for Interact.
- Interact roles – Select the Interact roles required for the user. If the role has not yet been created, you can edit the user at a later date to assign new roles.
- Click Save to create the user.
Registration
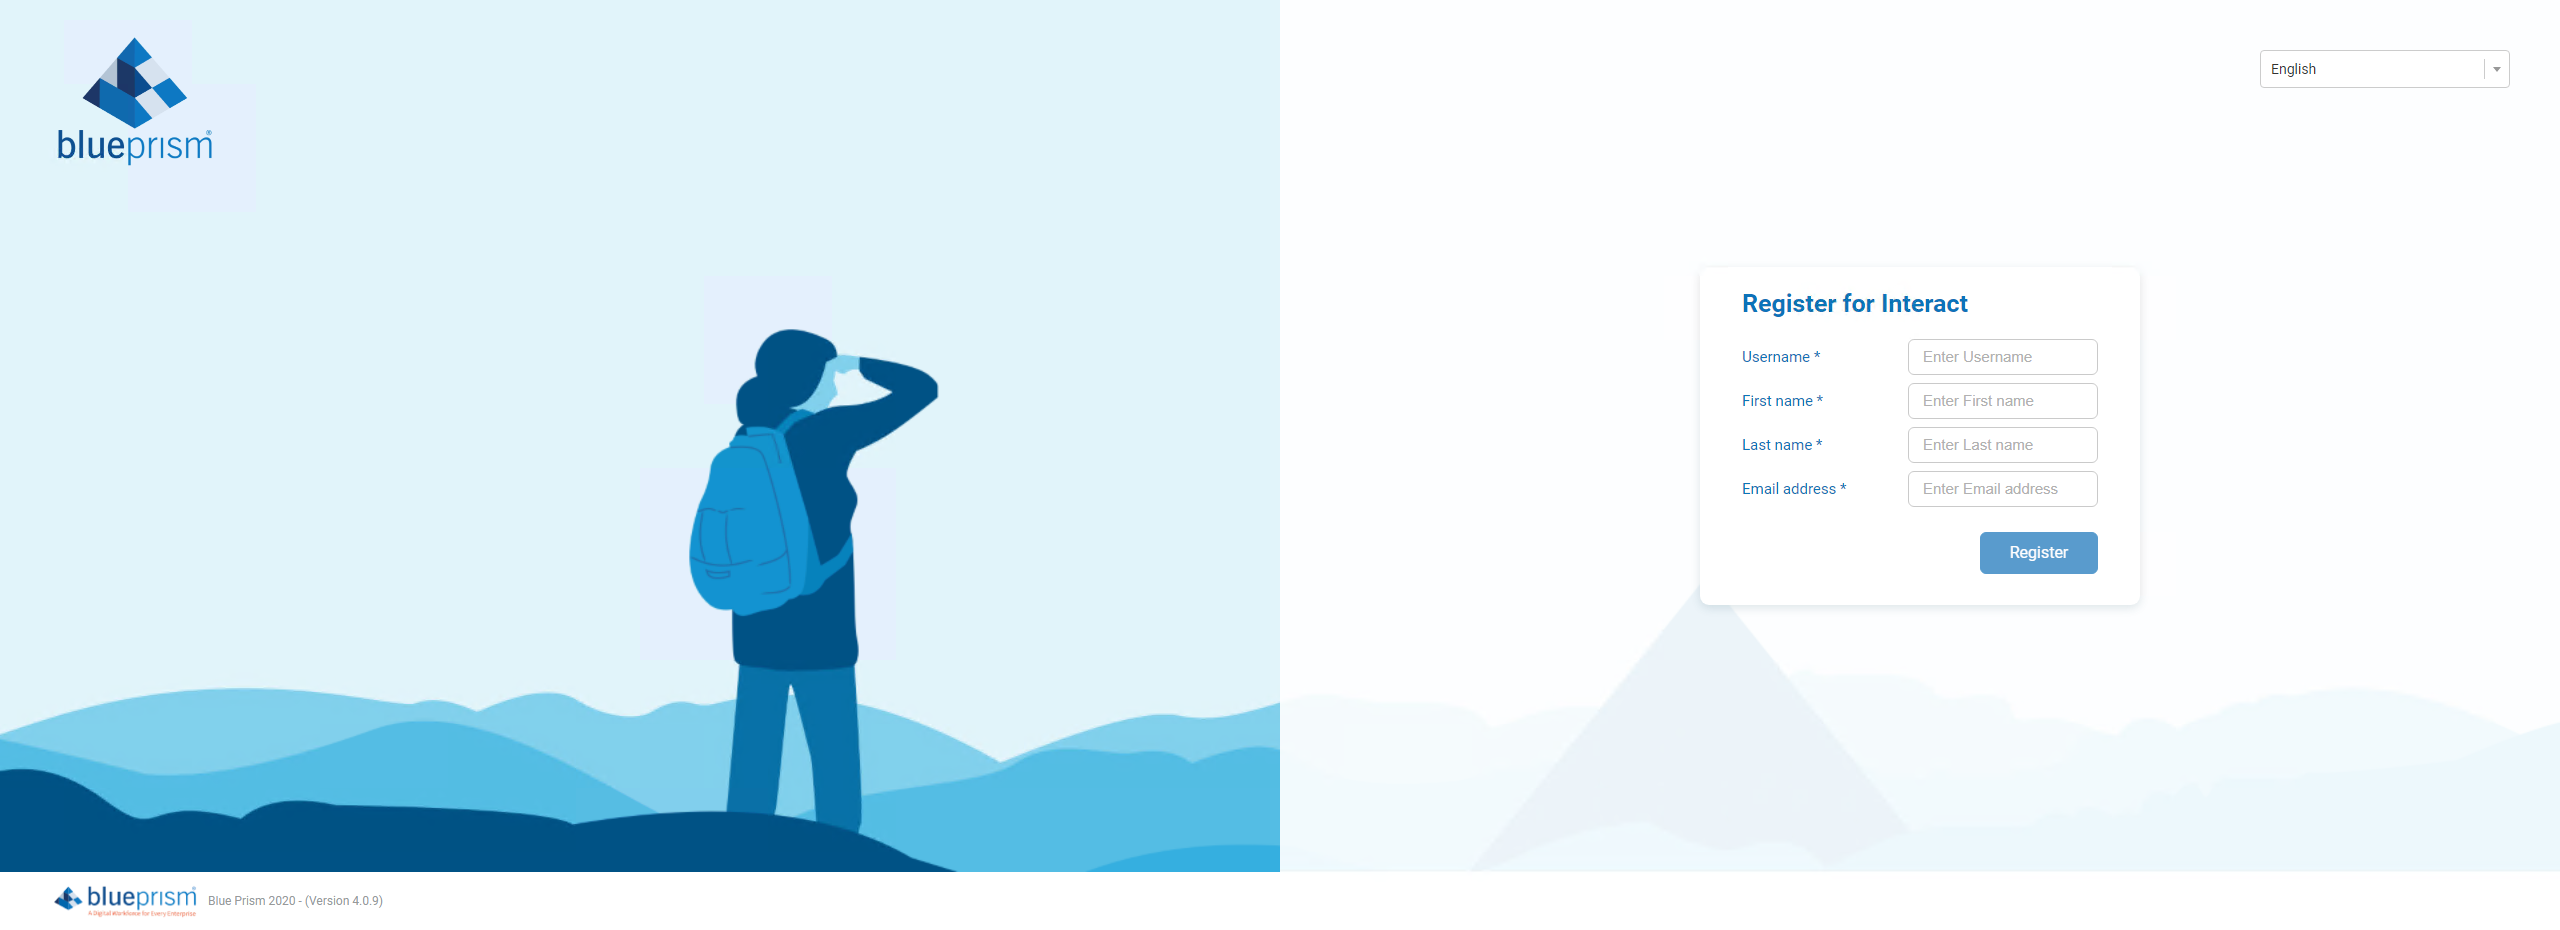
Users can request an Interact user account from the registration page: https://{hostname}/#/user-registration
Submitted registration requests are shown in the Interact Registration tab where administrators can approve or deny requests. If accepted the user will receive an email providing a one time use link to complete registration by entering a password and the user will then be able to access Interact.
The user will need to be added to a Role before they will be able to access any Forms.

Authentication settings
Authentication Settings allows the configuration of a Lightweight Directory Access Protocol (LDAP) connection to an organization’s Active Directory environment.
-
From the setting cog, click New Connection.
The LDAP Settings dialog displays.
- Complete the Configuration fields:
- Connection Name – A name that you want the connection to be known as;
- Domain – The name of domain you are connecting to, for example “bpc”.
- LDAP Server – The hostname of the LDAP server, for example blueprism-srv1.local.
- Port Number – The Port Number it operates on, by default this is Port 389.
- Base DN – The starting point within the Active Directory where the system begins to look for users, for example dc=blueprism, dc=local.
- Complete the Query Bind fields:
- Time Out – The timeout period in seconds that the system will wait to get a response from the Active Directory server.
- Query Bind Username – An Active Directory administrator that has access to the organization’s LDAP system.
- Query Bind Password – The password for the Active Directory administrator.
-
Complete the Attributes fields. The purpose of this section it to map the Active Directory attributes to the Hub fields. The text entered in these fields must match named attributes within the user profile in Active Directory. You can use the Active Directory Users and Computers (ADUC) tool to find the user attributes by selecting a user and then clicking the Attribute Editor tab to view the mapping of attributes to values.
- Username – The Active Directory attribute name for the username, for example, ‘SAMAccountName’.
- First Name – The Active Directory attribute name for the user's first name, for example, ‘givenname’.
- Last Name – The Active Directory attribute name for the user's last name, for example, ‘sn’.
- E-mail – The Active Directory attribute name for the user's email, for example, ‘mail’.
-
To test that everything is set up correctly, enter the username in Test Username and click Lookup User. The text entered in the Test Username field must match the text format of the Active Directory Attribute. For example, if the username is set to:
- ‘SAMAccountName’, then the test data is likely to be in the format domain\user.
- ‘name’, then the test data is likely to be in the format user.
The associated information will be retrieved and populated in the corresponding Attributes fields.
- Click Save.
- You are then prompted to import users from the Active Directory or you can choose to do synchronize at a later stage.
- When synchronizing, a list of users to be imported displays.
-
Select a user to import and assign the appropriate Hub roles and any Interact responsibilities.
If you configure a user to have a Hub Administrator role, they will have access to all the plugins and features of Hub, including the ability to create new Database and LDAP connections and other security features so it is important to assign this role with care.
- Repeat for all required users.

Synchronizing Active Directory users
When additional users are added to the Active Directory, those users must be synchronized with Hub. From the Authentication Settings screen, using the three dots (Meatball menu) and select the Re-Sync option corresponding to the LDAP connection that you wish to use, you will be allowed to add any new users to the Hub user base.
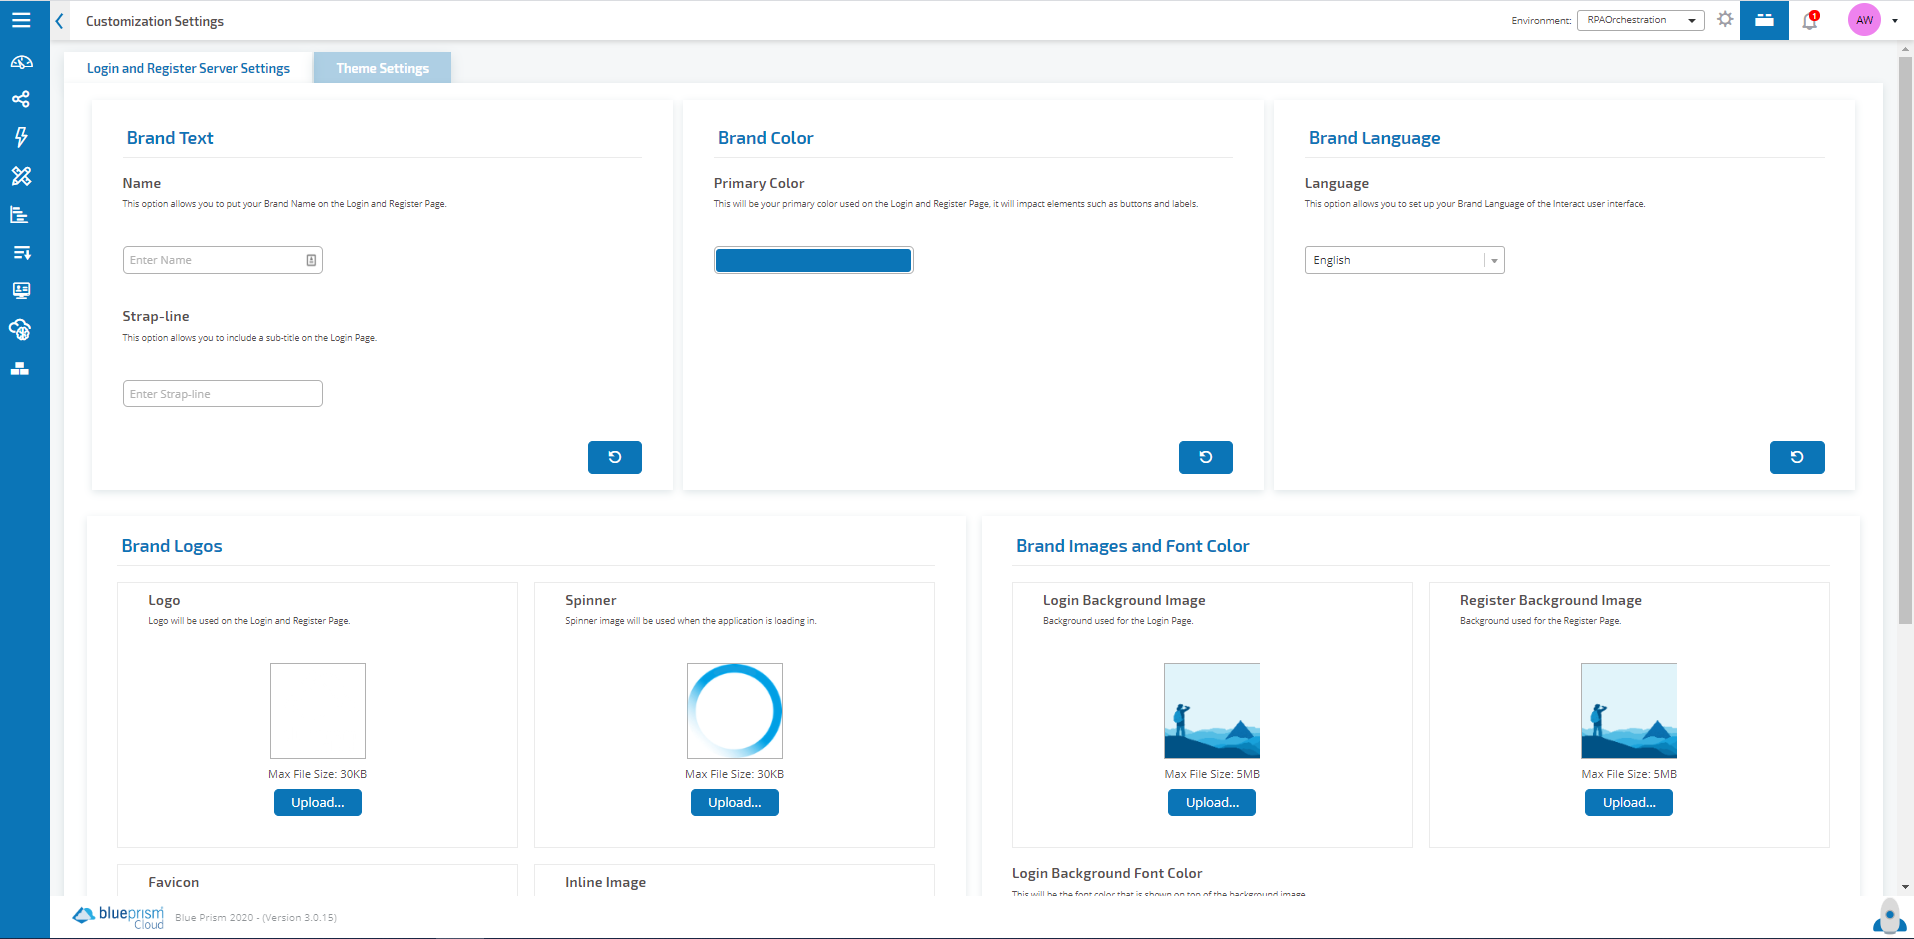
Customization settings
Customization settings, accessed from the administrator setting cog, allow you to change the appearance of Hub.
Login and register server settings
Administrators can change the following settings:
- Brand Text Name
- Strap-line
- Login Background Font Color
- Brand Logo
- Spinner logo
- Favicon
- Inline Image
- Login Background Image
- Brand Language:
- English
- French
- German
- Japanese
- Russian
- Spanish (Latin American)
- Simplified Chinese
- Portuguese (Brazilian)
User can also set their own language preference through their profile settings or through the Identity Management System (IMS) server.
Once the changes have been made, click Apply to save the changes.
Theme settings
Themes allow you to customize the Hub and Interact user interface, adding brand logo’s, changing the colors in the front page, and selecting the language applied to the user interface. Themes can be customized for different users, providing a different look and feel depending on who logs in.
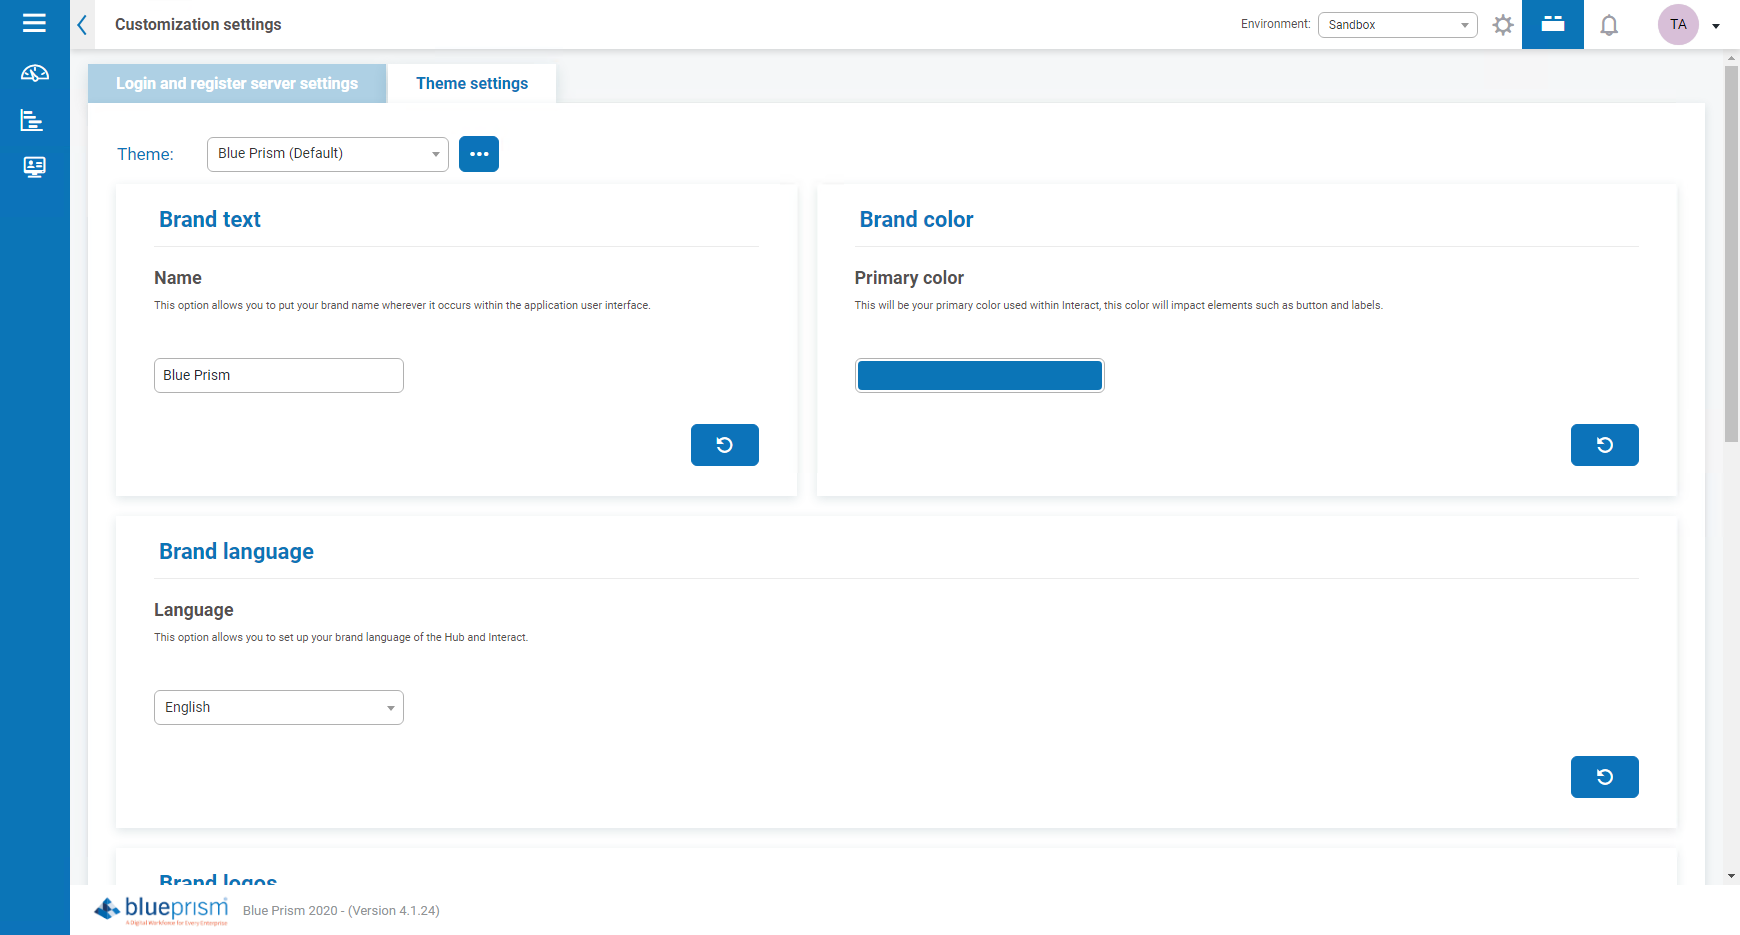
The default theme is automatically selected when creating a user. However, any of the available themes can be applied for a user by selecting one in the Theme field when creating or editing users.
