 Docs
DocsData verification
The Data Verification page enables you to load batches of documents for operator verification and input. Once a batch has been loaded, you can teach Decipher IDP the connections between the data and the document form definition. This enables the system to learn and therefore reduce the need for operator input for subsequent batches using the same document form definition.
Click the Data Verification tab to open the Data Verification screen.

Load batch
To load a batch of documents that has already been pushed to Decipher IDP via a SS&C | Blue Prism process:
-
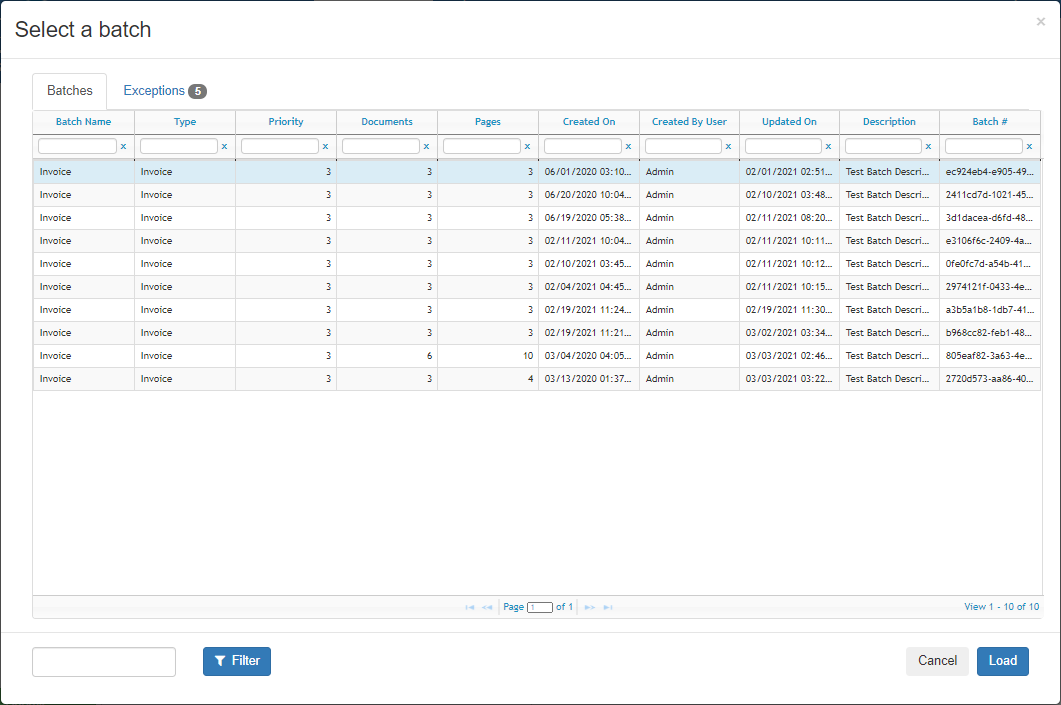
Click Load Batch.
The Select a batch dialog displays.
Alt + E to automatically load the batch with the highest priority.
When processing a large number of batches, document and page count data will only be shown for the first 50 batches pushed to Decipher IDP.
-
Select the batch you want to load and click Load.
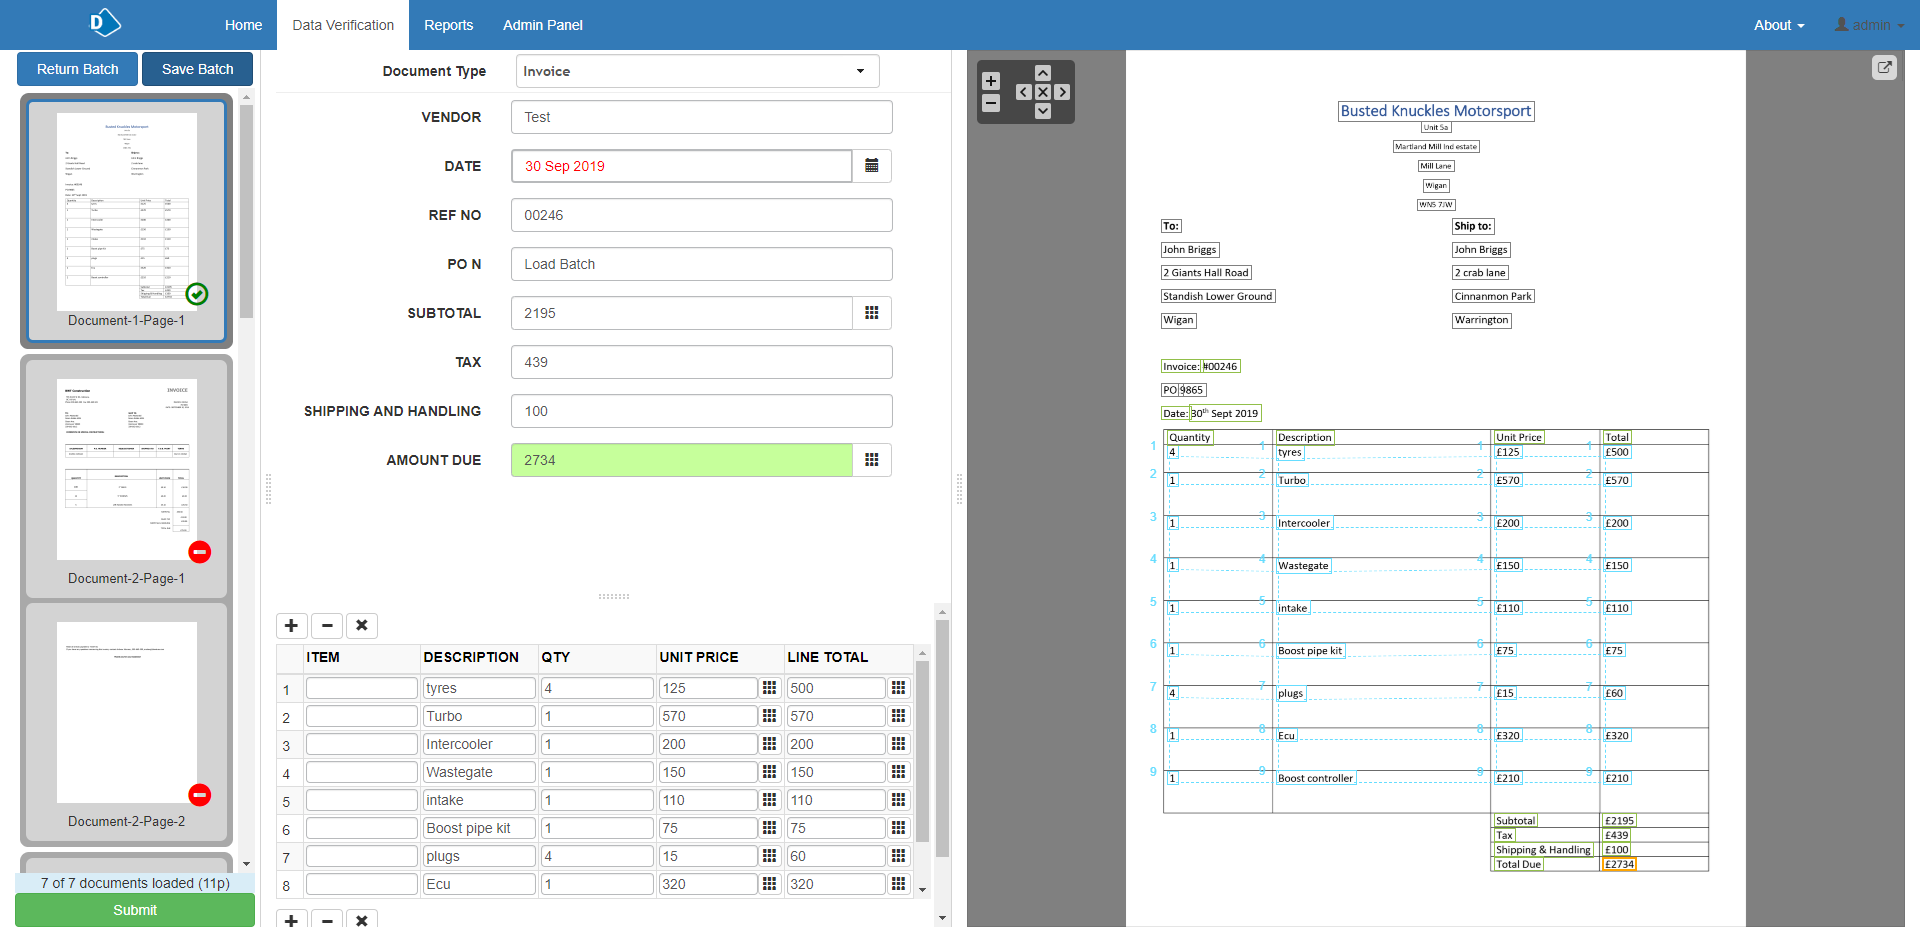
When the batch is successfully loaded, the Data Verification page splits into the following three parts:
- Thumbnails of all documents in the batch – Each thumbnail displays a red warning or a green tick to indicate whether it requires verification, or has been successfully completed.
-
For details of the thumbnail shortcut menu options, see Data verification thumbnail shortcut menu options.
- Document form definition – The template associated with the loaded batch type. The page displays the fields and tables that have been defined for the extracted data in the DFD.
-
Document requiring verification – The document from which the data is being extracted. The separate regions on the document are highlighted and can be associated with the fields on the document form definition.
Once a batch is loaded, you can use the
 icon to detach the document view from the main interface for use on a second monitor.

- To complete a field and associate it with a region of the document, click the field in the template and then click the associated region in the document.
- Associate each field in the template with a region in the document until each field is complete and assigned, and a green tick displays on the thumbnail for the document.
- Once you have done this for all the documents in the batch you can:
The field will update with the content of the region and the document form definition file will learn to associate the field with that region for subsequent documents.
Pressing Alt + X on the keyboard temporarily hides all existing regions. You can then add a new region in an uncluttered space.
- Click Submit to submit the completed batch.
- Click Save Batch to save your changes, but not submit the batch.
- If there are any outstanding validation errors for this batch, the Validation errors window displays when you click Submit.
Load an exceptioned batch
In Data Verification > Load Batch, the Exceptions tab on the Select a batch screen lists the batches of documents that have been marked as an exception during data verification, and enables users to further process exceptioned batches.
The Exceptions tab only displays for users with the Resolve Exceptions user permission.
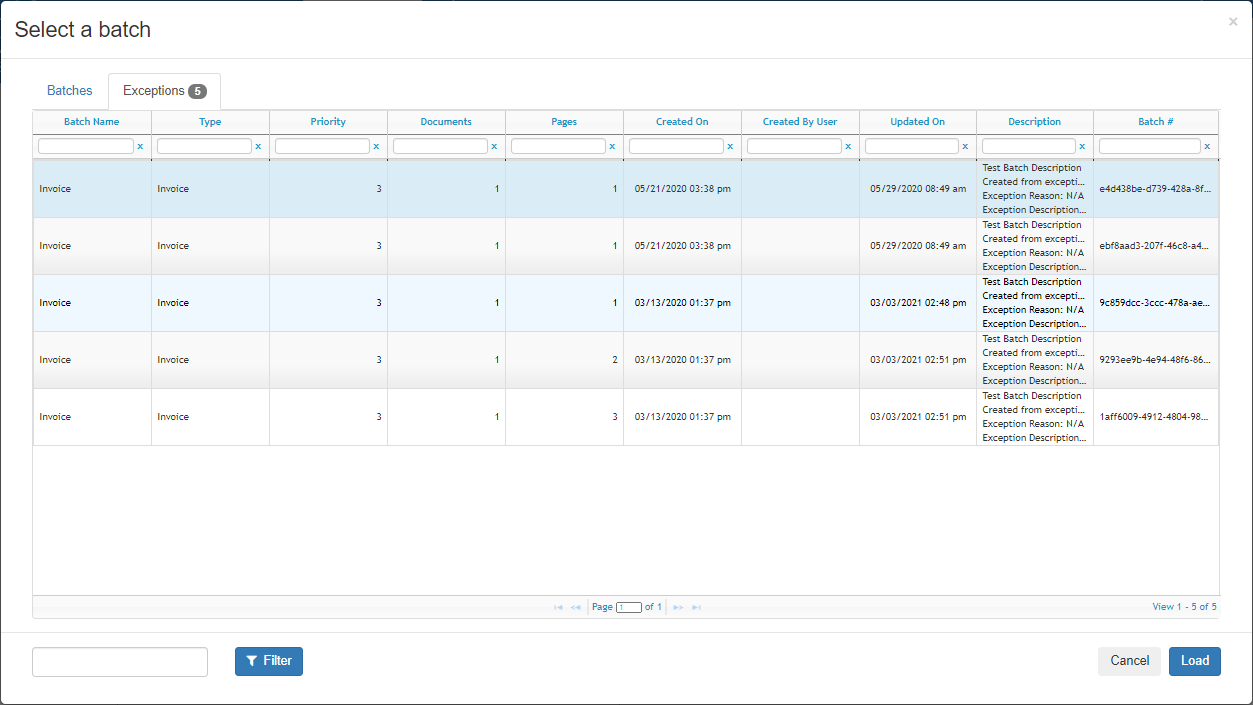
From the Exceptions tab, you can click Load, or double-click the batch to load it into Data Verification, where you can:
-
Add an additional note to the batch description by marking the batch as an exception again.
-
Force validate any invalid field and submit the batch.
-
Delete the batch.
Delete a batch
You can delete a batch from the Select a batch screen using the Delete button. You cannot retrieve a deleted batch.
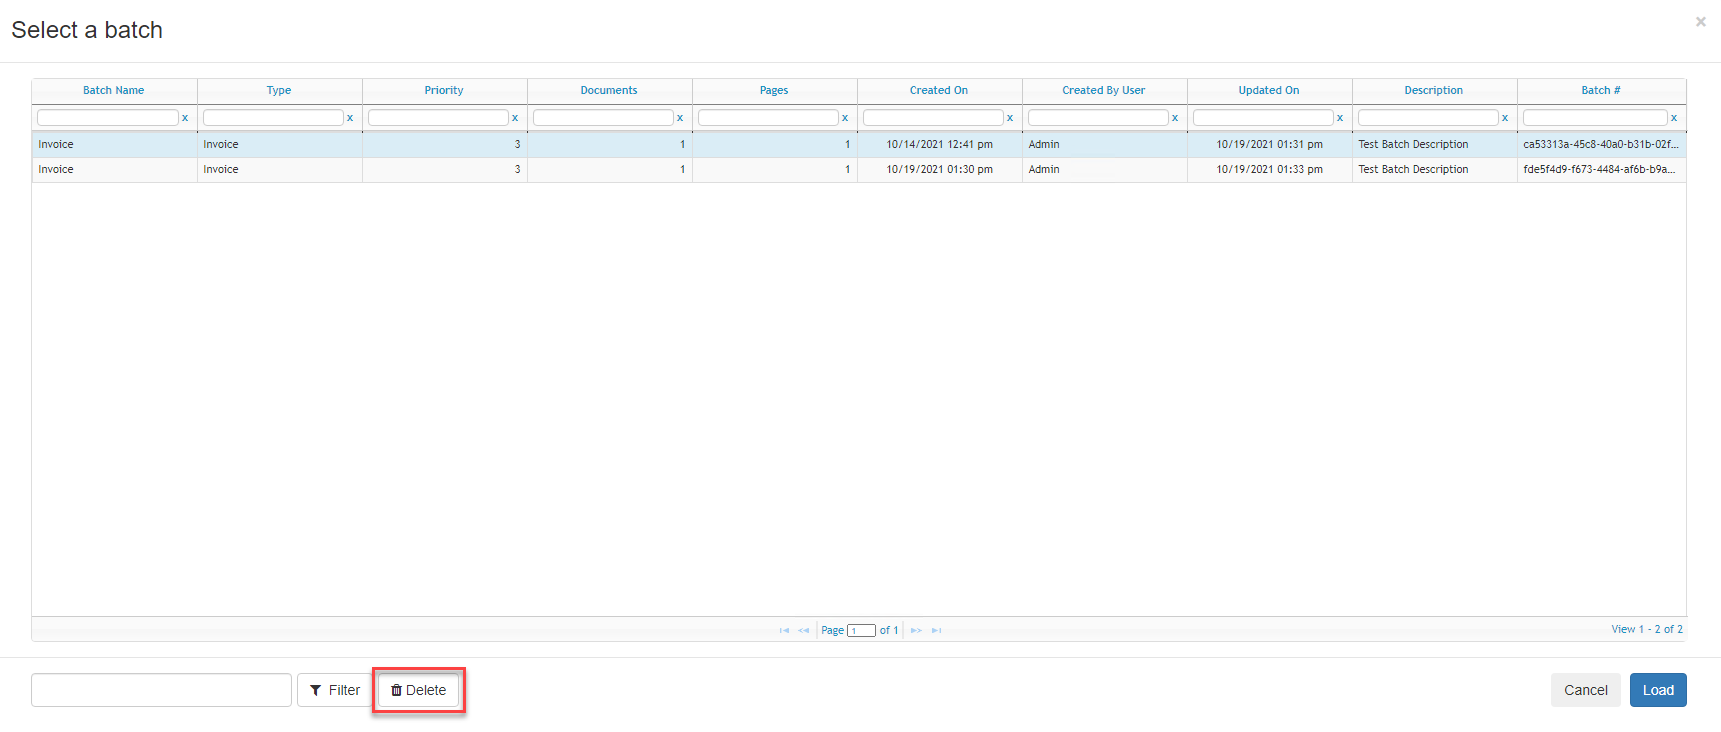
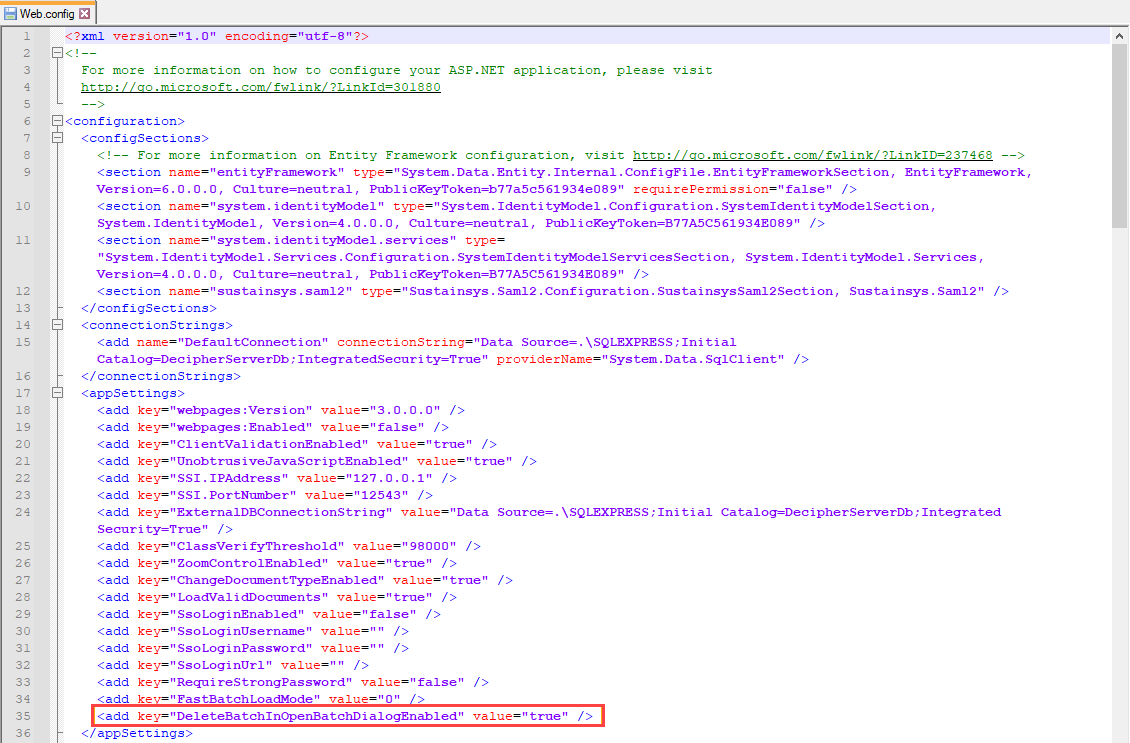
This option is disabled by default, and must be enabled by editing a parameter in the Web.config file:
-
Navigate to the Web.config file. The default location is: C:\Program Files (x86)\Blue Prism\Decipher Web\Web.config.
-
Open the file in a text editor.
-
In the appSettings section, locate DeleteBatchInOpenBatchDialogEnabled and set to true.
-
Save the changes to the Web.config file.

For more information, see Configuration file parameters.
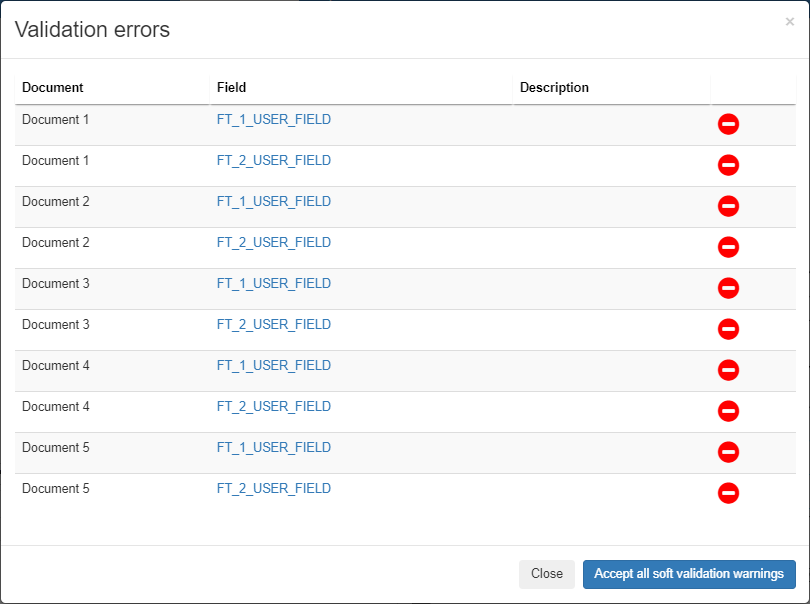
Validation errors
When you click Submit during data verification, the Validation errors dialog displays if there are any outstanding validation errors for the current batch.
To address a validation issue, click a link in the Field column to open the document with that field in focus, then map the correct text to the DFD. Alternatively, you can click Accept all soft validation warnings to continue to submit the batch without resolving the validation warnings.
Skip data verification for high accuracy documents
To bypass the data verification stage for batches of documents with a high level of accuracy:
-
Ensure Data verify is enabled on the Configuration screen.

-
In Admin Panel > Batch Types, select Separate documents with high confidence types in new batch before data verification.
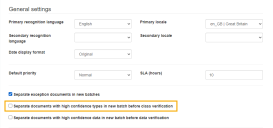
- Click the Save batch type to apply the changes.


