 Docs
DocsExceptions
Watch a video about handling exceptions.
In
- Not interrupt the process flow for normal documents.
- To keep track of all documents, including those that could not be processed.
Common examples of problem documents are:
- Password protected PDF documents.
- Documents loaded into the system in error.
- Unnecessary pages - you can move the pages into a separate document and set that document as an exception. These documents can be deleted or reprocessed later via Admin Panel > Batches.
Documents with exception state can be automatically separated into new batches so the workflow can continue normally. Automated batch separation for exception documents can be set in Admin Panel > Batch types > General settings > Separate exception documents in new batches.
Generating exceptions
Exceptions can be automatically generated or applied manually.
Automatically generated exceptions
If a system component, such as input, image processing, or classification is unable to process a batch, the batch is automatically put into an exception state.
Manually marked exceptions
To manually mark a document as an exception during data verification, right-click the document’s thumbnail and select Set as an Exception.
- Exception documents are not exported.
- Exception documents can be automatically separated in their own batches. To manually mark an entire batch as an Exception click Session > Set batch as an exception.
Documents marked as exceptions are visually removed from the batch.
Exception reasons
When setting a document or a batch as an exception you must provide an exception reason and an exception description.
You can predefine exception reasons in the Document Type settings and in the Batch Type settings.
Predefined exception reasons
You can predefine exception reasons at batch type level via Admin Panel > Batch Types> Exception reasons.
You can set any Exception documents to be automatically separated into their own batches for later inspection or reprocessing. In that case the newly created batch is also set as an Exception batch.
Resolving exceptions
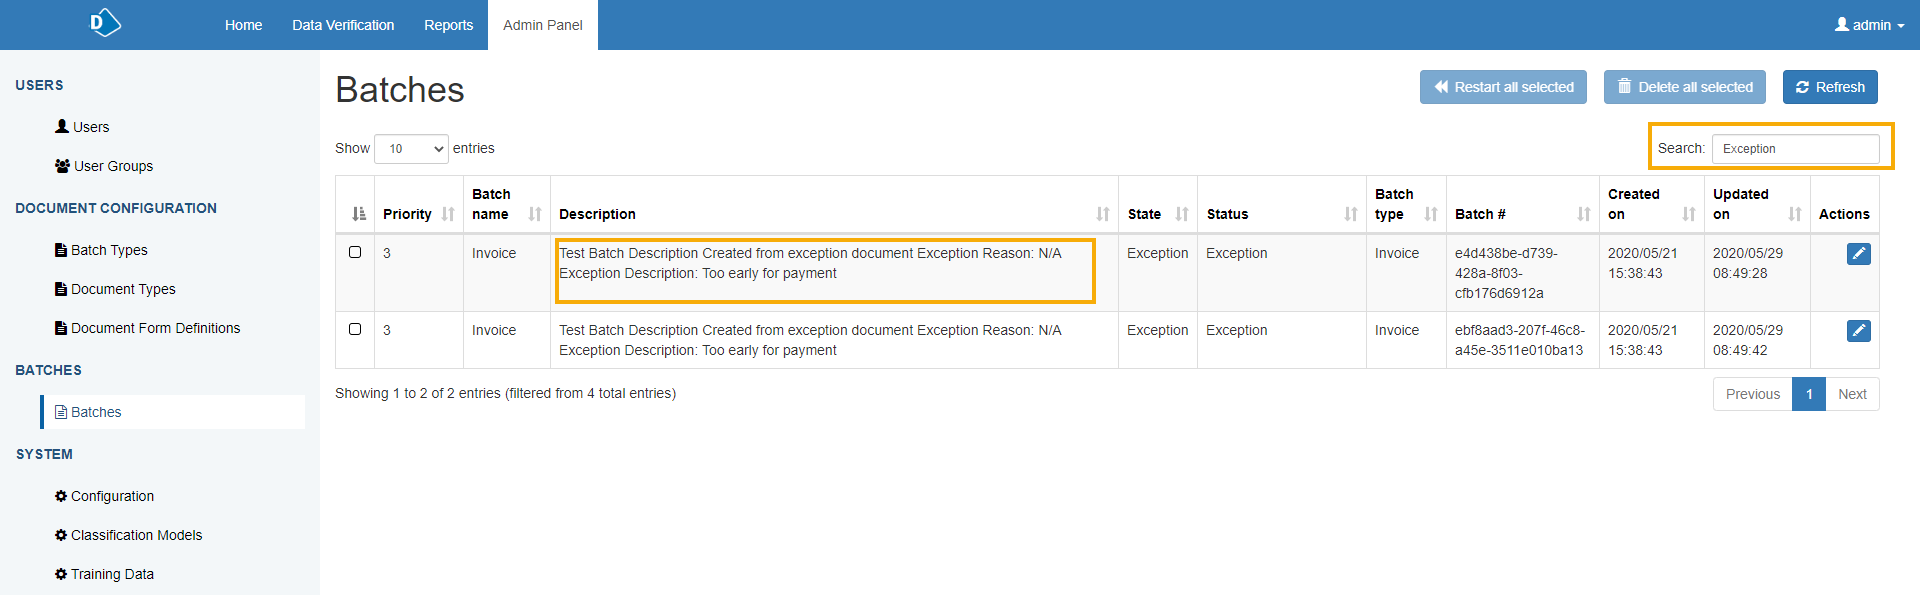
To view exceptioned documents and batches, go to Admin Panel > Batches and click Edit for the batch you want to resolve. (You can type Exception in the filter box to only show Exception batches.)
To reprocess the batch set Batch state to Open. This will return the batch to its previous state (ready for verify, ready for capture, etc.) and will mark any exception documents. Or, click Delete to delete the batch.
To unmark an exception document, click the Edit button for the batch you want to amend. The Edit Batch dialog displays.
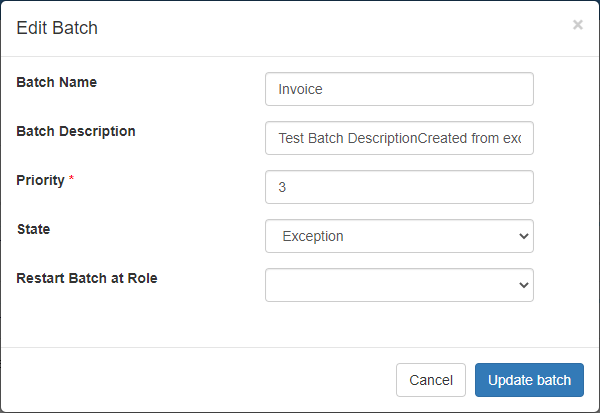
Amend the State of the batch and select OCR, Capture or Verify from the Restart Batch at Role drop-down to reprocess the batch.
Load an exceptioned batch
In Data Verification > Load Batch, the Exceptions tab on the Select a batch screen lists the batches of documents that have been marked as an exception during data verification, and enables users to further process exceptioned batches.
The Exceptions tab only displays for users with the Resolve Exceptions user permission.
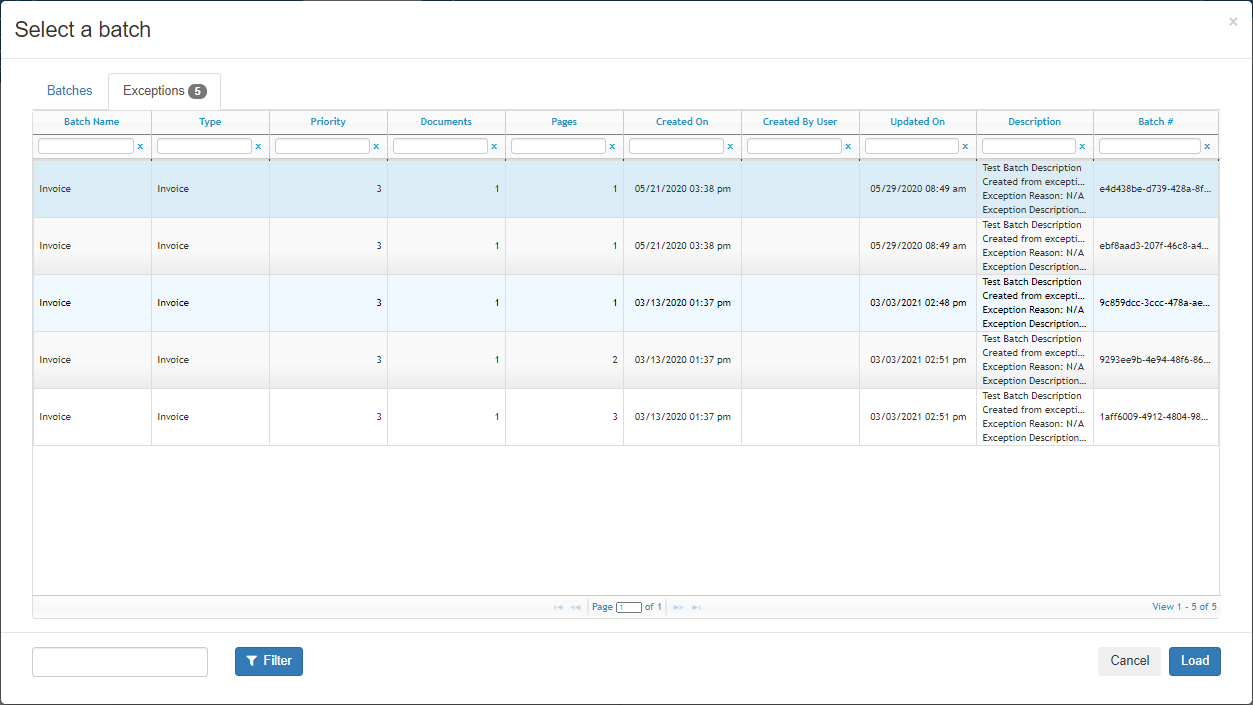
From the Exceptions tab, you can click Load, or double-click the batch to load it into Data Verification, where you can:
-
Add an additional note to the batch description by marking the batch as an exception again.
-
Force validate any invalid field and submit the batch.
-
Delete the batch.
Video
This video explains the best ways to handle document exceptions.
