 Docs
DocsView your process
When a
Process map
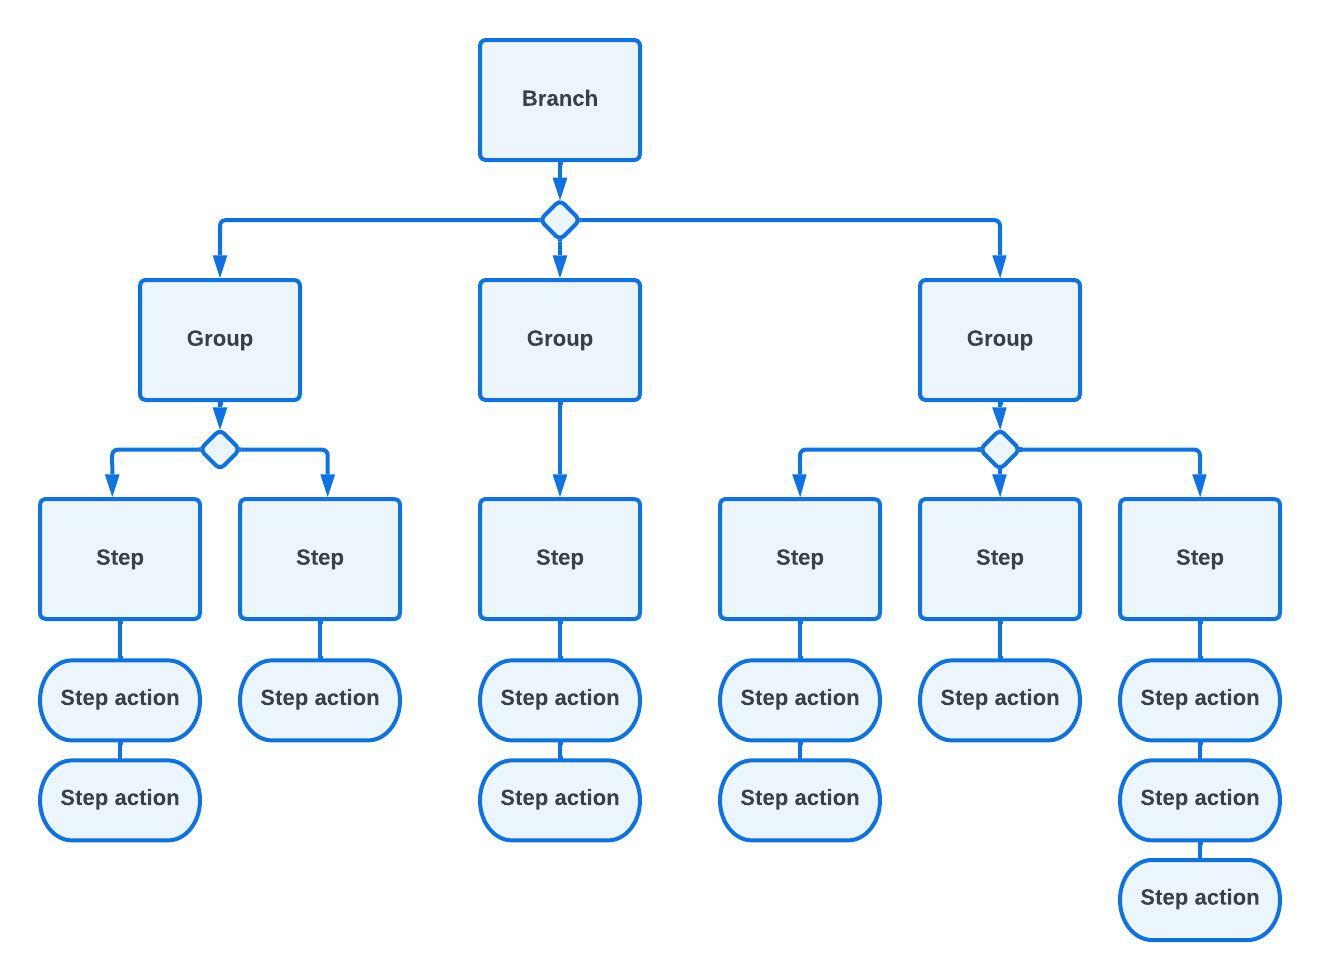
While you are recording your process, Capture automatically creates a process map that flows between the interactions you make with different applications. These interactions are organized into branches that contain groups. Groups contain steps, and steps contain step actions.
The flowchart below shows the hierarchy of elements within a Capture process map.
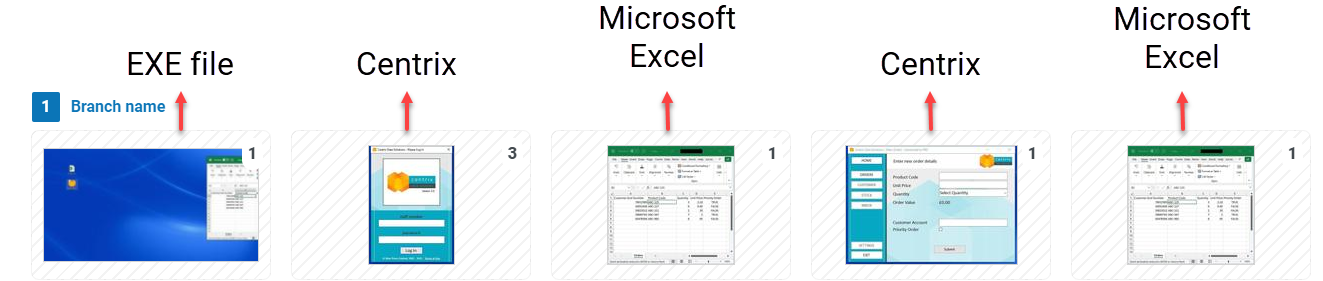
Branches
While you are recording your process, Capture automatically creates a new group in the process branch whenever you switch from one application to another. For more information, see Branches.
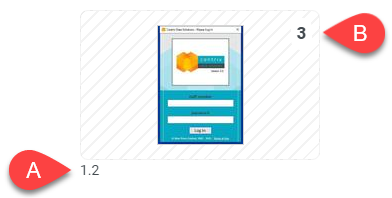
Groups
A single image in the process branch represents the interactions you made with a single application before you switched to another application. This is a group.
|
Label |
Description |
|---|---|
|
A |
Group number label (the order it is placed in the branch). |
|
B |
A label for the number of steps within the group (the number of different screens that you interacted with during this interaction with the application). |
For information about editing step groups, see Edit groups.
Steps
Every time you interact with a different screen within a single application, Capture takes a new screenshot and gathers information for that specific interaction. These interactions are called steps. They are not visible on the process map.
Click a step overview to open the step editor. Here you can view and edit each step contained in the group.
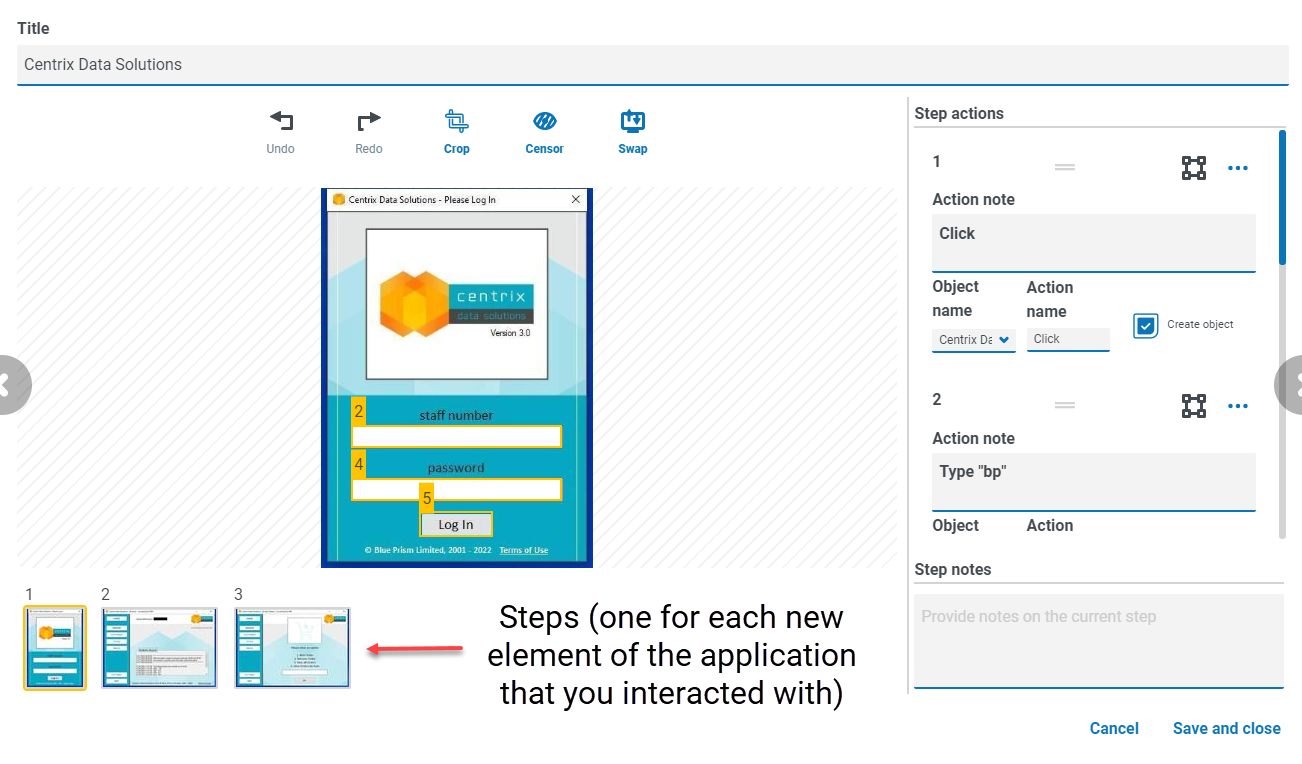
Step actions
Each step represents the interactions you made with a single screen in an application. You may have completed more than one action during this interaction, such as typing into a text field and then clicking a button on the same screen. For more information, see Edit step actions.
Depending on your settings, step action information can be automatically populated when you record your process, and the information gathered can then be exported into
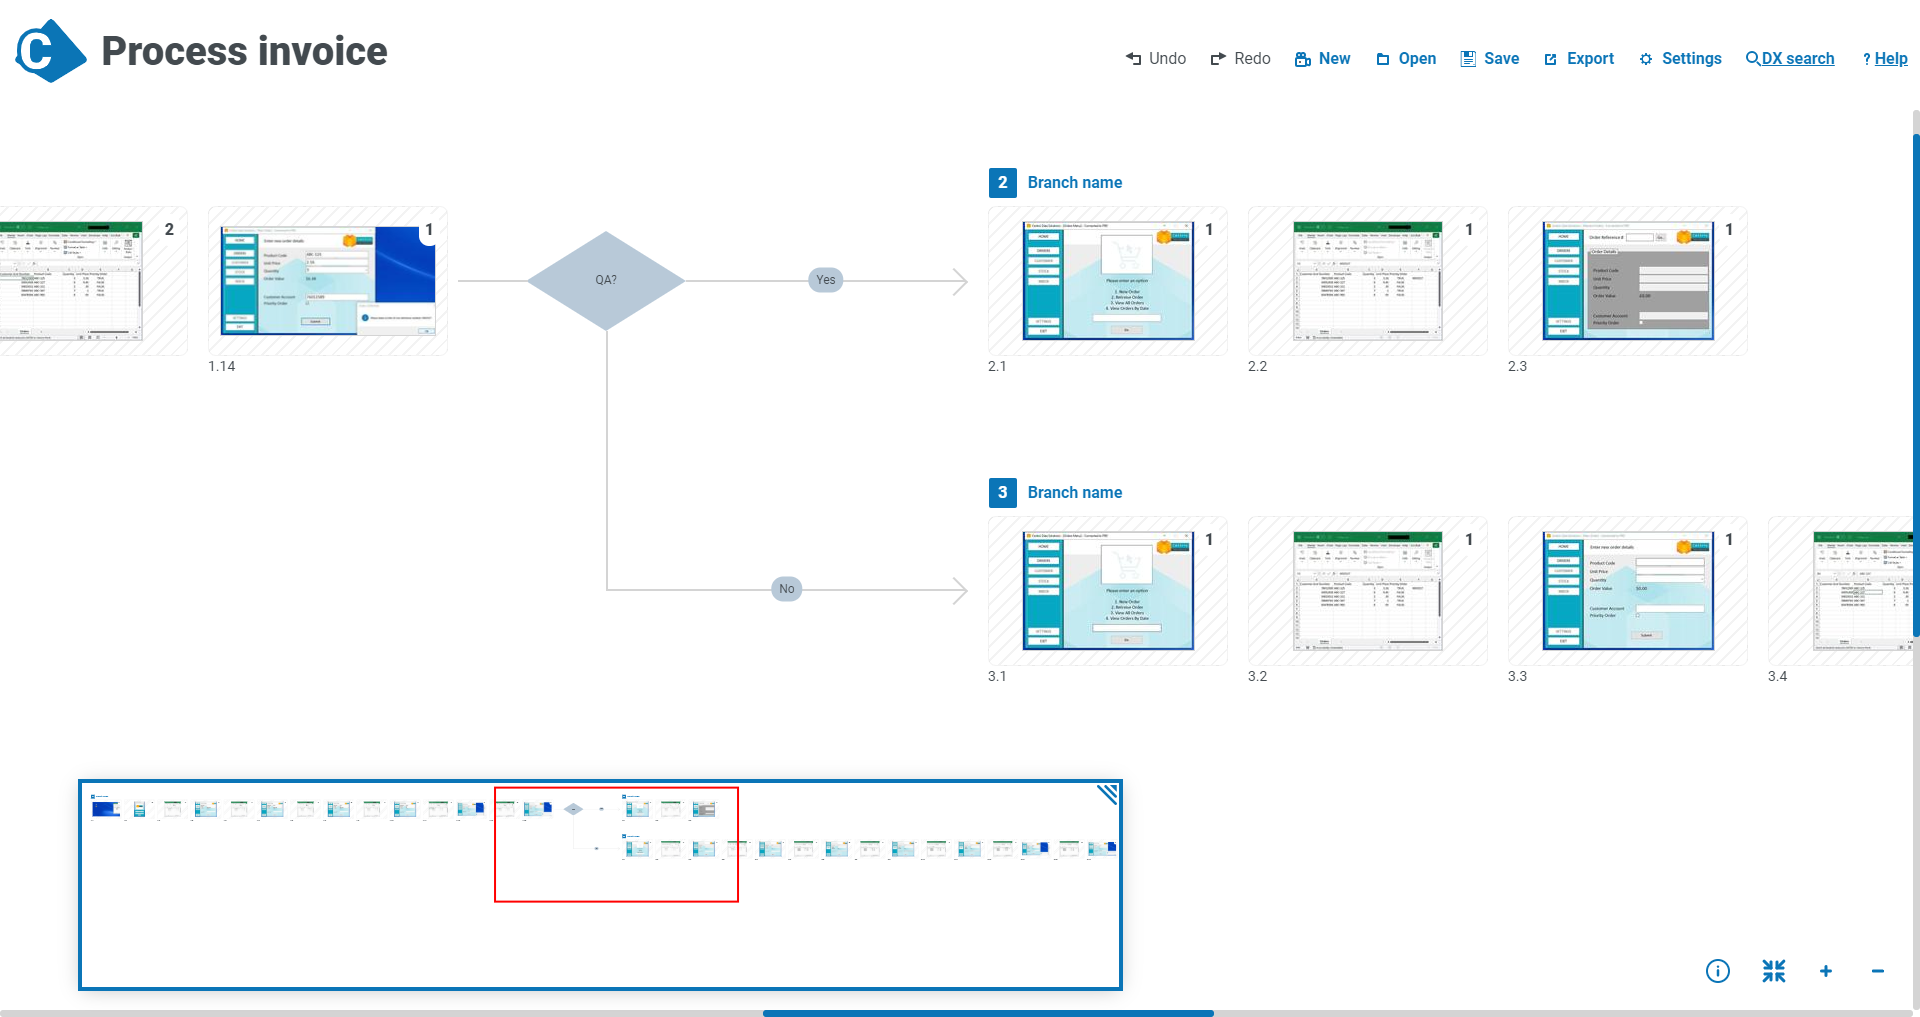
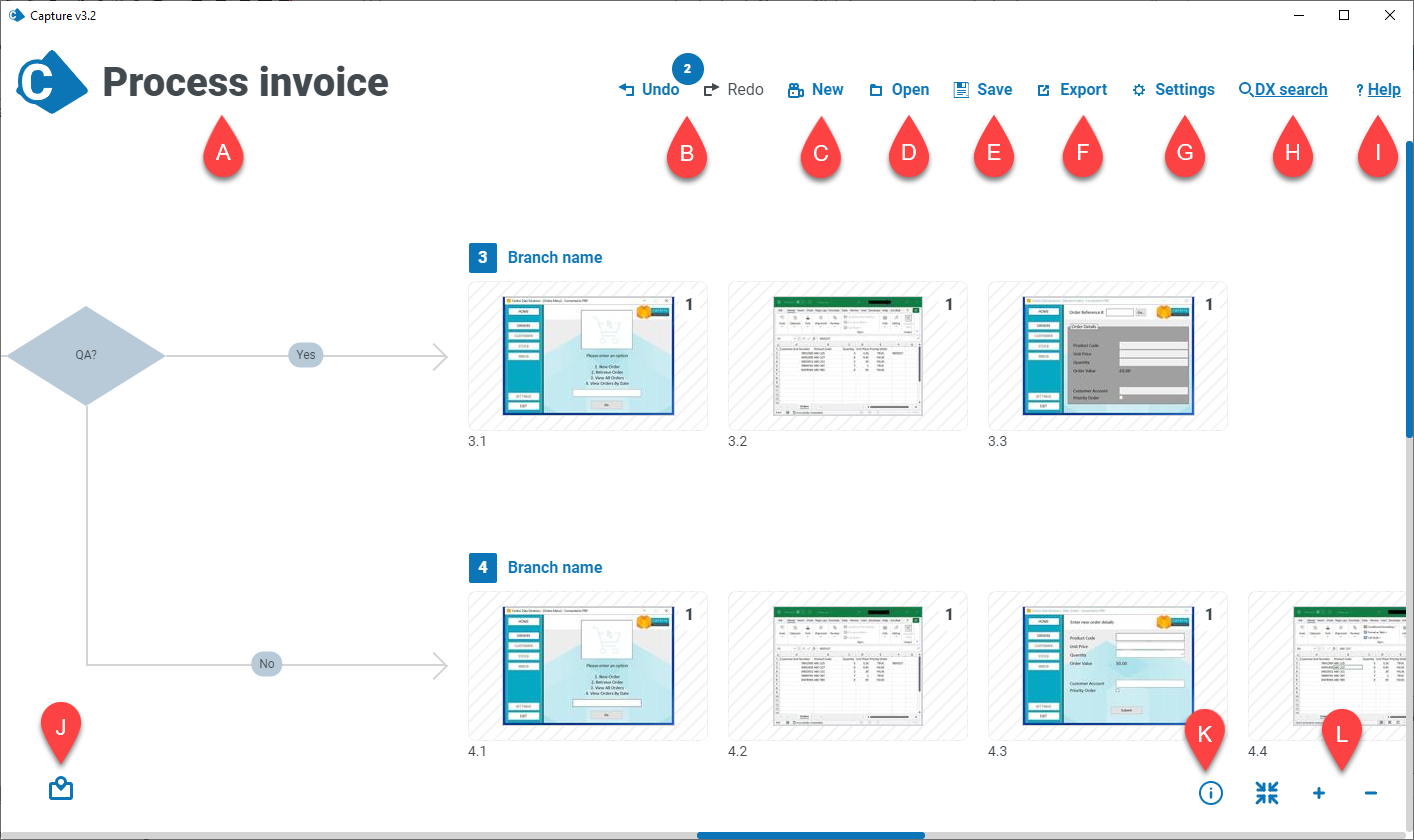
Main process screen
When a
|
Location |
Name |
Description |
|---|---|---|
|
A |
Title |
Click the title to rename your process. |
|
B |
|
|
|
C |
|
|
|
D |
|
|
|
E |
|
|
|
F |
|
|
|
G |
|
|
|
H |
|
|
|
I |
|
|
|
J |
Mini-map |
|
|
K |
Information |
Open a Process information window. |
|
L |
Zoom |
Zoom – Click the + and - buttons to zoom in and out of your process. Alternatively, the following shortcut keys can be used:
|
|
M |
Auto-layout |
Instantly arrange your process into a clearly organized layout. When a process is opened that was created in an earlier version of Capture, auto-layout is applied by default. Auto-layout is also applied when enabling or disabling Solution Designer |
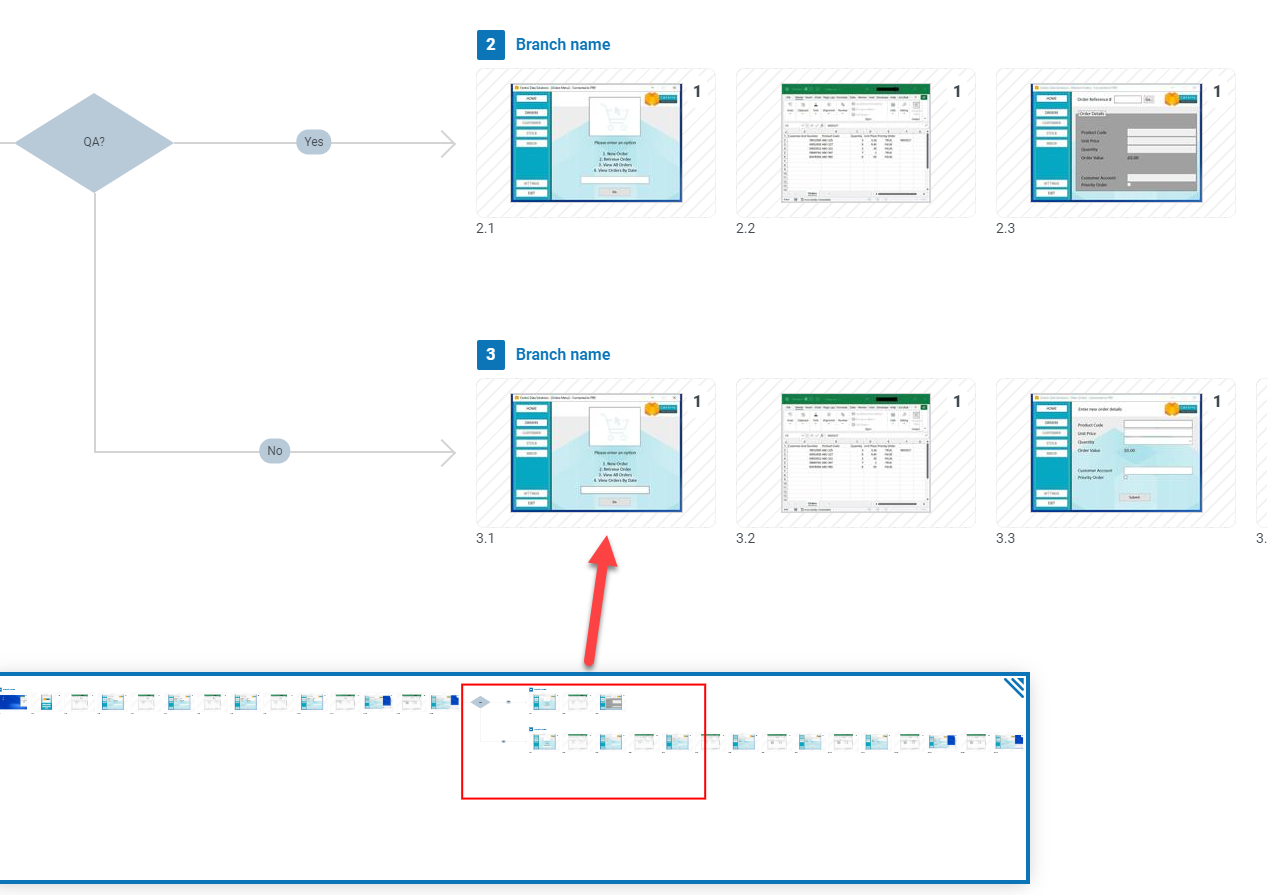
Use the mini-map
- To open the mini-map, click the mini-map icon (A).
-
Drag the red box to alter the process view.
-
You can move the mini-map anywhere on the screen by dragging it.
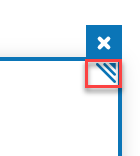
- You can resize the mini-map by dragging the resize icon in the top‑right corner.
-
Click X to close the mini-map panel.
-
To reset the mini-map, click Reset mini-map in User Settings.
![]()
The red box shows which area of the whole process you are currently viewing.
View process information
Click the information symbol to open the Process information panel.
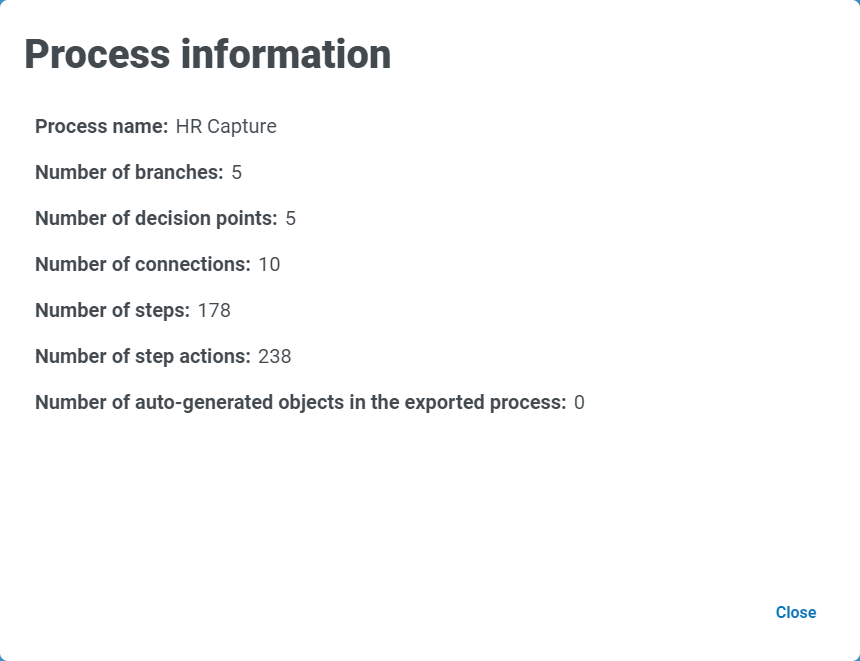
The Process information panel displays the following information about the currently open process:
- The process name
- The number of zones (if Solution Designer is enabled).
- The number of branches
- The number of decision points
- The number of connections
- The number of connection steps
- The total number of step actions in the process
- The number of auto-generated objects to be exported
