 Docs
DocsInstall Capture
The latest version of
Each installation step is described below, and is also demonstrated in the Capture installation video.
Upgrade from Capture 2.0 to 2.1
In the event of any errors occurring when upgrading from Capture 2.0 to 2.1, we recommend that you save a copy of your process database file prior to installation. See Upgrading Capture for details.
Unlike when upgrading from Capture 1.0 to 2.0, there is no longer a requirement to uninstall the previous version prior to installation of the latest version. The Capture 2.1 install wizard will overwrite version 2.0, with all saved processes transferred across to the new version.
Before installing Capture 2.1, ensure Capture 2.0 is not running.
To install Capture:
- Run the Capture installer.
-
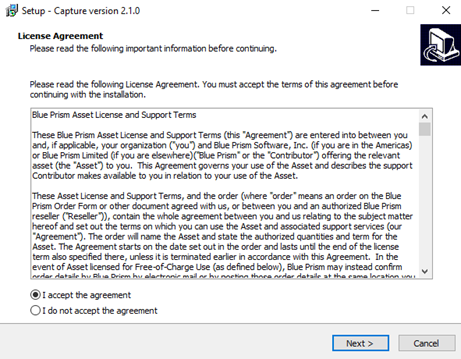
On the License Agreement screen, read the license agreement and, if you accept these terms, select I accept the agreement and click Next.
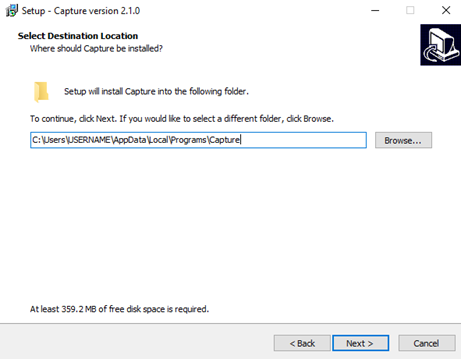
- On the Select Destination Location screen, click Next to install Capture in the default install location. Alternatively, click Browse to select a different location, and then click Next to continue.
-
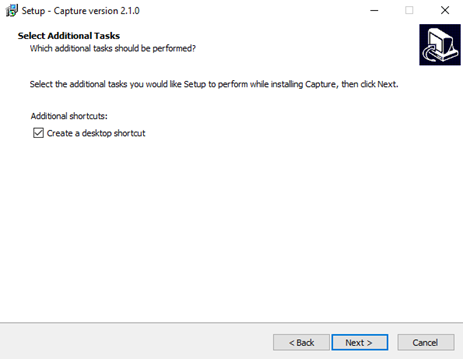
Optionally, on the Select Additional Tasks screen, select Create a desktop shortcut, and click Next.

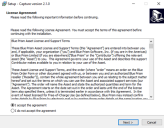
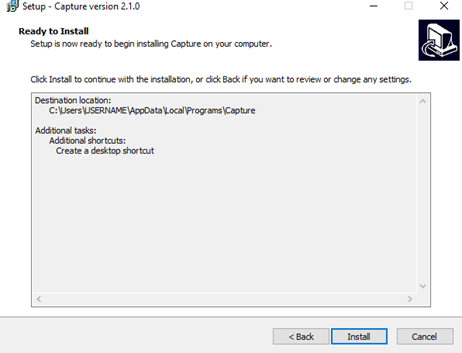
- On the Ready to Install page, check the install location and other details displayed are correct, then click Install.

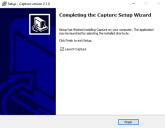
The Completing the Capture Setup Wizard page displays when installation is complete.
-
Click Finish to close the installer and launch Capture.
If you do not want to launch Capture immediately, clear the selection of the Launch Capture option.

If you selected the Create a desktop shortcut option, the Capture icon  is added to your desktop and can be used to launch Capture.
