 Docs
DocsWorkflow – work queues
Work queues are managed from the Workflow section of System Manager. This includes creating, deleting, renaming and configuring queues.
Managing queues
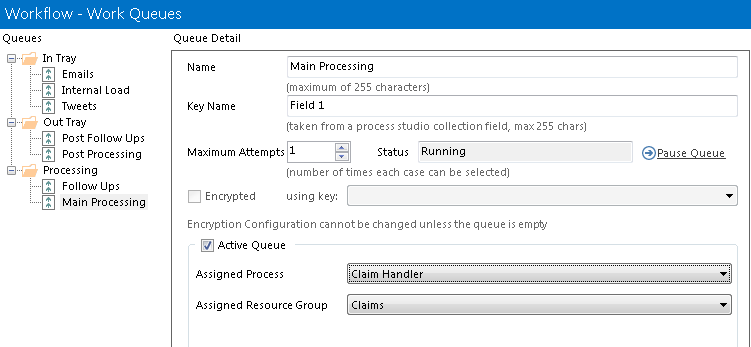
A list of queues is displayed in the left hand list. The details of the selected queue are displayed on the right hand side.
Creating a new queue
Click the New button, and use the panel on the right to give your queue a name and configure the remaining details.
Deleting a queue
Select the queue of interest in the left hand list, and use the Delete button. Only queues which are empty may be deleted. You should first ensure that all items in the queue have been worked (or manually marked with an exception), and then deleted from the queue.
Renaming a queue
Select the queue of interest in the left hand list, and edit the name on the right hand side. Click Apply to finalise your change.
Changing a queue's status
You may pause a queue using the link displayed on the right hand side. A paused queue appears empty to processes which attempt to select cases from it. A paused queue can be resumed at any time afterwards.
Ensure that you have selected the correct queue on the left before performing this action.
Configuring the Key field
Items are entered into a queue using a process studio collection. Of the fields in this collection, one of them may be used as the key for each item. The key is used to identify items when queue activity is monitored from Control Room. For example, if you are updating bank accounts in a list, then you may wish to use the account number as the key field.
You do not have to set a key field if this is not desirable. This may apply, for instance, in cases where the information being worked on is confidential.
Setting a maximum number of attempts
A case may be selected for working, partly updated and not completed. It will then be picked for working from the queue again at a later stage. The value you enter here places a limit on the number of times this will be allowed to happen. Once this limit is reached, the case will automatically be marked as an exception.
To change the Maximum Attempts setting, select the queue of interest in the left hand list, and edit the value on the right hand side. Click Apply to finalise your change.
Setting the encrypter/decrypter
The data held by each work item is stored in plain text on the database by default. The queue can be configured to encrypt the data automatically when it is saved to the queue, and decrypt it automatically when it is retrieved from the queue.
To enable encryption on a queue, an Encryption Scheme must be configured for the current environment.
To change the encryption scheme or disable encryption, select the queue in the left of the window, and use the checkbox and drop down list to choose the encryption state of the queue.
If the key for the selected scheme cannot be found in the server then it will be appended with Unresolved Key and, as such, any work item operations in this queue are likely to fail.
Like the other queue configurations, changes are not saved until the Apply button is pressed.
This video shows you how to encrypt work queues.
Configuring an active queue
A queue can be configured to be 'active', meaning that it has a process and a resource group assigned to it, giving it the knowledge necessary to be able to process its items.
To make a queue active, tick the Active Queue checkbox. The assignation fields will be enabled, and the process and resource group must be selected before the changes can be saved.
Note that a resource group must exist before an active queue can be created.
